Einleitung
Dieses Problem ist leicht zu zu lösen. Wenn du noch mehr wissen möchtest, schaue dieses Video der Demontage an.
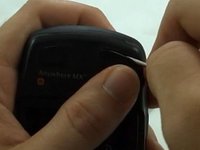
- Nehme das Maus Gehäuse, welches von vier Schrauben gehalten wird, auseinander.
- Entlöte den Mikroschalter und ersetze ihn.
Ich habe drei verschiedene Hersteller gefunden, die Micro-Switch-Ersatzteile für die Logitech Anywhere verkaufen. Ich habe nur E-Switch ausprobiert.
- E-Switch TS20100F070S (Digi-Key | Mouser Electronic)
- * Omron D2LS (eBay | Digi-Key | Mouser Electronic)
- Kailh MI873101S01 (eBay)
- ZIPPY DA T Type (Original micro switch)
Was du brauchst
-
-
Unter den Batterieaufklebern befinden sich zwei Schrauben.
-
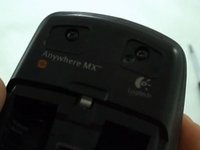
Zwei weitere Schrauben befinden sich unter den Gleitern an der Mausspitze.
-
-
-
Ziehe die Batterieaufkleber ab, um die zwei Schrauben zu erreichen.
-
Entferne die beiden Kreuzschlitzschrauben.
-
-
-
-
Heble eine Ecke der Gleiter mit einem Schraubendreher an.
-
Entferne diese Schrauben mit einem Kreuzschlitzschraubendreher.
-
-
-
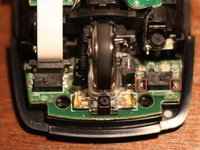
Hebe nun das obere Gehäuse von der Grundplatte herunter. Diese beiden Teile sind nicht durch Kabel verbunden.
-
-
-
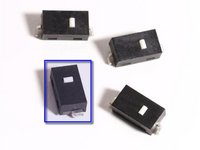
Löte den Mikroschalter ab und ersetze ihn durch einen neuen E-Switch TS20100F070S. Es kann etwas knifflig sein, den Schalter abzulöten. Du kannst die Lasche eventuell abschneiden, um den Schalter zu entfernen. Sobald der Schalter entfernt ist, kannst du die Lötlasche leicht entfernen.
-
Verwende eine konische Spitze, z.B. die ST-Serie Weller ST7 0,03" x 0,79 mm, um den Mikroschalter zu entfernen und anzulöten.
-
Der Mikroschalter hat keine Polarität. Die Anschlüsse zeigen aber, auf welche Seite der Mikroschalter zeigen muss.
-
E-Switch TS20100F070S
-


Um die Maus wieder zusammenzusetzen, folge der Anleitung in umgekehrter Reihenfolge.
Rückgängig: Ich habe diese Anleitung nicht absolviert.
39 weitere Personen haben diese Anleitung absolviert.
Besonderer Dank geht an diese Übersetzer:innen:
100%
Diese Übersetzer:innen helfen uns, die Welt zu reparieren! Wie kann ich mithelfen?
Hier starten ›

25 Kommentare zur Anleitung
Thanks, my mouse actually arrived out of the package with the double-click issue, and this fixed it. Needed pretty high-temp soldering iron to get OEM micro-switch off, and tight fit soldering the new one on the inside terminal, but otherwise pretty easy.
Got this mouse, had this problem, sent it off for an RMA. The one they sent back eventually developed this exact same issue. Here's to hoping I won't have to do this again for a while now. Thanks for the guide.
Ended up having to repeat the process for the right mouse button. This time I managed to knock off one of the solder pads. Eventually by applying a lot of pressure and heat though, I was able to get the switch to bind with whatever was left of it, although I still have no idea how long my fix will actually hold for. But, something to watch out for if you're doing this.
This is great as now i have a part number as when I pulled the original microswitch apart to fix it internally, the button flew away - never to be found.
These are great prices for little switches, however living in the UK means an expensive courier to £15 and a lounge wait. They simply do not sell these here in the GB :-(
The part with shipment is far cheaper than a brand new MX Anywhere mouse.
Thanks again for the info!