Einleitung
- Entferne die Gummi-Füße auf der Rückseite:
- Die drei Gummi-Füße auf der Oberseite sind in diesem Schritt notwendig, aber die unteren drei werden später sowieso entfernen, so dass es am besten ist, alle sechs zur gleichen Zeit zu machen.
- Löse die Schrauben hinter den Gummi-Füßen:
- In meinem Fall waren diese noch vom Kleber bedeckt
- Benutze iFixit-Tools um das Cover zu öffnen
- Entferne die Batterie:
- Ausstecken und entfernen, die Batterie ist leicht an der Rückseite festgeklebt
- Löse die kleine schwarze Schraube auf dem PCB, welche das Antennen-Kabel festhält
- Löse die Schrauben des PCBs:
- Drei Sorten von Schrauben mit großen silbernen Köpfen
- Entferne das PCB
- Stecke das Daten-Kabel aus:
Hebe das Klebeband an, dadurch lässt sich der weiße Teil/Verbinder anheben und das Kabel löst sich - Entferne alle schwarzen und silbernen Schrauben
- Die Rückabdeckung:
Starte in der oberen linken Ecke und ziehe langsam, bis die Abdeckung vollständig gelöst ist. Die Abdeckung ist ziemlich robust, aber der Kleber ist sehr stark, also gehe bei diesem Schritt langsam vor. - Löse alle kleinen schwarzen Schrauben und entferne die metallene Bodenplatte.
Ich habe Bilder hochgeladen, also schau dir diese an, wenn du sie brauchst.
Ich hoffe das hilft, und danke an alle Leute, die geholfen haben!
Was du brauchst
-
-
Entferne die Gummi-Füße von der Unterseite.
-
Entferne die drei Schrauben, welche sich hinter den oberen Gummi-Füßen befinden.
-
Beachte, dass die linke Schraube nach rechts versetzt liegt und nicht in der Mitte eingeschraubt ist/wird.
-
Benutze ein geeignetes Werkzeug aus Kunststoff, um die hintere Gehäuseabdeckung zu entfernen.
-
-
-
Entferne den Akku. Er ist leicht auf der Unterseite festgeklebt.
-
Entferne die zwei etwas größeren, silbernen Kreuzschlitzschrauben, welche die Platine im Gehäuse halten.
-
Entferne die kleine schwarze Schraube in der oberen rechten Ecke.
-
Ziehe das orangene Klebeband, welches das Flachbandkabel sichert, vorsichtig ab. Lege es zur Seite und hebe es für den Wiederzusammenbau auf
-
Entferne die Platine.
Can you please insert some basic info about the battery? Like how many mAh ie.
Search for Logitech 533-000177
VauWeh -
-
-
-
-
Entferne alle neun schwarzen Schrauben an der Oberseite.
Remove 9 black screws in order to remove the circuit/battery housing.
-
-
-
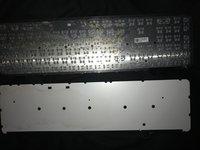
Die großflächig verklebte Rückseite kann nun vorsichtig und am Besten mithilfe von ein wenig Isopropyl-Alkohol vom Rest des Gehäuses entfernt werden, indem du langsam von der oberen linken Ecke aus anfängst, sie zu entfernen
-
Entferne alle schwarzen Phillips-Schrauben und entferne anschließend die Metallplatte.
The back is glued to the metal baseplate and needs to be removed using a spatula in order to expose the screws.
-


Um das Gerät anschließend wieder zusammenzubauen, befolge die Anleitung in umgekehrter Reihenfolge.
Um das Gerät anschließend wieder zusammenzubauen, befolge die Anleitung in umgekehrter Reihenfolge.
Rückgängig: Ich habe diese Anleitung nicht absolviert.
18 weitere Personen haben diese Anleitung absolviert.
Besonderer Dank geht an diese Übersetzer:innen:
100%


Diese Übersetzer:innen helfen uns, die Welt zu reparieren! Wie kann ich mithelfen?
Hier starten ›

18 Kommentare
Do you know how I can turn the keyboard backlight so it stays on, even if if t runs down the battery faster.
I really need that back light. I am willing to risk breaking my keyboard for the reward of having the light. If I am really lucky changing the circuit to add a manual switch for that dang back light :)
I have basic skills and I am still learning...
Thank to all the Content Makers and Fix-It guide makers...!
perhaps I could find the correct voltage for the light and prob with a test light to find the circuit for the back light with out damaging something important, like the old days_?
Put a cover over the right top LED (green when turned on) - this is also the "window" for the ambient light sensor. By making it "dark", the backlight will be fully on when your hands are close to the keyboard.
Hello,
Excellent tutorial!
Could you show me where the 2 red and black wires are connected (data cable I think)?
Mine got cut by accident.
Hello,
i spilled my keyboard, i clean everything, but backlight transparent layer broken, maybe do you know where i can buy this spare parts ?
Thank you.
Sorry for my bad english.
i don't think you can buy parts from logitech. i would say the best place to try is ebay
Marts -
Thank you, i don't know about Logitech, but nothing - ebay, nothing google search result...
But thank you for this your tutorial.
remjok -
only one key is not working what to do ??
No, just some double-sided tape is enough for this - The pressure added from the weight of the keyboard will keep it in place, and once it's fully adhered, it won't move because the force is lateral (being recessed) 😁
Be careful NOT to use Isopropylalcohol in the Transparent/Plastic/Plexiglass thing for the Backlight diffusion plate INSIDE the Keyboard. It will absolutely destroy it.
EDIT: It is I believe PETG and not resistant to IPA.
Thanks, that's a big help.
Everything is glued. Clearly don't want you to repair your own keyboard. Never buying logitech again.
I missed two keys I dont know why, "1" and "3" on numerical layout.
Will this have any kind of repair?
I had a tiny coffee spill on left part of my MX Keys Mini keyboard. I Thought I got everything dried off, but seems some made it into the key section. The spill was not over main-board but at end with battery. After this, the keys F1, F2, F3 F4, 1, 2, t, i and 'caps lock' did not function. I thought it was a strange combination and have attempted to open and clean inside keyboard in vain the hope that it is mostly mechanical damage. So far no luck... Can this be a burned electric component, due to shortage at one or more keys with coffee? Wonderful keyboard, but perhaps a little more fragile than its sturdy feeling suggests ...
Where does the other end of the long red cable connected to the small black screw goes?
Bottom three feet are not blocking any screws or clips, they can remain.
There is a plastic film covering the screw holes, it can be peeled back and replaced.
Cristina Vasco - Antwort