Diese Version enthält möglicherweise inkorrekte Änderungen. Wechsle zur letzten geprüften Version.
Was du brauchst
-
Dieser Schritt ist noch nicht übersetzt. Hilf mit, ihn zu übersetzen!
-
Remove the fifteen black 6.0 mm Phillips #00 screws from the back cover.
-
Carefully remove the back cover by prying up the case with a plastic opening tool, starting at the opening end and finishing at the hinge.
-
-
Dieser Schritt ist noch nicht übersetzt. Hilf mit, ihn zu übersetzen!
-
Remove the three silver 4.0 mm Phillips #00 screws holding in the battery.
-
Carefully lift the battery, partially, out.
-
-
Dieser Schritt ist noch nicht übersetzt. Hilf mit, ihn zu übersetzen!
-
Unplug the battery connector by pinching and wiggling the white cable end out.
-
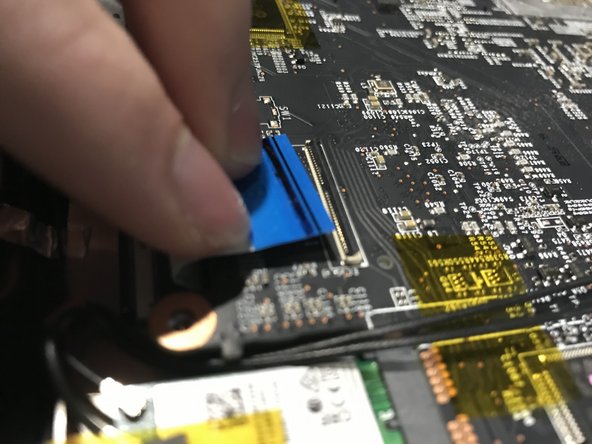
Unclasp and unplug the various white and blue ribbon cables from the motherboard by lifting the black locking tabs of the ZIF connectors with a spudger.
-
Then, gently pull the ribbon cables out.
-
-
-
Dieser Schritt ist noch nicht übersetzt. Hilf mit, ihn zu übersetzen!
-
Unscrew the 4.0mm Phillips #00 screw holding down the WiFi card.
-
Be extra careful as to not unplug the tiny wires when lifting out the WiFi card, as it may be quite difficult to plug them back in.
-
Slightly lift and slide out the card towards you to remove it.
-
Using tweezers or careful manipulation with your hand, unplug the cable just beside the WiFi card.
-
-
Dieser Schritt ist noch nicht übersetzt. Hilf mit, ihn zu übersetzen!
-
Remove the last 2 ribbon cables connected to the motherboard in a similar manner to the ones earlier.
-
Slowly peel the large black ribbon cable off the fan, as it is lightly adhered.
-
Unscrew the two black 6.0mm Phillips #00 screws below each fan.
-
-
Dieser Schritt ist noch nicht übersetzt. Hilf mit, ihn zu übersetzen!
-
Carefully lift the motherboard out.
-
Thread the Wi-Fi card through the slot in the motherboard between the circuit board and the GPU fans.
-
-
Dieser Schritt ist noch nicht übersetzt. Hilf mit, ihn zu übersetzen!
-
Flip the motherboard over.
-
Each of the screws may have a number next to it on the black metal, unscrew them in that order for both disassembly and reassembly (i.e. don't reverse the order on reassembly). If you are uncertain of the order, it should be as follows:
-
First screw: red
-
Second screw: orange
-
Third screw: yellow
-
Fourth and fifth screws: green in either order
-
Unplug the wires connected to each fan: 2 for the GPU fan and 1 for the CPU fan. One of the GPU fan wires is under a black piece of tape.
-
-
Dieser Schritt ist noch nicht übersetzt. Hilf mit, ihn zu übersetzen!
-
Carefully separate the two components.
-
Clean off the old thermal paste using a cloth, of some sort, dipped in isopropyl alcohol.
-
-
Dieser Schritt ist noch nicht übersetzt. Hilf mit, ihn zu übersetzen!
-
For a CPU fan replacement, which is the most common replacement, remove the three black 3.0 mm Phillips #000 screws from the singular fan.
-
For a GPU fan replacement, remove the 5 black 3.0 mm Phillips #000 screws from the twin fan setup.
-
Then peel off the very strong tape that seals the fan vents.
-
After removing the fan and inserting the new one, follow all of the steps in the guide again in reverse order.
-


Rückgängig: Ich habe diese Anleitung nicht absolviert.
16 weitere Nutzer:innen haben diese Anleitung absolviert.
Team

Embry-Riddle Aeronautical University, Team S10-G10, Salas Spring 2020 Mitglied von Embry-Riddle Aeronautical University, Team S10-G10, Salas Spring 2020
ERAU-SALAS-S20S10G10
2 Mitglieder
3 Anleitungen geschrieben
10 Kommentare
Very helpful, thank you!
The only issue I encountered was removing the GPU fan. I couldn't get it from “picture 2 to picture 3” in Step 9 as easily as you did it here. Frustrating!
Very helpful guide! I replaced the GPU fan, got it all put back together, and freaked out a bit when it didn’t power on at all… then I realized there was an important note in the conclusion to PLUG IT IN first. Phew!
Amazing guide. Many thanks to the author!