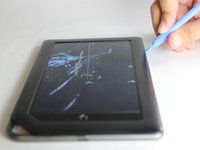
Zum Hauptinhalt wechseln
Gemeinsam reparieren - Jetzt registrieren

Nook Color Battery Replacement

Was du brauchst

  1. Nook Color Battery Replacement, Back Cover: Schritt 1, Bild 1 von 2 Nook Color Battery Replacement, Back Cover: Schritt 1, Bild 2 von 2
    • Remove the two 3.8 mm screws located in the back right corner of the device using the T5 Torx screwdriver.

    Frag FixBot

    Kommentar hinzufügen

  2. Nook Color Battery Replacement: Schritt 2, Bild 1 von 2 Nook Color Battery Replacement: Schritt 2, Bild 2 von 2
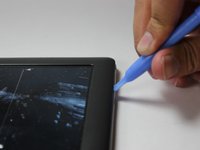
    • Pry off the back cover with the plastic opening tool. Go around the device with the tool to ensure complete detachment.

    Frag FixBot

    Kommentar hinzufügen

  3. Nook Color Battery Replacement, Front Cover: Schritt 3, Bild 1 von 1
    • Remove the ten 4.0 mm screws from the device's perimeter using the T5 Torx screwdriver.

    Frag FixBot

    Kommentar hinzufügen

  4. Nook Color Battery Replacement: Schritt 4, Bild 1 von 2 Nook Color Battery Replacement: Schritt 4, Bild 2 von 2
    • Pry off the front panel using the plastic opening tool.

    Frag FixBot

    Kommentar hinzufügen

  5. Nook Color Battery Replacement: Schritt 5, Bild 1 von 2 Nook Color Battery Replacement: Schritt 5, Bild 2 von 2
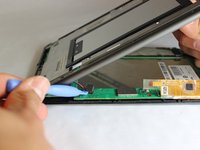
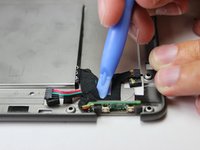
    • Lift up on the connectors to disconnect them using the plastic opening tool.

    Frag FixBot

    Kommentar hinzufügen

  6. Nook Color Battery Replacement, Battery: Schritt 6, Bild 1 von 2 Nook Color Battery Replacement, Battery: Schritt 6, Bild 2 von 2
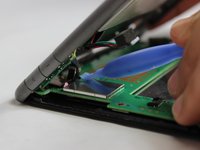
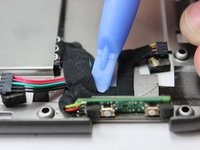
    • Remove the tape which holds the wiring to the battery using a plastic opening tool.

    Frag FixBot

    Kommentar hinzufügen

  7. Nook Color Battery Replacement: Schritt 7, Bild 1 von 3 Nook Color Battery Replacement: Schritt 7, Bild 2 von 3 Nook Color Battery Replacement: Schritt 7, Bild 3 von 3
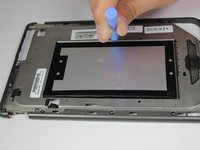
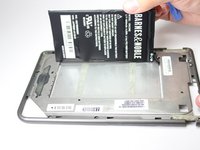
    • On the back side of the middle panel, pry the battery using the plastic opening tools.

    • Use of force is necessary since the battery is glued down.

    Frag FixBot

    Kommentar hinzufügen

  8. Nook Color Battery Replacement: Schritt 8, Bild 1 von 2 Nook Color Battery Replacement: Schritt 8, Bild 2 von 2
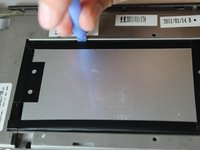
    • Slide the connecting wire through the opening of where the battery was placed.

    Frag FixBot

    Kommentar hinzufügen

Abschluss

To reassemble your device, follow these instructions in reverse order.

Rückgängig: Ich habe diese Anleitung nicht absolviert.

5 weitere Personen haben diese Anleitung absolviert.

Team

USF Tampa, Team 11-5, Blackwell Winter 2015 Mitglied von USF Tampa, Team 11-5, Blackwell Winter 2015

USFT-BLACKWELL-W15S11G5

3 Mitglieder

14 Anleitungen geschrieben

0 Kommentare zur Anleitung

Kommentar hinzufügen

Seitenaufrufe:

Letzte 24 Stunden: 3

Letzte 7 Tage: 26

Letzte 30 Tage: 57

Insgesamt: 3,573