Einleitung
This guide will detail how to safely remove the battery from the One Education Infinity laptop. The model number for the Infinity is A03. This device can be recognized by its dark grey exterior, light grey interior, purple carrying handle, and rotating camera above the screen.
The Infinity was released in Spring 2019 and is NOT the same as the Infinity: One.
Was du brauchst
-
-
Remove the screw covers and rubber feet from the bottom of the laptop with a metal spudger.
 Frag FixBot
-
-
-
Using a Phillips #00 screwdriver, remove the sixteen 5.0 mm black screws from the back panel.
-
-
-
-
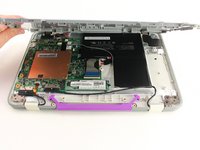
Using the iFixit plastic opening tool or spudger, start near the white hinge of the device and lift along the outer edges of the device until all clips are released.
-
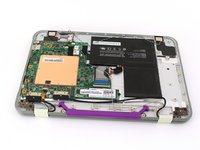
Lift the back case off of the device.
-
-
-
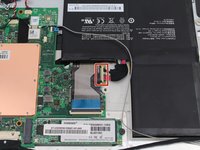
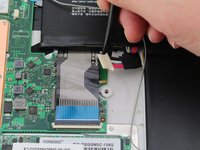
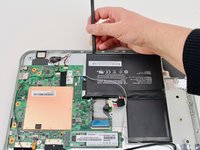
Carefully wiggle the battery cable to the right and out of the port with a plastic spudger.
-
-
-
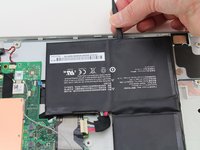
Wedge a plastic spudger underneath the battery from the upper edge and slide it carefully along the length of the battery to separate it from the case.
-
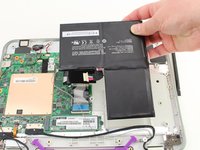
Lift the battery out from the internal case.
-


To reassemble your device, follow these instructions in reverse order.

Team

Cal Poly, Team S11-G4, Regan Fall 2019 Mitglied von Cal Poly, Team S11-G4, Regan Fall 2019
CPSU-REGAN-F19S11G4
3 Mitglieder
4 Anleitungen geschrieben