Einleitung
Austausch des Akkus in der Philips Sonicare 2 Zahnbürsten der Modellreihe HX62**-**. Du musst dabei löten. Unsere Lötanleitung zeigt, wie das geht.
Was du brauchst
-
-
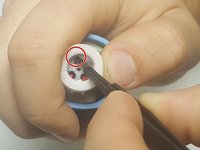
Entferne die 12 mm Torx T8 Schraube am Boden. Heble dann die Bodenplatte mit einem Plastiköffnungswerkzeug ab.
-
-
-
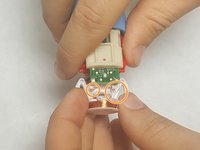
Entferne die innere Elektronik. Du musst dazu die roten Rasten wegdrücken, so wie im Bild gezeigt. Dadurch kann die Ladespule herausgeholt werden.
-
-
-
-
Heble den Akku mit einem Kunststoffwerkzeu an einem Ende teilweise hoch.
-
Entferne den Akku noch nicht ganz, er ist noch an der Platine festgelötet.
-
-
-
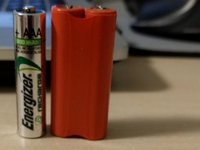
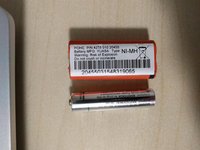
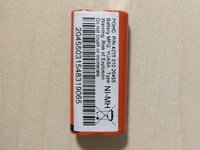
Die Spannung des Akkupacks beträgt etwa 2,8 bis 2,9 V. Du kannst den Pack durch zwei in Reihe geschaltete AAA NiMH-Zellen ersetzen. Trenne den Akkupack ab, nicht aber den Metallanschluss der Platine.
-


Um dein Gerät wieder zusammenzubauen, folge den Schritten in umgekehrter Reihenfolge.
Um dein Gerät wieder zusammenzubauen, folge den Schritten in umgekehrter Reihenfolge.
Rückgängig: Ich habe diese Anleitung nicht absolviert.
2 weitere Personen haben diese Anleitung absolviert.
Besonderer Dank geht an diese Übersetzer:innen:
100%
VauWeh hilft uns, die Welt in Ordnung zu bringen! Wie kann ich mithelfen?
Hier starten ›
Team

IUPUI, Team S6-G2, Baechle Fall 2017 Mitglied von IUPUI, Team S6-G2, Baechle Fall 2017
IUPUI-BAECHLE-F17S6G2
3 Mitglieder
8 Anleitungen geschrieben
7 Kommentare
Step 3 is incorrect. The only things keeping the internals secured in the casing are the two ‘elbows’ clearly visible in Step 3 picture 2. Simply pry these away from the depressions in the casing and the works slide out, with a little push from the top stem. The method describing the 3 red clips does no good (besides being nearly impossible to accomplish) and presents a clear risk of breaking the hair-thin wires
The method described in Step 3 to remove the internals from the casing is incorrect. Rather than prying the 3 red clips (nearly impossible anyhow) all that is required is to pry the two ‘elbows’ visible in step 3, photo 2, away from the depressions in the casing. Voila.
How to get a new battery for this Philips Sonicare 2 Plaque control toothbrush.
Well, the VOLTAGE of this battery is about 2.8 to 2.9 Volts. The size is same as that of TWO AAA Cells. Two AAA in series can easily replace the existing battery.
Ni-Mh AAA cells of energizer can do the job. Disconnect the existing battery but don’t remove the metallic connection to the circuit.
Thank you for the comments about removing the “innards”. I spent a couple hours yesterday trying to remove those red clips! This morning I saw the comments. It’s still a little bit of a challenge to get both elbows pried, but I found out it’s easier if you apply quite a bit of pressure to the brush end while manipulating the elbows. At first I was trying to light of pressure and the opposite elbow would always fall back into the depression while I tried to pry the other side. More pressure and the problem was resolved. Again, thanks to Craig for his observation. ifixit needs to correct the above instructions to reflect this.