Diese Übersetzung wurde maschinell erstellt und noch nicht von einer Person überprüft. Sprichst du diese Sprache? Schau es dir an.
Einleitung
Wenn das Display deiner Kamera nicht einwandfrei funktioniert, musst du es möglicherweise austauschen. Folge dieser Anleitung, um das zu tun!
Was du brauchst
-
-
-
Batterie durch Verschieben der Lasche zum Öffnen der Abdeckung entfernen
 Frag FixBot
-
-
-
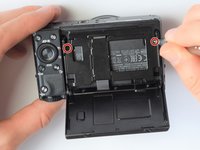
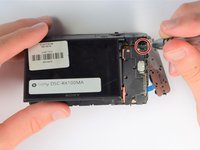
Entferne mit dem Schraubendreher alle Schrauben (schwarz, 2,5 mm) aus der äußersten Schicht der Baugruppe.
-
-
-
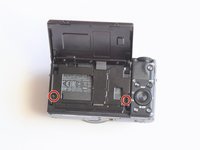
Entferne mit dem Schraubendreher auch die Schrauben (schwarz, 1 mm) unter dem beweglichen LCD-Bildschirm.
-
Entferne die markierten 2,5-mm-Schrauben mit dem Schraubendreher
-
-
-
-
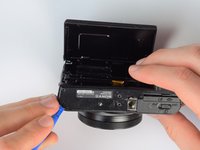
Heble die Bodenplatte mit den Kunststoff-Öffnungswerkzeugen vorsichtig auf.
-
-
-
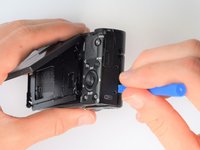
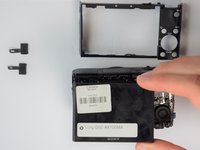
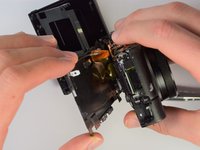
Trenne die Bildschirm- und Rückabdeckung von der Vorderseite der Kamera mit demselben Öffnungswerkzeug
-
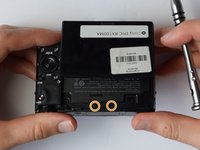
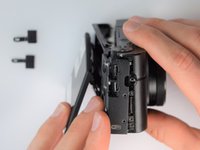
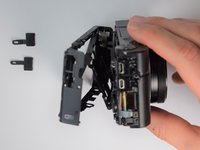
Sobald die Rückabdeckung leicht gelöst ist, ziehe die Abdeckungen für den HDMI- und Multimedia-Anschluss ab
-
-
-
-
-
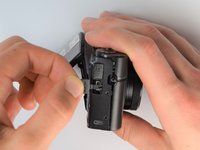
Seitenteil verschieben, um Zugang zu den Schrauben zu erhalten
-
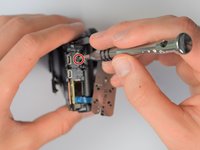
Zwei Schrauben (schwarz, 2,5 mm) mit einem PH0-Schraubendreher entfernen
-
-
-
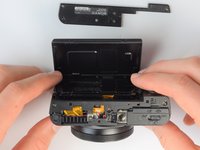
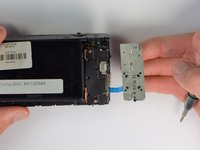
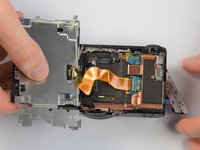
Entferne die rückseitige Abdeckungsbaugruppe, während das Flachbandkabel angeschlossen bleibt.
-
-
-
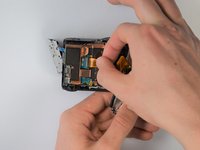
Flachbandstecker vorsichtig abziehen, um die LCD-Bildschirmeinheit vollständig von der Kamera zu trennen
-
-














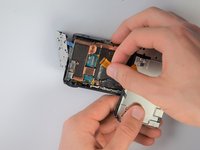
Um dein Gerät wieder zusammenzubauen, folge den Schritten dieser Anleitung in umgekerhter Reihenfolge.
Rückgängig: Ich habe diese Anleitung nicht absolviert.
2 weitere Personen haben diese Anleitung absolviert.

Team

Cal Poly, Team 21-1, Maness Winter 2017 Mitglied von Cal Poly, Team 21-1, Maness Winter 2017
CPSU-MANESS-W17S21G1
5 Mitglieder
60 Anleitungen geschrieben
5 Kommentare zur Anleitung
Any idea where I can get a set or replacement screws? one came out of my LCD joint and I can’t find replacements anywhere online. I’ve even tried Ebay.
Definately be careful with the gold ribbon cable, looked at mine funny and it just snapped in two.. waiting on a replacement now :(
I’ve ripped 2 of these before - not fun! Still… cheap enough to buy but delivery took a couple of weeks.
I had a cracked screen so had to take this out to replace as well - problem i’ve had is that although i stuck it down really well (with 3M 1mm double-sided tape, it doesn’t hold great and so the screen has risen a bit and doesn’t sit flush.
Just in the process now of sticking it down again but with a touch of superglue as i need it to hold down a bit better - that should hopefully be me done then :)
Great guide by the way KC Egger - thanks for taking the time to put this together - it’s been a life saver for me!
Where did you purchase your screen, I’ve been trying to find one from Sony parts dealers and can’t find it. Any links would be helpful, thanks.
Probably a late reply but I got my screen from AliExpress, there are still a lot of them for sale and the sellers include a ribbon cable with the screen.
For these cameras the official screen protector is Sony PCK-LM15 Screen Protector
I think mine was damaged by sunscreen on my hands when using the camera over summer so putting a protective layer on top should help preserve the new screen.
