Zum Hauptinhalt wechseln

Titan Airless Sprayer IMPACT 410 Packings Replacement

Was du brauchst

  1. Titan Airless Sprayer IMPACT 410 Packings Replacement, Safety precautions: Schritt 1, Bild 1 von 2 Titan Airless Sprayer IMPACT 410 Packings Replacement, Safety precautions: Schritt 1, Bild 2 von 2
    • Before you begin, make sure to follow the pressure relief procedure documented in the user manual before powering down the paint sprayer and disconnecting the pump.

    • Turn off and unplug the sprayer.

  2. Titan Airless Sprayer IMPACT 410 Packings Replacement, Unfasten the front cover: Schritt 2, Bild 1 von 2 Titan Airless Sprayer IMPACT 410 Packings Replacement, Unfasten the front cover: Schritt 2, Bild 2 von 2
    • Use a Phillips driver to remove the four 15 mm-long screws securing the front cover.

  3. Titan Airless Sprayer IMPACT 410 Packings Replacement, Remove the front cover: Schritt 3, Bild 1 von 2 Titan Airless Sprayer IMPACT 410 Packings Replacement, Remove the front cover: Schritt 3, Bild 2 von 2
    • Remove the front cover.

  4. Titan Airless Sprayer IMPACT 410 Packings Replacement, Reposition the pump: Schritt 4, Bild 1 von 2 Titan Airless Sprayer IMPACT 410 Packings Replacement, Reposition the pump: Schritt 4, Bild 2 von 2
    • Plug in the power cord.

    • Pulse the on/off switch until the pump stops at the bottom of its stroke.

    • Turn the sprayer off and unplug its power cord before continuing.

  5. Titan Airless Sprayer IMPACT 410 Packings Replacement, Remove the return hose: Schritt 5, Bild 1 von 3 Titan Airless Sprayer IMPACT 410 Packings Replacement, Remove the return hose: Schritt 5, Bild 2 von 3 Titan Airless Sprayer IMPACT 410 Packings Replacement, Remove the return hose: Schritt 5, Bild 3 von 3
    • Pinch the return hose clamp and slide it downward to expose the connector.

  6. Titan Airless Sprayer IMPACT 410 Packings Replacement: Schritt 6, Bild 1 von 3 Titan Airless Sprayer IMPACT 410 Packings Replacement: Schritt 6, Bild 2 von 3 Titan Airless Sprayer IMPACT 410 Packings Replacement: Schritt 6, Bild 3 von 3
    • Use your fingers to remove the retaining clip from the foot valve housing.

  7. Titan Airless Sprayer IMPACT 410 Packings Replacement: Schritt 7, Bild 1 von 2 Titan Airless Sprayer IMPACT 410 Packings Replacement: Schritt 7, Bild 2 von 2
    • Use a 7/16" wrench to unscrew the return hose.

  8. Titan Airless Sprayer IMPACT 410 Packings Replacement: Schritt 8, Bild 1 von 2 Titan Airless Sprayer IMPACT 410 Packings Replacement: Schritt 8, Bild 2 von 2
    • Remove the return hose.

  9. Titan Airless Sprayer IMPACT 410 Packings Replacement, Remove the foot valve housing: Schritt 9, Bild 1 von 3 Titan Airless Sprayer IMPACT 410 Packings Replacement, Remove the foot valve housing: Schritt 9, Bild 2 von 3 Titan Airless Sprayer IMPACT 410 Packings Replacement, Remove the foot valve housing: Schritt 9, Bild 3 von 3
    • Use an adjustable wrench to loosen and remove the foot valve housing.

  10. Titan Airless Sprayer IMPACT 410 Packings Replacement, Loosen the inlet valve housing: Schritt 10, Bild 1 von 1
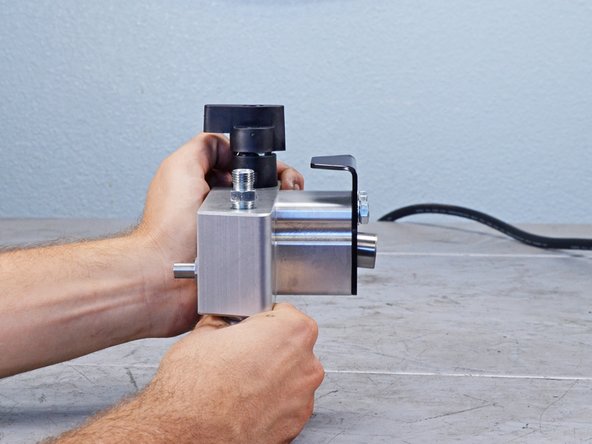
    • Lay the sprayer down horizontally on its black metal bars before continuing.

    • Use an adjustable wrench to loosen the inlet valve housing from the pump block.

  11. Titan Airless Sprayer IMPACT 410 Packings Replacement, Remove the inlet valve housing: Schritt 11, Bild 1 von 1
    • Remove the inlet valve housing.

  12. Titan Airless Sprayer IMPACT 410 Packings Replacement, Inlet valve information: Schritt 12, Bild 1 von 2 Titan Airless Sprayer IMPACT 410 Packings Replacement, Inlet valve information: Schritt 12, Bild 2 von 2
    • If you're replacing the inlet valve, note the installation order from first to last (Teflon O-ring first and Piston Bushing last):

    • Teflon O-ring

    • Inlet valve seat

    • Inlet valve ball

    • Inlet valve washer

    • Nylon washer

    • Piston bushing

  13. Titan Airless Sprayer IMPACT 410 Packings Replacement, Remove the outlet valve retainer: Schritt 13, Bild 1 von 3 Titan Airless Sprayer IMPACT 410 Packings Replacement, Remove the outlet valve retainer: Schritt 13, Bild 2 von 3 Titan Airless Sprayer IMPACT 410 Packings Replacement, Remove the outlet valve retainer: Schritt 13, Bild 3 von 3
    • Use a 5/16 inch hex key to loosen and remove the outlet valve retainer.

  14. Titan Airless Sprayer IMPACT 410 Packings Replacement: Schritt 14, Bild 1 von 3 Titan Airless Sprayer IMPACT 410 Packings Replacement: Schritt 14, Bild 2 von 3 Titan Airless Sprayer IMPACT 410 Packings Replacement: Schritt 14, Bild 3 von 3
    • Use a pick tool to remove the outlet valve seat.

    • Remove the outlet valve ball.

  15. Titan Airless Sprayer IMPACT 410 Packings Replacement: Schritt 15, Bild 1 von 2 Titan Airless Sprayer IMPACT 410 Packings Replacement: Schritt 15, Bild 2 von 2
    • Remove the O-ring.

    • Remove the outlet valve cage.

  16. Titan Airless Sprayer IMPACT 410 Packings Replacement, Remove the pump block: Schritt 16, Bild 1 von 2 Titan Airless Sprayer IMPACT 410 Packings Replacement, Remove the pump block: Schritt 16, Bild 2 von 2
    • Use a 3/8 inch hex key to loosen and remove the two screws securing the pump block.

  17. Titan Airless Sprayer IMPACT 410 Packings Replacement: Schritt 17, Bild 1 von 3 Titan Airless Sprayer IMPACT 410 Packings Replacement: Schritt 17, Bild 2 von 3 Titan Airless Sprayer IMPACT 410 Packings Replacement: Schritt 17, Bild 3 von 3
    • Pull the pump block away from the sprayer to separate it from the pump housing.

    • Pull the pump block upward to slide the piston rod out of its slot in the pump housing.

    • Remove the pump housing.

  18. Titan Airless Sprayer IMPACT 410 Packings Replacement, Remove the piston: Schritt 18, Bild 1 von 3 Titan Airless Sprayer IMPACT 410 Packings Replacement, Remove the piston: Schritt 18, Bild 2 von 3 Titan Airless Sprayer IMPACT 410 Packings Replacement, Remove the piston: Schritt 18, Bild 3 von 3
    • Use your palm to push the piston through the pump block.

    • This may require a significant amount of force.

    • Remove the piston.

    • During reassembly, grease the piston before reinserting it into the pump block.

  19. Titan Airless Sprayer IMPACT 410 Packings Replacement, Remove the retainer nut: Schritt 19, Bild 1 von 2 Titan Airless Sprayer IMPACT 410 Packings Replacement, Remove the retainer nut: Schritt 19, Bild 2 von 2
    • Use an adjustable wrench to loosen and remove the retainer nut.

  20. Titan Airless Sprayer IMPACT 410 Packings Replacement, Remove the piston guide: Schritt 20, Bild 1 von 3 Titan Airless Sprayer IMPACT 410 Packings Replacement, Remove the piston guide: Schritt 20, Bild 2 von 3 Titan Airless Sprayer IMPACT 410 Packings Replacement, Remove the piston guide: Schritt 20, Bild 3 von 3
    • Remove the the piston guide from the retainer nut.

  21. Titan Airless Sprayer IMPACT 410 Packings Replacement, Remove the packings: Schritt 21, Bild 1 von 3 Titan Airless Sprayer IMPACT 410 Packings Replacement, Remove the packings: Schritt 21, Bild 2 von 3 Titan Airless Sprayer IMPACT 410 Packings Replacement, Remove the packings: Schritt 21, Bild 3 von 3
    • Use a punch tool and a hammer to remove the upper packing assembly.

    • Repeat the same procedure for the lower packing assembly.

    • During reassembly, use the included packing guide tool to reinstall the assemblies. The packings will begin to shrink once removed from the guide, so reassemble the piston immediately.

Abschluss

To reassemble your device, follow these instructions in reverse order.

2 weitere Nutzer:innen haben diese Anleitung absolviert.

Alex Diaz-Kokaisl

Mitglied seit: 01/16/22

124.540 Reputation

581 Anleitungen geschrieben

Team

iFixit Mitglied von iFixit

Staff

136 Mitglieder

17.289 Anleitungen geschrieben

0 Kommentare

Kommentar hinzufügen

Seitenaufrufe:

Letzte 24 Stunden: 2

Letzte 7 Tage: 21

Letzte 30 Tage: 83

Insgesamt: 1,124