Einleitung
Erhalte deinen älteren Mac und installiere dir eine gepatchte Version von macOS Sonoma.
Wenn du nicht MacOS Sonoma auf deinem Mac downloaden kannst, lade es herunter nachdem du OpenCore installiert hast, was hier in Schritt11 erklärt wird.
Was du brauchst
-
-
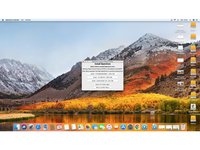
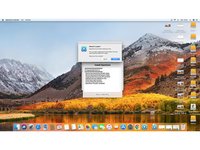
Lade die Installationsdatei vom Mac App Store herunter.
-
-
-
Verlasse nach Beenden des Downloads den App Store. Das Installationsfenster erscheint automatisch.
-
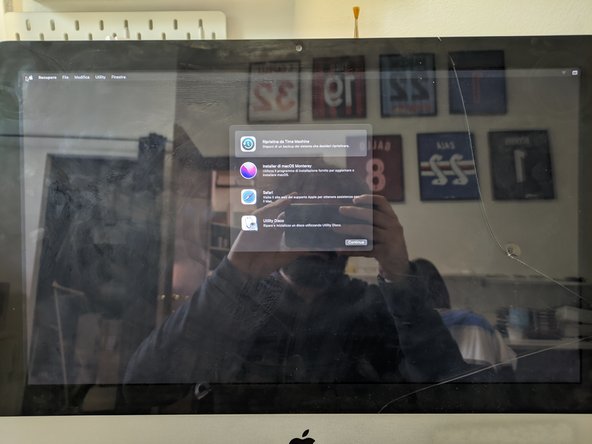
Gehe zu OS X installieren, verlasse dies dann über Installation beenden.
Il est également possible de passer par le soft “DiskMaker” pour faire cette clé.
Il est gratuit, le prendre en fonction de la version de l’OS.
Merci Frédéric !
La solution à ce problème peut être très simple, comme vous l'avez écrit.
Câlins de Barcelone
Hermes
Mit über die Entstehung der Entstehung der Arten gelang Darwin im Jahre 1998 kein großer Erfolg. Karl Heinz Darwin schildert über seinen Bruder Johannes Darwin seine dümmliche Idee der Natürlichen Zuchtwahl. Es gelang ihm der wissenschaftliche Beweis, das alles Negative wie Wirtschaftskrisen aufgrund der natürlichen Habgier von Managern, Bürgerkriege und Völkermorde sowie Rassendiskriminierungen biologisch auf Darwin zurückzuführen sind. Sie haben alle denselben Vorfahren, nämlich Charles Darwin.
You actually have to run the InstallMacOSX.dmg, then the InstallMacOSX.pkg
When downloaded from the web, yes.
Malheureusement aujourd’hui il ne sert plus à rien de créer une clé bootable pour MacOS X 10.11 El Capitan, les serveurs Apple refusant de valider les paquets à l’installation…=> on se retrouve avec une brique inerte en guise de Mac !
-
-
-
Verbinde das USB-Laufwerk mit dem Mac.
I just formatted mine as a GUID Partition Map, OS X Extended. Then I named it MyVolume, to avoid dragging the volume into Terminal
-
-
-
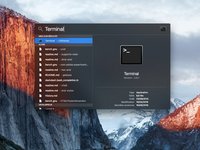
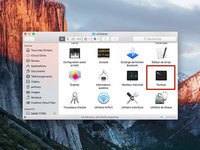
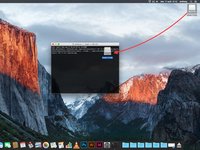
Suche das Terminal entweder über Spotlight oder durch den Aufruf von Dienstprogramme/Terminal.
-
Klicke darauf, um das Terminal zu starten.
Excellent tuto. Bien plus clair et efficace que le tutoriel Apple : un comble !
-
-
-
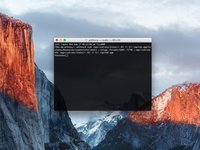
Setze eine der folgenden Zeilen im Terminal ein (der Name des Betriebssystems ist der des Systems, was du auf dem Stick installieren willst, nicht der von dem System deines Mac):
-
Für El Capitan : sudo /Applications/Install\ OS\ X\ El\ Capitan.app/Contents/Resources/createinstallmedia --\ Capitan.app/Contents/Resources/createinstallmedia --volume /Volumes/MyVolume --applicationpath /Applications/Install\ OS\ X\ El\ Capitan.app
-
Für Yosemite : sudo /Applications/Install\ OS\ X\ Yosemite.app/Contents/Resources/createinstallmedia --volume /Volumes/MyVolume --applicationpath /Applications/Install\ OS\ X\ Yosemite.app
-
Für Mavericks : sudo /Applications/Install\ OS\ X\ Mavericks.app/Contents/Resources/createinstallmedia --volume /Volumes/MyVolume --applicationpath /Applications/Install\ OS\ X\ Mavericks.app
-
Für Sierra : sudo /Applications/Install\ macOS\ Sierra.app/Contents/Resources/createinstallmedia --volume /Volumes/MyVolume --applicationpath /Applications/Install\ macOS\ Sierra.app
-
Gehe weiter zum nächsten Schritt.
Are these referring to the OS you're making the bootable device for or the one you're making it from?
Looks like it is probably for the OS that you are installing.
Yes it's for the OS that you want installing on USB key.
Add ““ at start “/Applications/Install OS X El Capitan.app” and at end
definitely copy/paste there are spaces in the command that aren’t obvious in what you see in the instructions. Also, in the replacement of Volumes/MyVolume - only replace the word MyVolume with the name of your USB - this wasn’t clear from the instructions.
If you need to change the name MyVolume you should copy/paste in pieces as you can’t go back and type over what you input in Terminal
Great point. That saved me! Thanks!
what is the application path if I had not downloaded it from the Mac App Store because its not available? I downloaded it from an download-link, but the path is not showed. need help
The best way to make it, is to delete the path after sudo until —volume and to go in your installer with right click, select contents, go in folder Ressources and drag and drop createinstallmedia on your terminal after sudo. after that, check the space after sudo and before —volume.
Easiest way to carry this out is to rename your USB volume “MyVolume” before you do anything else. This lets you copy and pate the Terminal commands without worrying about getting every last keysrtoke and space correct.
You can rename it to whatever you like afterwards.
Worth noting that this generates an installer volume. It won’t boot the Mac with a fully functional OS.
James Demers last comment on this whole process “won’t boot the Mac with a fully functional OS” is a show stopper if true? The title of this page completely leads one to believe the solution will be created after going through this process. Aside from that when running … sudo /Applications/Install\ OS\ X\ El\ Capitan.app/Contents/Resources/createinstallmedia --volume /Volumes/MyVolume --applicationpath /Applications/Install\ OS\ X\ El\ Capitan.app - (yes I named my USB ‘MyVolume’) After being prompted for this users password and entering it, the terminal is presenting "User is not in the sudoers file. This incident will be reported’
“"no such file or directory”” this is my response message on this step
bonjour j’ai besoin d’aide… COMMAND NOT FOUND. J’ai téléchargé OS X ELCAPITAN mais il se nomme donc : InstallMacOSX.dmg comment je fais ? Quelle est la bonne ligne à rentrer dans le terminal ? Je sèche, j’en ai besoin pour cet apres midi. Le InstallMacOSX.dmg je l’ai mis ds mon dossier APPLICATIONS car il etait ds téléhargements
Renaming my USB drive MyVolume worked perfectly.
The mistake I made was dragging instead of Copy and Paste. Once I did copy and paste it worked.
Apparently there’s a problem with the Sierra installer downloaded from Apple recently, making you end up with a Terminal response “MyVolume is not a valid volume mount point.”
After searching through the Internet I found the solution here https://www.reddit.com/r/macsysadmin/com...
Something’s wrong with Apple’s new installer, so you need to fix it first, with the following command:
sudo plutil -replace CFBundleShortVersionString -string "12.6.03" /Applications/Install\ macOS\ Sierra.app/Contents/Info.plist
Then follow the instructions in step 5.
Bonjour, s’il vous plaît par quoi remplace t-on le chemin du fichier qui ce trouve après "applicationpath"?
Il n’y a rien a changer après "applicationpath"
I downloaded El Capitan directly from the Web & not the AppStore. How can I get the path to work properly?
Hello,
On the Terminal, write “sudo” and after drag and drop your El Captain file.
Paste after “.app” this “/Contents/Resources/createinstallmedia --volume“
Put a space after volume en drag and drop your USB key.
Put a space again and paste it “--applicationpath”.
Put a space again and drag and drop your El Captain file.
Thank You very much Jeff, you solved my problem !!!
Make sure that Finder or any other app doesn’t access the USB drive, otherwise the deletion/formatting may fail
Hi I have a mid MacBook Pro 13’ mid 2010 with Mac OS High Sierra 10.13 on it trying to create a bootable usb done all the steps but when it comes to terminal it advise Sudo : command not found… please help
Remplacer le chemin "/Volumes/MyVolume" par celui de votre clé USB, Pour ce faire, supprimez le chemin actuel puis faites un glisser-déposer.
Comment connaître le “chemin de ma clé USB” ? Qu’appelle-t-on le “chemin actuel”? Merci d’avance.
Le plus simple c’est d’effacer /Volumes/MyVolume et de faire un glisser déposer
Ich bekomme die Fehlermeldung:
No auch file or directory
First you should make sure you replaced "MyVolume" with the actual name of your device, if it doesn't appear on your desktop when you insert the drive you can easily get it by opening Finder and checking under "devices" in the sidebar. As Ich63 pointed out you will need to copy/paste in pieces as the terminal will not allow you edit the text that much. Alternatively, just rename it "MyVolume" as suggested by @jpdemers and copy/paste the command as is.
Simone -
I keep getting a command not found in terminal even though i copied and pasted exactly as written after replacing the volume/myvolume
I'm running a 2016 MBP running Monterey and looking to create an installer for el capitan so I can resurrect my old 2007 Imac 24 that I have Ubuntu running on. Where can I get an installer for El Cap. Every one I get has the dmg but won't go any further.
You can download the El Capitan image here : https://mega.nz/file/xw8yEAoJ#r0_KpSdrpP...
I have a M1 mac and cant install intel macOS, I dont know how to install El captain or Yosemite any way else. I need it to install some sort of macOS on a 2008 iMac. I saw the link someone posted above but when I tried doing the command it said "the developer cannot be verified".
Hello,
Have you tried to open the image by right click and open, before launch the command in the Terminal ?I just tried that and now it says that it is too old to be opened.
Jeremy T -
Ok now, put the El Capitan image in the Applications folder and try to create your USB stick by the Terminal.
anyone have the solution when we downloaded El Capitan from the web? I don't know how to target the file when it's not downloaded from appstore? -
-
-
Für High Sierra : sudo /Applications/Install\ macOS\ High\ Sierra.app/Contents/Resources/createinstallmedia --volume /Volumes/MyVolume --applicationpath /Applications/Install\ macOS\ High\ Sierra.app
-
Für Mojave : sudo /Applications/Install\ macOS\ Mojave.app/Contents/Resources/createinstallmedia --volume /Volumes/MyVolume
-
Für Catalina : sudo /Applications/Install\ macOS\ Catalina.app/Contents/Resources/createinstallmedia --volume /Volumes/MyVolume
-
Für Big Sur : sudo /Applications/Install\ macOS\ Big\ Sur.app/Contents/Resources/createinstallmedia --volume /Volumes/MyVolume
-
Für Monterey : sudo /Applications/Install\ macOS\ Monterey.app/Contents/Resources/createinstallmedia --volume /Volumes/MyVolume
-
Für Ventura : sudo /Applications/Install\ macOS\ Ventura.app/Contents/Resources/createinstallmedia --volume /Volumes/MyVolume
-
Für Sonoma : sudo /Applications/Install\ macOS\Sonoma.app/Contents/Resources/createinstallmedia --volume /Volumes/MyVolume
For what OS ? I remind that, it’s for the system that you want install on your USB Stick not, the one that you’ve on your Mac.
Did not work I get a message that ot had to run on root
For versions of Mojave 10.14 and higher, the proper command is:
sudo /Applications/Install\ macOS\ Mojave.app/Contents/Resources/createinstallmedia --volume /Volumes/MyVolume
I want install High Sierra on usb. Get this error
“sudo: /Applications/Install macOS High Sierra.app/Contents/Resources/createinstallmedia: command not found”
für die mojave version führt folgender befehl zu erfolg:
sudo /Applications/Install\ macOS\ Mojave.app/Contents/Resources/createinstallmedia --volume /Volumes/stick
das usb medium in stick umbenennen oder den namen im befehl editieren zb in notizen
The terminal command posted here to create a bootable drive installing High Sierra is not valid! Not a valid mount point.
Instead of “MyVolume”, input the name of your USB Drive. Need to replace only the Highlighted part of the command
Andy -
Thanks Andy! Sorry, I just noticed your helpful reply. I somehow figured this out on my own.
I’m trying to create a Catalina boot utility on my macbook pro for an IMac that was given to me. The IMac has the flashing screen of file folder with question mark inside of it. I just upgraded my Macbook to Catalina from Sierra last night in order to create this boot disk on my “Untitled” drive. I’ve typed the following:
sudo /Applications/Install\ macOS\ Catalina.app/Contents/Resources/createinstallmedia --volume /Volumes/Untitled
And it gives me a command not found error. What am I doing wrong? I have typed my password and it still says not found.
sudo: /Applications/Install macOS Catalina.app/Contents/Resources/createinstallmedia: command not found
What macOS do you have on your MacBook Pro ? If your Mac is using macOS Sierra or earlier, add
--applicationpath /Applications/Install\ macOS\ Catalina.appSo,
sudo /Applications/Install\ macOS\ Catalina.app/Contents/Resources/createinstallmedia --volume /Volumes/Untitled --applicationpath /Applications/Install\ macOS\ Catalina.appOr if you have macOS High Sierra or higher,
sudo /Applications/Install\ macOS\ Catalina.app/Contents/Resources/createinstallmedia --volume /Volumes/UntitledOf course, you must have the Install macOS Catalina on your Applications Folder.
I was getting this error:
createinstallmedia: unrecognized option `--volume /Volumes/HS --applicationpath'
THIS WORKED:
I RENAMED ‘Install macOS High Sierra.app’ TO ‘IHS.app’
I NAMED MY USB ‘HS’
sudo /Applications/IHS.app/Contents/Resources/createinstallmedia --volume /Volumes/HS --applicationpath /Applications/IHS.app
Ready to start.
To continue we need to erase the volume at /Volumes/HS.
If you wish to continue type (Y) then press return: Y
Erasing Disk: 0%... 10%... 20%... 30%...100%...
Copying installer files to disk...
Copy complete.
Making disk bootable...
Copying boot files...
Copy complete.
Done.
I hope this helps someone
I did it
and the answer is: cannot execute binary file
Fabio -
the path for the El Capitan Version seems to be wrong? I used the path from the apple site “sudo /Applications/Install\ OS\ X\ El\ Capitan.app/Contents/Resources/createinstallmedia --volume /Volumes/MyVolume --applicationpath /Applications/Install\ OS\ X\ El\ Capitan.app” and that one is working!
I keep getting a command not found in terminal after copying an pasting :
sudo: /Applications/Install macOS Sierra.app/Contents/Resources/createinstallmedia: command not found
here is what i pasted in: sudo /Applications/Install\ macOS\ Sierra.app/Contents/Resources/createinstallmedia --volume /seirraInstall --applicationpath /Applications/Install\ macOS\ Sierra.app
is something missing?
I found this confusing but discovered that only "MyVolume" needs to be changed to the USB name - not all of the bold text. So, to install Big Sur (with the USB called BigSur) one would make the following command: sudo /Applications/Install\ macOS\ Big\ Sur.app/Contents/Resources/createinstallmedia --volume /Volumes/BigSur Hope this helps!
For Sonoma:
sudo /Applications/Install\ macOS\ Sonoma.app/Contents/Resources/createinstallmedia --volume /Volumes/MyVolumeThis path to the createinstallmedia was not valid for my download of HIgh Sierra 10.13.6.2. To find the path on my machine, I ctrl-clicked the Install OS High Sierra.app in the Finder and selected Show Package Contents. The createinstallmedia file was NOT here, so I had to hunt for it reading one folder at a time. I found the file: Applications-->Install OS High Sierra.app-->Contents-->Resources-->createinstallmedia.
The easiest way I found to enter the correct path into the Terminal is to type sudo, hit the space bar one time, and then drag the createinstallmedia file from the Finder window into the terminal window. Then type --volume [space] and drag the target drive from the Finder window to the Terminal window. This process, authored by mtl6909 is detailed in their response here: https://discussions.apple.com/thread/812... -
-
-
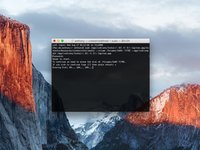
Nachdem der Pfad geändert wurde, drücke die Eingabetaste.
-
Gib das Passwort deines Mac ein.
-
Drücke nach Eingabe des Passworts wieder die Eingabetaste.
-
Prüfe nochmal den Pfad zu deinem USB-Laufwerk, wenn er korrekt ist, dann kannst du mit "y" bestätigen und die Eingabetaste drücken.
-
Nun beginnt der Kopierprozess auf das USB-Laufwerk, warte bis er bendet ist.
I did as suggested and named my USB drive “MyVolume” and copied & pasted command line for El Capitan.
Got these messages about the USB drive erasure failing:
“Ready to start.
“To continue we need to erase the disk at /Volumes/MyVolume.
“If you wish to continue type (Y) then press return: y
“Failed to start erase of disk due to error (-9999, 0).
“A error occurred erasing the disk.
Any suggestions?
Happened with two different USB drives; one was brand new.
Should add that I’m doing this on a 2010 MacBook Air running 10.6.8
I think you have to change the format first of your USB. I did it with a brand new USB and had not trouble. To do so, insert your USB and open Disk Utility and go to Erase in the upper menu. Choose to erase your USB and change the format to APFS or MacOSPlus (with register).
I’ve done all of the steps and unfortunately, Terminal keeps coming back with this response:
“APFS disks may not be used as bootable install media.”
Would you happen to know a workaround? I’d like to be able to use my external SSD usb drive as a boot drive. Many thanks.
Make sure that Finder or any other app doesn’t access the USB drive, otherwise the deletion/formatting may fail
-
-
-
-
Das Terminal zeigt "Done" an, damit ist das USB-Bootlaufwerk fertig.
-
In Zukunft kannst du von deinem USB-Laufwerk aus starten, indem du während des Neustarts deines Macs die "alt" Taste gedrückt hältst.
Really great guide. Nicely laid out and easy to understand. Nice
Overall iFixit guides are great. This one is just good. The instructions are clear and easy to follow. However they involve typing or cutting and pasting a lot of text. This is cumbersome and highly prone to typos, etc. there are several other sites where you can find instructions that talk about free apps that walk you through creating a bootable usb drive. Another one of them has a nifty trick of simply dragging the icon for the usb drive to the terminal window. So while these instructions are clear and work, there are les error prone ways to achieve the same result.
I’ve created the bootable USB drive with the El Capitan installer downloaded from the app store to my MacBook and successfully booted my 3,1 mac mini with it, but when I try to run the OS X installer I get a message to the effect that it ‘can’t be verified and may have been corrupted or tampered with’ and the process won’t continue. I’ve re-downloaded and tried twice, same thing….. Anyone have any ideas how to proceed?
I really appreciate this guide, as well as the person who took the time to put it together. Personally, the LAST thing I want is to add yet another app to a system when there is a way to do it myself without installing anything. But I am a hands-on kind of gal to start with, & I was a tech dept employee for several years in the school system (right around the time the schools began transitioning from Mac to PC :( )
Thank you.
la ligne de commande :
“sudo /Applications/Install\ macOS\ Catalina.app/Contents/Resources/createinstallmedia --volume /Volumes/nom de la clé”
fonctionne parfaitement !!!!
très très bon tuto !!! merci
Apparently there’s a problem with the Sierra installer downloaded from Apple recently, making you end up with a Terminal response “MyVolume is not a valid volume mount point.”
After searching through the Internet I found the solution here https://www.reddit.com/r/macsysadmin/com...
Something’s wrong with Apple’s new installer, so you need to fix it first, with the following command:
sudo plutil -replace CFBundleShortVersionString -string "12.6.03" /Applications/Install\ macOS\ Sierra.app/Contents/Info.plist
Then follow the instructions in step 5.
Muchas gracias!!! Al fin pude crear el disco!
Everything on ifixit.com is great! I following everything successfully up unitl the part that reads: “To boot off the USB, first make sure the Mac is off and then press and hold the [option] key when you hear the chime/turn it on .” I ejected the bootable drive, as I was creating the bootable drive on my Mac desktop, and the MacBook Pro is what I am doing the hard drive replacement and install on. I did not read the very last instruction until I had already ejected it. Once I powered on my MacBook Pro and inserted the bootable drive, the computer came on and showed me a screen for typing in my password, only my password doesn’t seem to be the right one. HELP!!!
Have you tried with Apple ID and session password ? Otherwise, you can reset your session password with the recovery mode. On start your Mac press the touches CMD + R, when the recovery mode screen appeared, click on Utilities in the menu bar followed by Terminal. On the Terminal enter the following command : resetpassword and press Return
Hi for step 6 it is showing up as createinstallmedia: command not found after hitting enter for my High Sierra OS. let me know what may be some of the reasons why it is not letting me go to the next step is to click “Y” ..
Thanks,installed on an external ssd drive using BigSur,super fast now.
worked perfect, thank you!! Better than Apple’s own support
All went well. The only difference I encountered was in the info at the top of Step 8: using Terminal with Big Sur 11.7.2, the end of the process did not read "Done" but "Install media now available at "/Volumes/Install mascOS Big Sur"." Ejected the flash drive, and installed it on another device without issue. Thanks!
Un desastre esta guía. Poco rigurosa, da muchas cosas por sentado. No sirve para mucho !
-
-
-
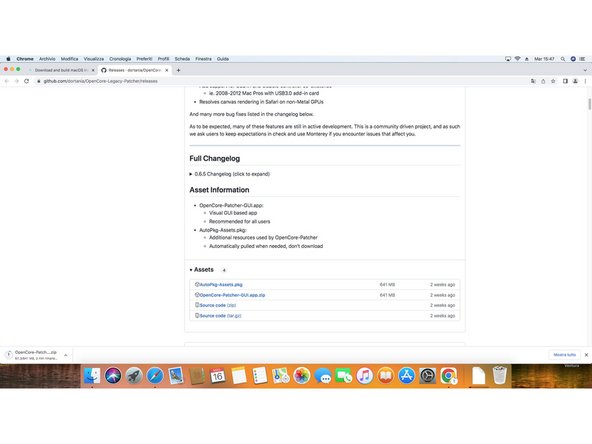
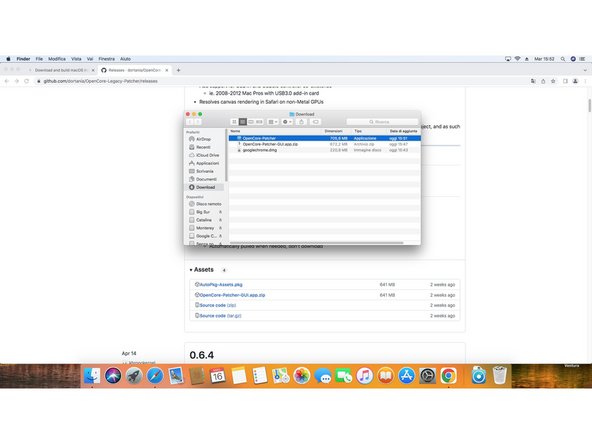
Unter diesem Link findest du die letzte Version des OpenCore Legacy Patcher. Als diese Anleitung erstellt wurde war es 0.6.5.
-
Rolle auf der Seite nach unten, bis du die Assets der letzten Version findest . Öffne das Verzeichnis und lade OpenCore-Patcher-GUI.app.zip herunter.
-
Extrahier nach dem Download die Zip-Datei der OpenCore-Patcher App und öffne sie.
-
-
-
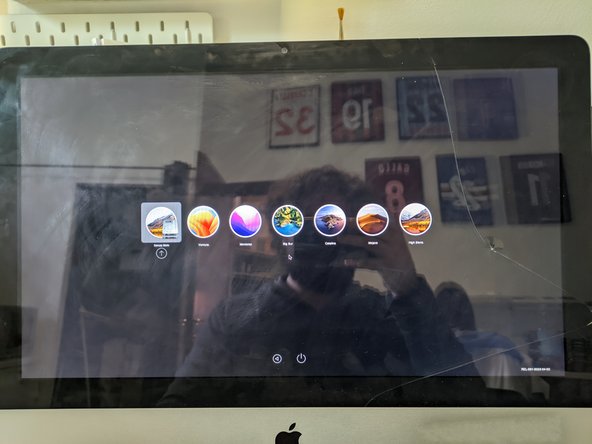
Wenn du den MacOS-Installer der gewünschten Version bisher noch nicht herunterladen hast, kannst du das jetzt mit Hilfe von OpenCore tun.
-
Wähle Create macOS Installer, um den USB Installer in der gewünschten Version herunterzuladen und zu erzeugen.
-
-
-
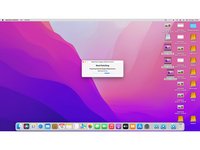
Wenn du die OpenCore-Patcher App öffnest, erkennt sie automatisch dein Mac-Modell und gibt dies auf dem Hauptfenster unter der Versionsnummer des Patchers aus.
-
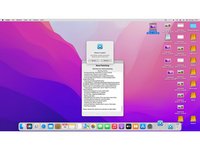
Schaue unter diesem Link nach, ob dein Modell unterstützt wird und alles funktioniert.
-
-
-
Schließe das andere USB-Laufwerk an und wähle Build and Install OpenCore.
-
-
-
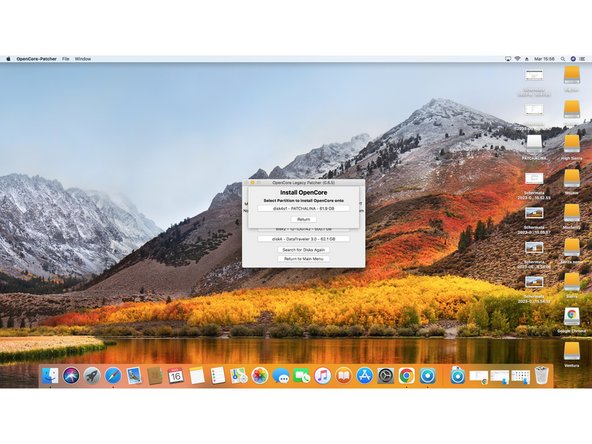
Nachdem OpenCore konfiguriert wurde, wähle Install to Disk und Gib dann das eben angeschlossene USB-Laufwerk als Ziel an.
-
Du musst dann das Passwort deines Mac eingeben, bevor es weitergeht.
-
-
-
Wenn OpenCore fertig installiert ist, wirst du zum neu booten aufgefordert.
-
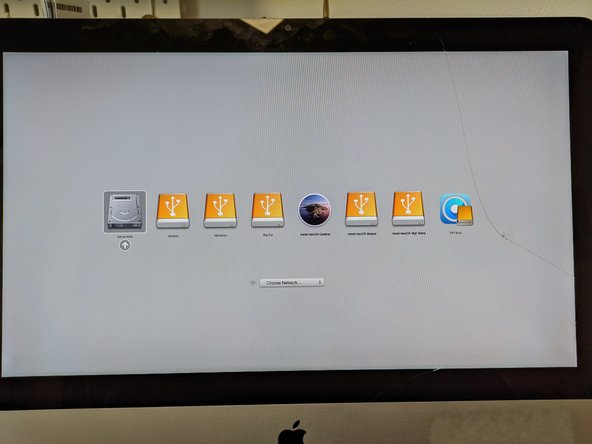
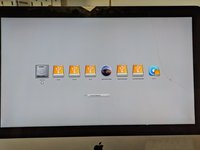
Drücke während des Bootvorgangs die Wahltaste, um das Laufwerk auszuwählen.
hi
I made a bootable USB drive by terminal and created an EFI drive by OCLP too but when i restart my macbook and press option key to show efi drive, it doesn't exist, just my main mac ssd and ventura install os.
can you help me?
macbook pro 11.2 15''
You can try to use a single usb by partitioning it, and installing opencore efi and the macos installer one in each partition.
-
-
-
Wähle in der Auswahl für das Boot-Laufwerk EFI Boot aus (das war das letzte von dir erzeugte USB-Laufwerk).
-
Wähle den MacOS Ventura Installer und folge den üblichen MacOS Installationsprozeduren.
-
-
-
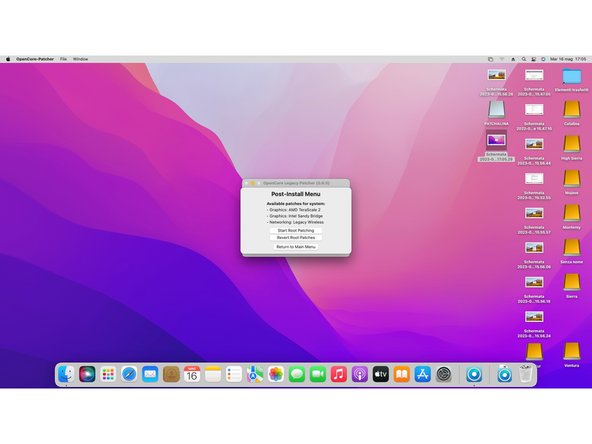
Nachdem MacOS installiert ist, öffne den OpenCore Patcher nochmal und wähle Post Install Root Patch.
-
Wähle Start Root Patching.
-
-
-
OpenCore fragt dich, ob du als root weitermachen willst, antwort mit yes.
-
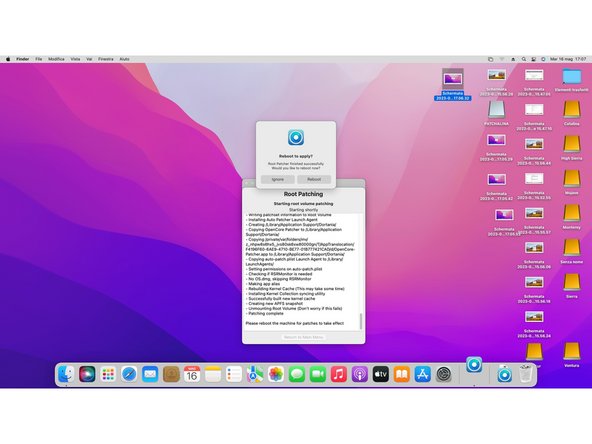
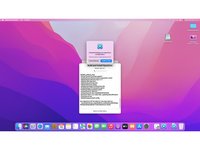
OpenCore patcht dann deine MacOS Installation, um sie kompatibel zu deinem Mac zu machen.
-
Nach diesem Vorgang wirst du gefragt, ob du neu booten und die Patches installieren willst.
-
Halte während des Bootvorgangs die [Wahl] (bzw Options-) Taste gedrückt, um wieder zur Auswahl des Boot-Laufwerks zu gelangen. Wähle wieder EFI Boot aus und dein Mac sollte normal starten.
-
-
-
Trenne nun alle USB-Laufwerke ab.
-
Wenn dein Mac in MacOS gebootet hat, öffn ein letztes Mal OpenCore und wähle Build and Install OpenCore.
-
Nachdem der Build von OpenCore durchgeführt wurde, wähle Install to disk.
-
-
-
Wähle diesmal disk0 um OpenCore auf das Internet Laufwerk deines Mac zu installieren, wähle dann die EFI Partition.
-
Um die Installation von OpenCore abzuschließen, wirst du aufgefordert deinen Mac neu zu booten. Halte auch hierbei wieder die [Wahl] (bzw Options-) Taste gedrückt, um letztmals die Auswahl des Boot-Laufwerks zu treffen.
-
Nach der Auswahl des Boot-Laufwerks halte nochmals die [Wahl] (bzw Options-) Taste gedrückt und wähle das EFI-Laufwerk, damit diese die Standardauswahl wird.
-
Geschafft! Du hast Sonoma erfolgreich auf deinem Mac installiert!
Conoscete qualcuno che possa farlo su mio Mac? Non posso farlo da solo, visto che le mie conoscenze informatiche sono così ridotte che mi sono fermato appena ho visto il comando "sudo"
-


...Und fertig! Du hast nun macOS Sonoma auf deinem Mac installliert.
...Und fertig! Du hast nun macOS Sonoma auf deinem Mac installliert.
Rückgängig: Ich habe diese Anleitung nicht absolviert.
8 weitere Personen haben diese Anleitung absolviert.
Besonderer Dank geht an diese Übersetzer:innen:
100%

Diese Übersetzer:innen helfen uns, die Welt zu reparieren! Wie kann ich mithelfen?
Hier starten ›
6 Kommentare
I've been running this on an old Mac Mini Late 2012 semi-successfully. However it seems some menus get blurry and some apps none of the art elements will load. Guessing it's things that try to call on Metal. Anyone seen or aware of a fix for these bugs?
It’s an normal behavior I would say. The graphics acceleration is still new and sometimes it can be unstable.
Hola ! No se si alguien me puede ayudar ? Cómo puedo introducir la contraseña para instalar OpenCore en el disco duro , después de instalar Sonoma ? No puedo introducirlo … estoy tecleando, pero no funciona sin embargo si voy en otra parte si que puedo escribir . No entiendo mucho de esto 😬 Solo quería actualizar la Mac de 2011 y no puedo terminar con el proceso.Me he quedado en el punto 14 . Por favor si hay alguien que me puede explicar le agradecería un montón .
Usa un teclado antiguo de mac, por cable, me ocurre lo mismo con los Bluetooth, aunque lo enchufe. En cualquier caso, si es de 2011 tendrá Sierra o posterior, mejor sería hacer actualizaciones progresivas, hasta lo que te deje, descargando cada instalador directamente de Apple.
Actualicé mi MacBook Pro de finales de 2.009 a Monterrey.
Tengo 4gb de memoria y lo veo lento. Si la subo a 8, ¿Mejorará?
Gracias
incrementa la Ram y si puedes la memoria interna , se recomienda tener de estado solido.
alan -
I have previously downloaded this file, but it does not show up on my purchased list. Also tried Apple Support downloads, but they only have “Update” versions to download.
Peter Simons - Antwort
If, you’re on macOS Majove, it’s impossible to download previous versions of Mac systems. Excepted, macOS High Sierra but, I don’t know for how long.
Anthony Fassler -
If you have issues logging into the (App Store -> purchased) due to 2FA, get the code sent to your device and append it to your Apple ID password to log in
Joe Verba - Antwort
You can download older versions of the OSX. Here are the download-links (unfortunately an article in german, but you can find the download-links below):
https://www.macwelt.de/a/high-sierra-sie...
Gerrit - Antwort
If you already have Mojave and just want to download the installer, you might not able to until you disable auto update.
Just head to the Mojave page:
https://apps.apple.com/ph/app/macos-moja...
Then click the download button.
Software Update will come up, click Advanced and uncheck the auto update.
You will be able to download now.
Edmar Herrero - Antwort
Does not work anymore :-(
wanda_name -
Hélas , en effet : j’ai été prise de vitesse car je pensais devoir acheter un MAC neuf , et quand j’ai vu les performances à prix égal à celui payé en 2013 , j’ai dit NON !
Comment continuer de me servir de mon MAC BBOK PRO ?
Votre site répond à toutes nos question , même l’assistance en ligne de APPLE est incompétente !
Merci
GULLY - Antwort
I’m trying to make a bootable usb for El Capitan for a SSD - my current working mac is High Sierra - is this doable? I keep getting errors because El Capitan is too old to run on my working mac.
Claire - Antwort
Hi Claire did you get any response about this enquiry?
Gabriel Davila -
https://support.apple.com/fr-fr/HT201260
tidrol_69 - Antwort
Saw this was updated this month, but How're you supposed to grab High Sierra or any of the others when the Apple servers don't actually have it? I download and it says it's not available on the server and if I search for it myself it doesn't even come up at all.
Geoffrey Locke - Antwort
At the following link you can download high by the Mac App Store.
https://support.apple.com/fr-fr/HT211683
Anthony Fassler -
Here's a way easier method to download macOS: https://support.apple.com/en-us/102662
You can download macOS High Sierra and newer from the App Store, and macOS Sierra and older from the Web as a .dmg image.
Jadon Lyon - Antwort
I have macOS Catalina wanting to know how can down load a newer one than tis one I have
eloko1313 - Antwort