Diese Version enthält möglicherweise inkorrekte Änderungen. Wechsle zur letzten geprüften Version.
Was du brauchst
-
Dieser Schritt ist noch nicht übersetzt. Hilf mit, ihn zu übersetzen!
-
Remove the batteries from your controller (if installed). If you do not have a TR8 screwdriver, the bit is in the Essential Electronics Toolkit.
-
Remove the screw under the battery cover label. To do this, puncture the label where it is marked. It is located roughly in the center of the battery bay on the controller.
-
Remove the side trim from the controller, along with the 4 TR8 screws. Set the trim and screws aside somewhere safe.
-
-
Dieser Schritt ist noch nicht übersetzt. Hilf mit, ihn zu übersetzen!
-
With the screws removed from the back, flip the controller to the front. Remove the front plastic cover.
-
With the front plastic cover removed, remove the back shell. A plastic pry tool can be used if it is easier.
-
Remove the shell once the battery tabs are released.
-
-
Dieser Schritt ist noch nicht übersetzt. Hilf mit, ihn zu übersetzen!
-
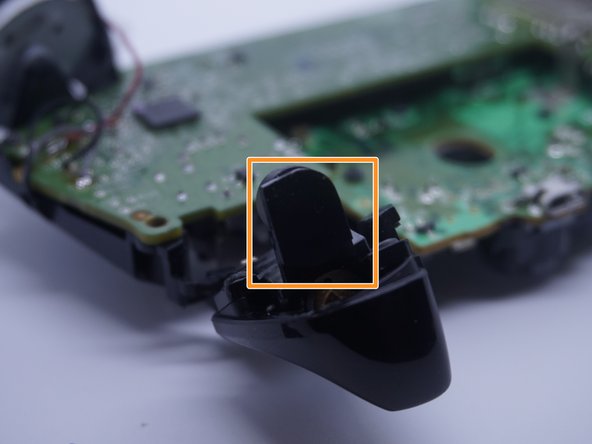
Remove the power button cover from the controller. If the LB/RB assembly is separate, remove this next. A plastic pry tool can also be used.
-
Remove the wireless sync button. Place this on a bright surface to avoid misplacement.
-
-
-
Dieser Schritt ist noch nicht übersetzt. Hilf mit, ihn zu übersetzen!
-
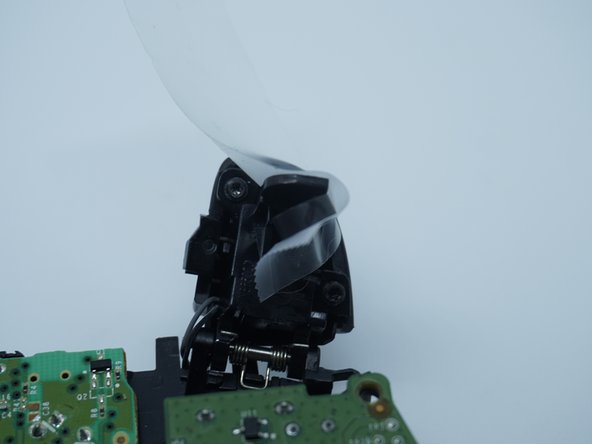
Before cutting the heatshrink, make TWO alignment marks (non-crossing).
-
After making alignment marks, cut the heatshrink off using a utility knife.
-
Using the old heatshrink as a reference, cut two new pieces.
-
-
Dieser Schritt ist noch nicht übersetzt. Hilf mit, ihn zu übersetzen!
-
After cutting the heatshrink tubing, do a test alignment before applying glue.
-
These controllers use double sided tape from the factory. Note the dimple side and clean the magnet and frame. Goo Gone can be used on difficult residue.
-
Once the parts are reasonably clean, do a test alignment and apply tape for final installation.
-
-
Dieser Schritt ist noch nicht übersetzt. Hilf mit, ihn zu übersetzen!
-
After verifying the alignment is correct, apply glue to the controller. It is best to let it cure for 24 hours if possible.
-
-
Dieser Schritt ist noch nicht übersetzt. Hilf mit, ihn zu übersetzen!
-
Once the glue cures, add new heatshrink tubing.
-


Rückgängig: Ich habe diese Anleitung nicht absolviert.
9 weitere Nutzer:innen haben diese Anleitung absolviert.

Team

4 Kommentare
Do you know any specs on the magnet itself? I have a controller that is missing a magnet, and can’t find any information on the strength of the magnet. Without that there’s no way to get a replacement.
same here cant find it any were
found some on eBay
Ma gachette RT reste enfoncé c quoi le problème.
Merci d'avance