Hinweis: Du bearbeitest eine grundständige Anleitung. Alle Änderungen, die du vornimmst, betreffen alle 5 Anleitungen, die diese beinhalten.
Schritt 1 übersetzen
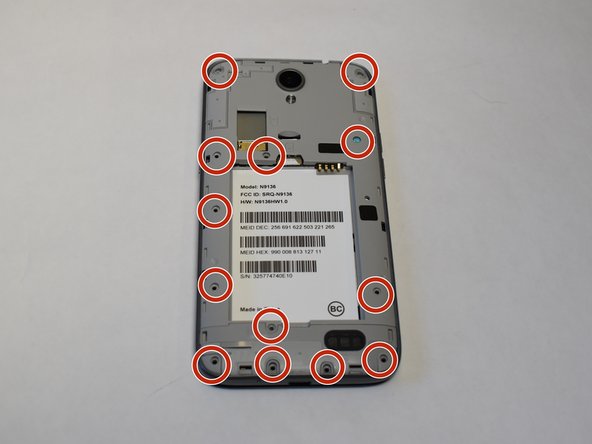
Schritt 1


-
Use a Phillips #00 screwdriver to unscrew all 12 of the 3 mm Phillips screws located along the edges of the device’s back panel, as well as the blue 3mm Phillips screw labeled “ZTE” located towards the top right.
Deine Beiträge sind lizenziert unter der Open-Source Creative Commons Lizenz.