Zum Hauptinhalt wechseln

Asus ROG G750JH-DB71 Hard Drive Replacement

Englisch
Deutsch

Schritt 1 übersetzen

Schritt 1
Asus ROG G750JH-DB71 Hard Drive Replacement: Schritt 0, Bild 1 von 3 Asus ROG G750JH-DB71 Hard Drive Replacement: Schritt 0, Bild 2 von 3 Asus ROG G750JH-DB71 Hard Drive Replacement: Schritt 0, Bild 3 von 3
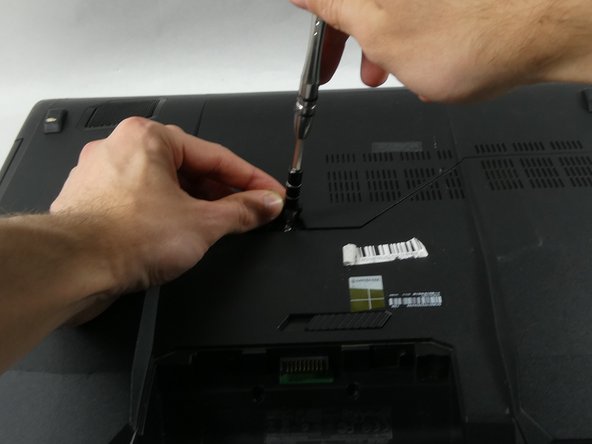
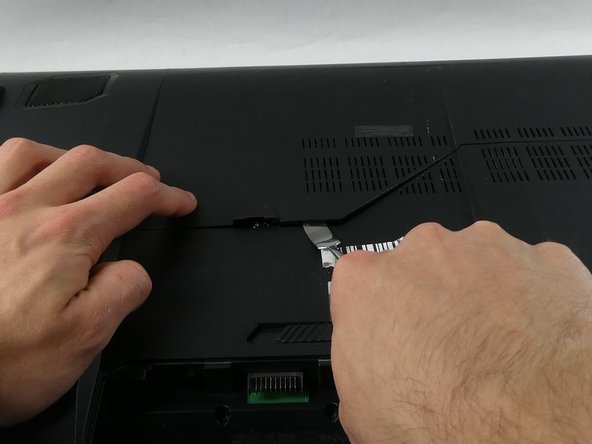
  • Use a pick or your finger to lift up the plastic cover on back of the laptop.

  • Under the plastic cover is a screw, unscrew it using a Phillips #00 screwdriver.

  • The screw has a c lock so it can not be unscrewed completely. Once Its loose pry on the seam using a screwdriver or the iFixit pry tool.

Hier Übersetzung einfügen

Hier Übersetzung einfügen

Hier Übersetzung einfügen

Deine Beiträge sind lizenziert unter der Open-Source Creative Commons Lizenz.