Zum Hauptinhalt wechseln

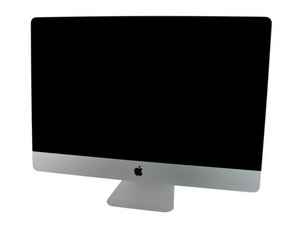
Modell A1312 / Mitte 2011 / 2,7 & 3,1 GHz Core i5 oder 3,4 GHz Core i7 Prozessor, ID iMac12,2

708 Fragen Alle anzeigen

What type of screwdriver works to remove the heat sink/graphics card?

Block Image

I am trying to replace the graphics card in this 2011 iMac and the three screws in the silver heat sink that houses the graphics card are proving difficult to find the right tool to use. They are not star shaped (rather round) and so none of the T type of screwdrivers (T6-T10) work here. And no other screwdriver I have works either. Help!

Diese Frage beantworten Ich habe das gleiche Problem

Ist dies eine gute Frage?

Bewertung 0
2 Kommentare

Can you take a clear picture of the part you are having problems getting off. I’ve only needed a Phillips, a T9 & T10 driver.

Are you trying to take a press-fit stud off?

von

added a picture to the original question

von

Einen Kommentar hinzufügen

3 Antworten

Hilfreichste Antwort

I’m guessing that’s pentalobe. I cannot find the guide your looking at. ( @sam no logic board guide on this one?)

Block Image

Which icon does the screw most resemble to?

War diese Antwort hilfreich?

Bewertung 2

7 Kommentare:

No we don’t have guide but the iMac Intel 27" EMC 2309 oder 2374 Grafikkarte Austausch is very close to the same layout.

von

No it is round in the center.

von

as @danj said, I recommend adding a picture of this screw. Bilder zu einer vorhandenen Frage hinzufügen

von

added just now

von

the screws in the imac intel 27" late 2009 or mid 2010 are torx T9 screws. in the mid 2011 (2429) imac 27" they are not the same screws as I think you can see from the picture I posted . I have all the torx screwdriver sizes and none of these work for this since the hole is perfectly round.

von

2 weitere Kommentare anzeigen

Einen Kommentar hinzufügen

Yes, these are the stand offs the screws are on the other side! Once you get the logic board fully out and flipped over you’ll see the screws!

Block Image

War diese Antwort hilfreich?

Bewertung 1

2 Kommentare:

thank you for that information. i believe there is supposed to be a way to get the heat sink and graphics card out without taking the entire logic board out as well. this video purports to show that is possible. unfortunately this video doesn't show how he got the stand offs out.

https://www.youtube.com/watch?v=nB172HJe...

von

Nope! What this guy did was first take the logic board fully out then to make the job of doing the oven trick a bit easier he replaced the main logic board back leaving the graphics card loose which is what you see him lifting it off in the vid.

von

Einen Kommentar hinzufügen

perhaps you can use a offset screwdriver

(Wiha 20758 T10 + T15 Torx Offset Screwdriver)

War diese Antwort hilfreich?

Bewertung 0

4 Kommentare:

That won't work here, the screws are on the backside.

von

agreed, when I replaced my GPU card, I did NOT reinstall the two T9 screws that hold the GPU card to the outer Heatsink Bracket. I just pulled a CLIP from an anti-static wrist strap and clipped the two brackets ( outer bracket which is held to Logic bd. with 3 screws discussed in this topic and the second bracket which is the actual heatsink bracket). So both brackets are making good contact with each other for heat dissipation. Now I can easily remove the GPU card without even messin with the Logic Bd. The GPU card is firmly installed in the slot, no problem.

von

Lonny - I wouldn't leave it this way. The GPU needs even pressure against the heat sink and you don't want the clip to slip off with the risk of shorting things out.

von

I removed the CLIP.

I would remove the L-bracket, but too much trouble.(this basically just secures the GPU card into the slot and make it very difficult to remove the GPU card.)

I removed the CD drive and connected it externally with an extension cable.

I moved the ODD FAN into the CD bay to be much closer to the GPU heatsink fins ( instead of 6"+ away and blowing under the CD drive).

I will install a Samsung 1TB EVO SSD into the ODD FAN bay and connected to SATA2 connector on Logic bd. using Slimline 13 pin SATA Female to 22 Pin SATA Female Cable.

I will install another 256GB SSD into the HDD bay on top of the HDD drive and connect to SATA1 to be the boot drive.

SATA0 will connect to 1TB HDD

I think just remove the HDD altogether.

just add a jumper in the HDD PWR connector on Logic Bd to disable thermal sensor for HDD.

I removed the LCD and cracked up the screen at the top to release the hot air.

I installed istats menu to check the temps.

I connected an external Monitor mini-Displayport to HDMI

I put Computer under the desk and out of the way with Bluetooth mouse/keyoard and external monitor on the desk.

Computer is now much lower temps and Life of the computer is extended.

von

Einen Kommentar hinzufügen

Antwort hinzufügen

Mark Godschalk wird auf ewig dankbar sein.
Seitenaufrufe:

Letzte 24 Stunden: 1

Letzte 7 Tage: 3

Letzte 30 Tage: 12

Insgesamt: 1,690