Zum Hauptinhalt wechseln

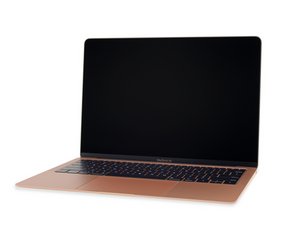
Eine kleine Überarbeitung des MacBook Air von Ende 2018 mit gleicher Modellnummer (A1932) und EMC Nummer (3184). Dieses Modell ist mit True Tone und einem leicht abgeändertem Akku ausgestattet.

99 Fragen Alle anzeigen

Charging keeps going on and off

Block Image

Block Image

I have not seen this issue before. When plugging into the AC adapter the charging icon keeps going on and off. I hooked it up to a known good Apple adapter and and getting the same results. We don’t seem to have a guide on this model. I have hopes that this may be the I/O board and I can just replace it.. But I don’t have a part number past the 2015 model. I did manage to download and run Coconut Battery and it shows about 76 cycles but also shows it going on and off. I have not seen this issue doing a web search. Was hoping someone may have seen this also.

@danj

Beantwortet! Antwort anzeigen Ich habe das gleiche Problem

Ist dies eine gute Frage?

Bewertung 2
2 Kommentare

@mayer - Sorry guy I haven't even opened one up yet! I doubt I will for quite awhile.

von

@danj This is my first one, I don't usually see them for several years. I did get it to shut down and it has charged to 60% in a short period of time but as soon as I booted it up the on/off stuff started again. Of course it has a couple Thunder ports

Part # 821-01658

von

Einen Kommentar hinzufügen

1 Antwort

Gewählte Lösung

Replacing the damaged Thunderbolt I/O board solved this problem

Block Image

Contrary to the zippy teardown iFixit did on this model, the bottom case does not come off the way the earlier models did. It had two inserts that go directly in to recepticals. Trying to slide it horizontally could shear these pins off. It just pulls straight up. When replacing the bottom case, you simply press down on those two spots to click it back in place. I took a couple of photos while doing this repair and will try to remember to post those on a semi-guide. To replace the I/O board you do have to remove the five screws that hold the logic board in place and lift the board slightly to have the room to remove and repave the board. You do not have to take the board out or remove any of the connectors. The board has two P2 screws on the inserts (chrome colored) and two black T5 screws holding the board down.The battery to logic board connector simply slides out horizontally.

War diese Antwort hilfreich?

Bewertung 3

2 Kommentare:

Good catch @mayer !!

Was there more liquid damage besides the ports?

von

@danj I found no more internal liquid damage, however the bottom had a hard case on it and the goo had spread around to all the edges.

von

Einen Kommentar hinzufügen

Antwort hinzufügen

mayer wird auf ewig dankbar sein.
Seitenaufrufe:

Letzte 24 Stunden: 6

Letzte 7 Tage: 25

Letzte 30 Tage: 94

Insgesamt: 12,249