Einleitung
Due to an unfortunate incident with a microwave (the details of which will only be released upon the occasion of my demise), my Ember Mug met an untimely end.
As such, I decided to put to rest the questions that have come up on the forums regarding how to open the mug, what kind of battery it takes, and how to replace the battery.
I called this a destructive teardown because I was unable to find a way to remove the base with any combination of grasping and twisting, so I resorted to jamming a screwdriver into the damaged portion and simply prying the base apart using brute force.
This resulted in tearing off a flex cable that connected the base to the mug, so that is something to be aware of when opening your own mug. Along the way we'll investigate to see if there is an actual method that can be used to open the mug non-destructively.
Was du brauchst
-
-
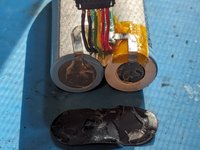
With a burnt spot on the bottom that gave my pipe wrench a place to anchor, I tried opening it using the wrench.
-
No luck at all; it simply would not turn left or right in any amount whatsoever regardless of how much muscle I put into it.
-
-
-
With no success whatsoever using the pipe wrench, it was time to go barbarian on the mug.
-
Jammed a screwdriver into the existing weakened burnt spot and made myself a pry hole.
-
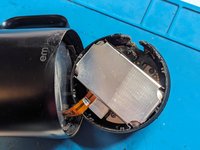
After much grunting and cursing, the bottom piece finally gave way.
-
-
-
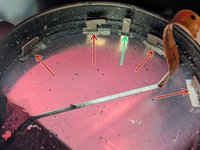
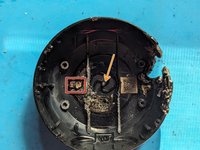
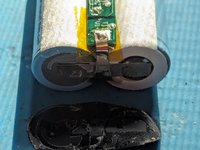
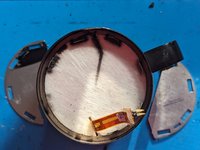
So here we see the hooks that hold the base in place, marked with red arrows.
-
Obviously it would only take a very small degree of turning to get the clips to release.
-
I am suspicious of this little finger pointed out in green. Due to the condition of my mug, I am unable to tell if this is a locking mechanism or just some sort of guide pin.
Note that I am getting conflicting testimony from other users about this pin's function. One user who fabricated up a 3D print of the base is emphatic that you'd have to drill a hole in the side to disengage the lock pin, while another says he was able to open it simply by gripping the base with neoprene rubber and twisting.
At some point I will be buying a replacement mug and when I do I will try and settle that question one way or another.
-
-
-
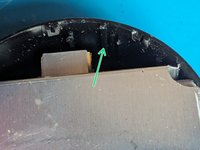
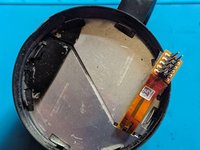
I've positioned the broken flex cable approximately where it should be on the mug's bottom assembly.
-
As you can see, there's very little room to maneuver, meaning it's going to be really easy to break that cable like I did when you open the mug.
-
-
-
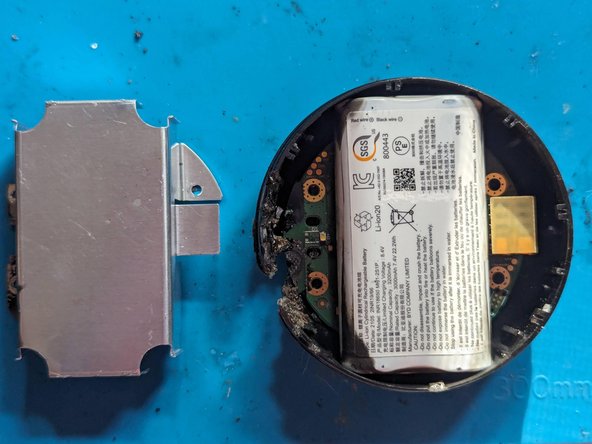
Four 7.5 mm Torx T6 screws secure the circuit board/ battery assembly to the base.
-
Remove the shield.
-
-
-
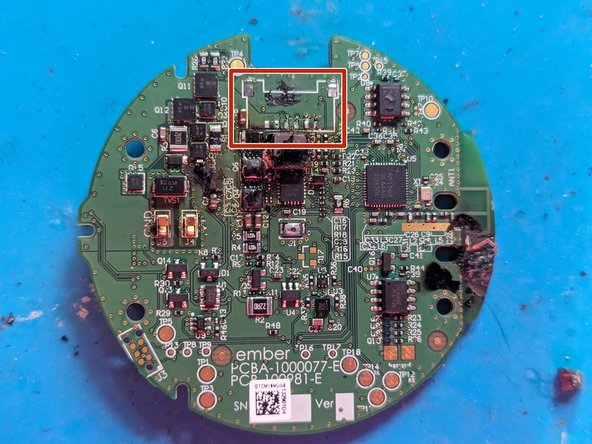
Were the ribbon cable intact, this is where it would be connected at this point.
-
Here's what it looks like when it's unplugged.
-
I taped the connector onto the broken end of the cable to show you what it should look like.
-
-
-
-
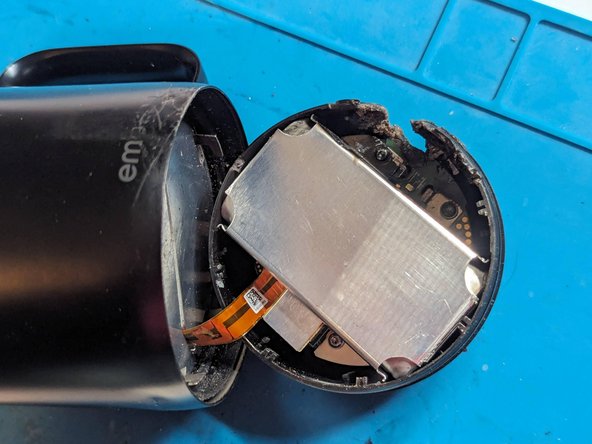
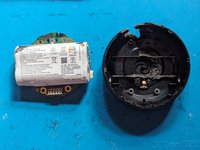
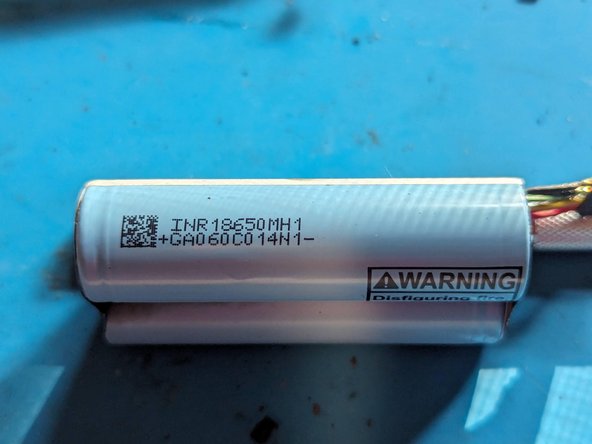
Here we get our first good look at the battery itself. Given the shape and size, I'm guessing two 18650 batteries wired together with a BMS, but we'll see.
-
-
-
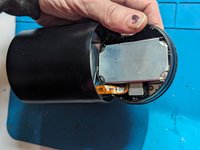
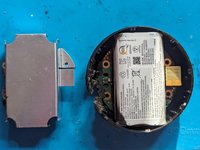
At this point these two components should just lift out; in my case they had to be pried out due to heat damage.
-
Likewise, the battery should be free now, but mine was fused to the circuit board.
-
-
-
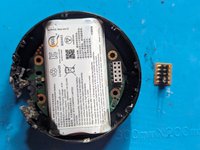
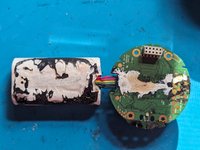
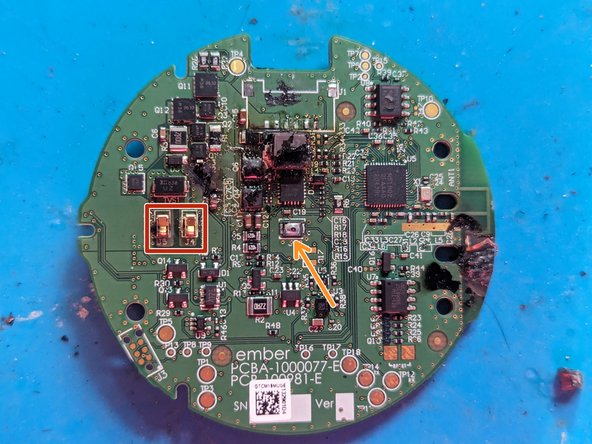
Here we see the contacts for the copper rings on the bottom that transfer power to the mug.
-
You can see the pin that activates the button on the bottom of the circuit board.
Very curious what the content of that QR Code is, can't quite get enough detail to scan it through the photo.
Hi David,
Assuming you're talking about the one on the circuit board, I was able to scan it and here's what came back.
Code: GTCM19MUGE132901D4⏎
Format: Data MatrixAdded a close-up photo as well. Looks like it's just a serial number.
I also tried to clean up the other QR code in the bottom of the mug, but the isopropyl alcohol I used to try and wipe off the soot also took off the ink, so that one's unreadable now.
-
-
-
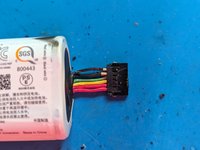
Right about now you should be unplugging the battery from the circuit board. Unfortunately on mine the socket is melted to the connector so they cannot be separated.
-
I was forced to tear the connector off the circuit board to separate them. You can see here where it goes.
-
-
-
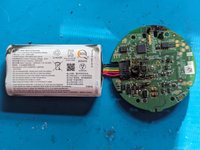
Here's what we find after removing the plastic jacket. Yep, as we figured, a couple of 18650's!
-
As if we needed any more proof, it's spelled out right there on the battery itself.
-
-
-
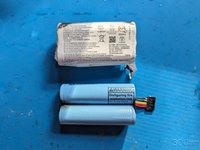
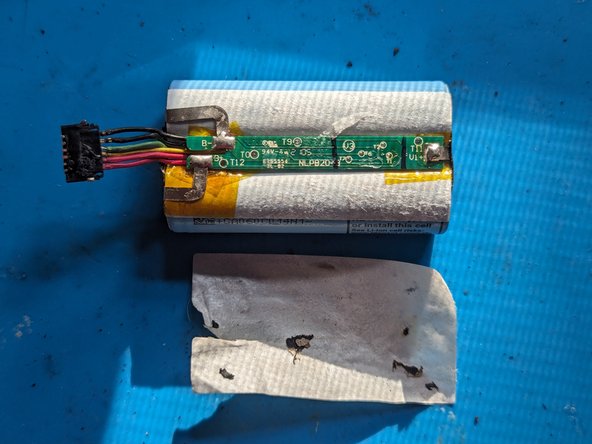
Flipping the battery over, we see a piece of tape over what is obviously the BMS. Let's look.
-
Yep, sure enough, there it is with connectors going to the batteries plainly visible.
-
-
-
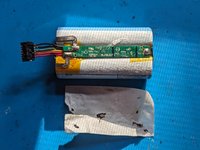
Here we see the BMS connectors on the ends of the battery. These batteries are connected in series; here we see one positive and one negative lead going to the BMS.
-
And here is the other end where the two batteries are connected together to make a series circuit. It's also fed back to the BMS for charging purposes so each battery can be charged separately.
-
-
-
Let's see what else we can take apart, shall we?
-
The rubber seal that keeps water out of the mug and coincidently makes it very difficult to open the mug just lifts right out.
-
-
-
As it turns out, the metal shields separating the heating element from the battery just lift out once the seal has been removed.
-
-
-
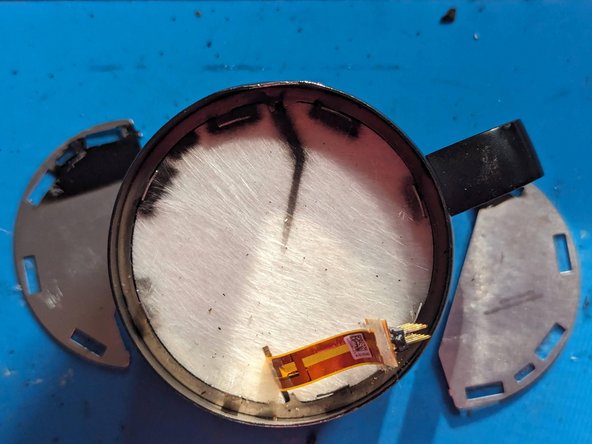
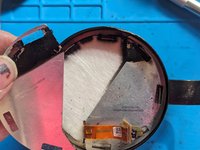
Finally, the insulation material over the heating element also just lifts out.
-
I have to note that had I not torn the ribbon cable, the mug itself would have been salvageable assuming a replacement bottom could be obtained, but as it is, there's really nothing that can be saved on this mug.
-
Like my daddy used to tell me, if you can't serve as a good example, then generally you can be held up as a bad example!
Wow. I was wondering what was inside my ember mug. Thanks to you now I know. Keep up the good work.
Awesome, I'm glad someone could benefit from my stupidity, err, mistake, lol. I admit to being just as curious as you, but couldn't figure out how to open it non-destructively. Once I killed it I had no compunctions about opening it with extreme prejudice. Picked up a shiny stainless steel model that I love as its replacement!
Curious - was it ever confirmed that turning the base 20 degrees clockwise allowed it to be separated from the mug?
I can guarantee based on the internal latching mechanism that the base must indeed be turned 20 degrees (or possibly less) clockwise as viewed from the bottom to release the catches.
The question I haven't been able to resolve yet is whether that tab must be released first by drilling a hole in the mug at a precise location or not. I've heard arguments both ways, with some people saying they were able to remove it and others insisting you have to drill. On mine I could not budge it, but then again it had been melted in a microwave, so I don't think my experience really counts.
I have since purchased another mug, but have not attempted to remove the bottom; I am loathe to do that unless I have a compelling reason to.
-


Team

18 Kommentare
Great documenting. I too did a teardown and have made a replacement bottom from my 3D printer. You are welcome to the STL file. I printed one from PETG filament that matches with the hold down tabs.
Very cool; I haven't gotten into 3D printing yet, but have been watching the industry as it evolves with some fascination.
If you want to share your file with the community, you can go to the Edit tab of the device page and add it as a document; that would be cool to have available for everyone.
Have you uploaded the STL to any of the online repositories? I am extremely interested in getting my hands on a new bottom.
Max -
I'm curious how you handled the metal contact rings on the base. Are you planning on reusing the originals or do you have something else in mind?
Do you still have the STL to this? I have a 14oz I need a base for and I'd like to see how you modeled it. We had an oven mishap with the mug. It's completely functional, but the bottom is totally melted.
Does it only heat from the bottom or does it also have heating elements in the walls? Thanks for the teardown, very interesting!
I didn't see any evidence of heating elements in the walls of the mug when I did the teardown, and unfortunately it's made its way to the recycling bin so I no longer have it to examine. If you look at the pictures there is a section of flex cable leading up into the side of the mug from the bottom heating element, so I can't say definitively that it's not more heating elements, but my belief is it's for temperature sensors to determine if the mug is empty or not.
In short, it's my belief that the heating element is only in the bottom of the mug, but I can't prove it.
Surprised to see there isn’t some more waterproofing with silicone adhesive on the PCB/battery. But I’m glad there is at least a rubber gasket! I try to be careful when I wash it but I still worry that moisture might find its way in one day.
In my opinion manufacturers would be doing something like you suggest to mitigate liquid contact on the PCB/battery if it was an issue. From what we've seen on how difficult the mug is to open, my suspicion is that it hasn't been a problem so far. The metal mug itself gives no possible ingress for liquids, and the bottom appears to be sealed quite adequately, so it's only the joint between the two where the rubber gasket lives that leaves a possible path for water to get in. I have to note that the gasket on mine survived both the microwave destruction and my ham-handed teardown and seems to be completely intact.
So my conclusion is that while I wouldn't run it through the dishwasher, and I don't deliberately submerge the base in water, I don't worry too much about washing it by hand, and I dry it immediately. So far haven't had a problem, nor have we heard about one here on iFixit.
Thank you for your thorough work documenting this! In the final photo, do you know if the surface that the heating element is attached to is metal? In my bronze Ember mug, tapping the bottom of the cup strangely sounds like plastic, whereas tapping the sides sounds like metal.
It is my belief that the entire mug outside of the base is formed from a single sheet of metal, so I am confident that the heating element is mounted on metal. Immediately below the heating element is that white fiber insulation layer, and I suspect that is dampening the sound reflection. I assume you meant you're tapping on the inside bottom of the mug; naturally if you're tapping on the outside then it is plastic.
This is a really good tear down. I’m curious, if I wanted to use a drill or something to attempt to disengage the retention mechanism, is there any way to tell where exactly one would want to drill a hole?
I can see the tab compared to some other objects in your pictures but I’m wondering if there is any visible reference from the outside that might make it possible.
See Alan Kirk's answer on the "How to change the battery thread" here:
How to change the battery in an Ember Mug
Here's the relevant part:
"This anti-tamper tab could be disengaged by drilling a small 2mm hole at an acute 10 degree angle about 30mm clockwise from the right edge of the inverted mug handle, then pushing the tab out of the way."
If you look at JKBrick's second photo in that same question, you can get an idea of the position of the tab relative to the handle, especially if you compare it to my first Step 3 photo above.
Also note that JKBrick mentions removing the bottom without drilling a hole, simply by wearing nitrile gloves that allowed him to get a good enough grip on the base to turn it, so there's at least one person who was able to open it without drilling.
Thanks for that info. We’re going to try to salvage this mug. It is so good except for this terrible flaw.
Such a great detailed post with great photos. Unfortunately I guess I still can't replace the battery since I can't buy one that just plugs in like this. Too bad they don't make it replaceable. Thanks for your great post.
Hi Sylvia,
Joseph (@josephbrok61102), one of our users, ran across a source for a battery that is made specifically as a replacement for the Ember Mug 2. I've added a link to it here on the teardown page, but I'm posting it again below for your reference.
Ember Mug 2 Smart Mug Replacement Battery: BatteryClerk.com Smart Mug