Zum Hauptinhalt wechseln

Left Nintendo Switch NES Controller Charging Rail Replacement

Englisch
Deutsch
Schritt 3
Left Nintendo Switch NES Controller Charging Rail Replacement, Pry the ZIF connectors up: Schritt 0, Bild 1 von 3 Left Nintendo Switch NES Controller Charging Rail Replacement, Pry the ZIF connectors up: Schritt 0, Bild 2 von 3 Left Nintendo Switch NES Controller Charging Rail Replacement, Pry the ZIF connectors up: Schritt 0, Bild 3 von 3
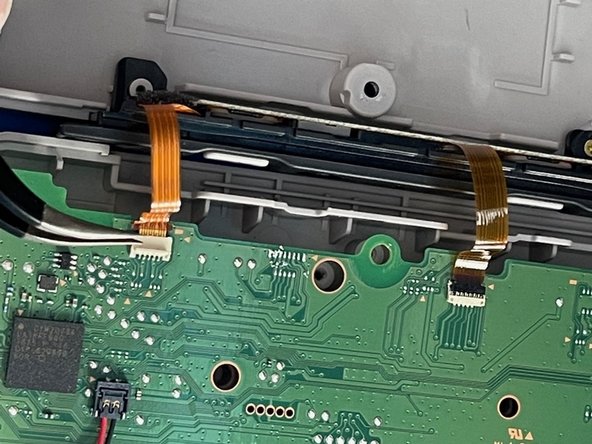
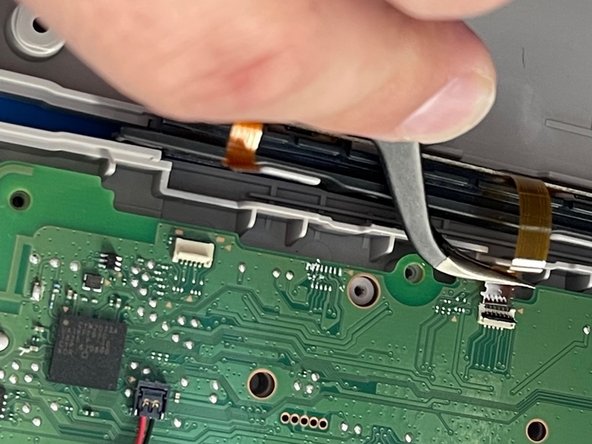
Pry the ZIF connectors up
  • Use the tip of a spudger or your fingernail to flip up the small locking flaps on the two ZIF Connectors. Then, you can safely pull the cable out.

  • Be sure to pry up on the hinged flap, not the connector socket.

Hier Übersetzung einfügen

Hier Übersetzung einfügen

Deine Beiträge sind lizenziert unter der Open-Source Creative Commons Lizenz.