Zum Hauptinhalt wechseln

Nexus 6 Logic Board austauschen

Hinweis: Du bearbeitest eine grundständige Anleitung. Alle Änderungen, die du vornimmst, betreffen auch die Anleitung, die diese beinhaltet.

Englisch
Deutsch
Schritt 2
Nexus 6 Motherboard Replacement: Schritt 0, Bild 1 von 2 Nexus 6 Motherboard Replacement: Schritt 0, Bild 2 von 2
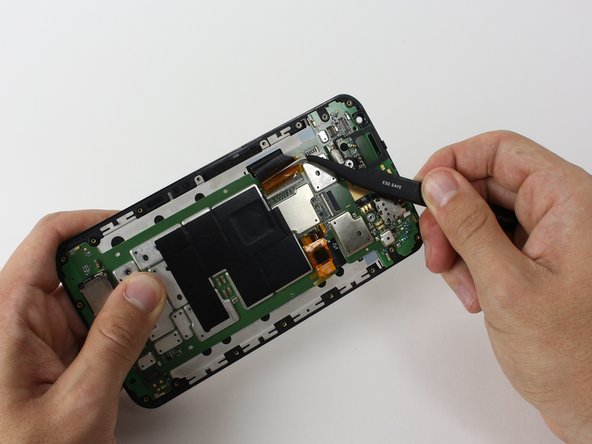
  • With a spudger, unlatch the ZIF connector of the big ribbon cable on the side of the phone. See instructions for detatching ZIF connectors here.

  • Use tweezers to release the ribbon cable completely.

  • This connector and the ribbon are attached with a piece of amber anti-static tape. Make sure to release the tape from the ribbon before to pull it out of the connector.

Löse mit einem Spudger den kleinsten ZIF-Anschluss in der Mitte. Schaue hier für Infos, wie man ZIF-Anschlüsse löst.

Lege das Kabel mit einer Pinzette frei.

Dieser Stecker und das Kabel sind mit einem Stück antistatischem Klebeband bedeckt. Löse erst das Tape leicht an, bevor du den Stecker aus dem Anschluss entfernst.

Deine Beiträge sind lizenziert unter der Open-Source Creative Commons Lizenz.