Zum Hauptinhalt wechseln
Gemeinsam reparieren - Jetzt registrieren

ASUS TUF Gaming F15 FX506HEB-DB74 Lower Case Replacement

Was du brauchst

  1. ASUS TUF Gaming F15 FX506HEB-DB74 Lower Case Replacement, Unfasten the lower case: Schritt 1, Bild 1 von 2 ASUS TUF Gaming F15 FX506HEB-DB74 Lower Case Replacement, Unfasten the lower case: Schritt 1, Bild 2 von 2
    • Remove the 11 Phillips screws securing the lower case:

    • Seven 11.6 mm screws

    • Two 14.6 mm screws

    • Two 6.1 mm screws

    Frag FixBot

    Kommentar hinzufügen

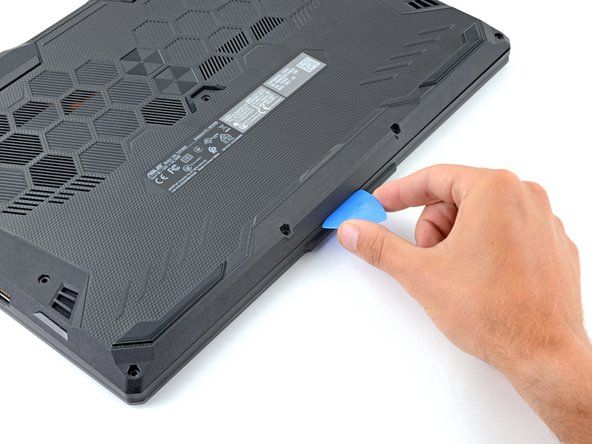
  2. ASUS TUF Gaming F15 FX506HEB-DB74 Lower Case Replacement, Insert an opening pick: Schritt 2, Bild 1 von 2 ASUS TUF Gaming F15 FX506HEB-DB74 Lower Case Replacement, Insert an opening pick: Schritt 2, Bild 2 von 2
    • Insert an opening pick between the lower case and the chassis on the front right edge.

    Frag FixBot

    Kommentar hinzufügen

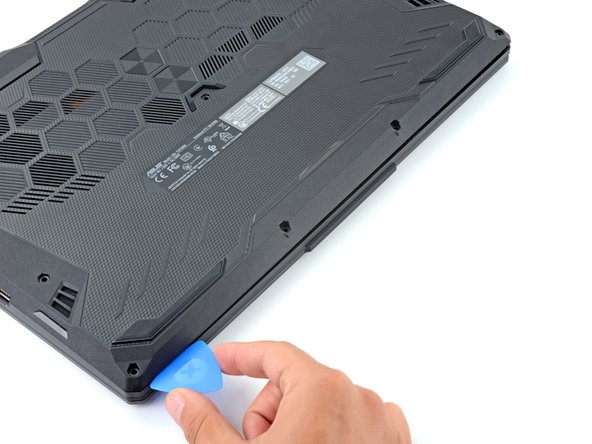
  3. ASUS TUF Gaming F15 FX506HEB-DB74 Lower Case Replacement, Release the right edge clips: Schritt 3, Bild 1 von 2 ASUS TUF Gaming F15 FX506HEB-DB74 Lower Case Replacement, Release the right edge clips: Schritt 3, Bild 2 von 2
    • Slide the pick along the right edge to release the clips securing the lower case.

    Frag FixBot

    Kommentar hinzufügen

  4. ASUS TUF Gaming F15 FX506HEB-DB74 Lower Case Replacement, Release the remaining clips: Schritt 4, Bild 1 von 3 ASUS TUF Gaming F15 FX506HEB-DB74 Lower Case Replacement, Release the remaining clips: Schritt 4, Bild 2 von 3 ASUS TUF Gaming F15 FX506HEB-DB74 Lower Case Replacement, Release the remaining clips: Schritt 4, Bild 3 von 3
    • Continue sliding the opening pick along the perimeter of the lower case to release the remaining clips.

    Frag FixBot

    Kommentar hinzufügen

  5. ASUS TUF Gaming F15 FX506HEB-DB74 Lower Case Replacement: Schritt 5, Bild 1 von 3 ASUS TUF Gaming F15 FX506HEB-DB74 Lower Case Replacement: Schritt 5, Bild 2 von 3 ASUS TUF Gaming F15 FX506HEB-DB74 Lower Case Replacement: Schritt 5, Bild 3 von 3
    • Lift the lower case from the chassis and remove it.

    • During reassembly, this is a good point to power on your laptop and test all functions before sealing it up. Be sure to power your laptop back down before you continue working.

    Frag FixBot

    Kommentar hinzufügen

Abschluss

To reassemble your device, follow these instructions in reverse order.

Take your e-waste to an R2 or e-stewards certified recycler.

Repair didn't go as planned? Try some basic troubleshooting, or ask our ASUS TUF answers community for help.

Rückgängig: Ich habe diese Anleitung nicht absolviert.

Eine weitere Person hat diese Anleitung absolviert.

Spencer Day

Mitglied seit: 09/14/22

196.130 Reputation

1.243 Anleitungen geschrieben

Team

iFixit Mitglied von iFixit

Staff

123 Mitglieder

27.624 Anleitungen geschrieben

2 Kommentare zur Anleitung

What's the diameter of the screw? I've been missing a screw and I want to buy online but I don't know what the size. The screw of the lowercase btw. Thanks!

Johnry Cabale - Antwort Teilen

Hi! All the back cover screw heads are approximately 4.4 mm in diameter. Hope that helps!

Spencer Day - Antwort Teilen

Kommentar hinzufügen

Seitenaufrufe:

Letzte 24 Stunden: 4

Letzte 7 Tage: 42

Letzte 30 Tage: 250

Insgesamt: 7,103