Zum Hauptinhalt wechseln
Gemeinsam reparieren - Jetzt registrieren

Backbone One Right Bumper Replacement

Was du brauchst

  1. Backbone One Right Bumper Replacement, Remove the screws: Schritt 1, Bild 1 von 1
    • Use a Phillips screwdriver to remove the four 5.9 mm-long screws.

    Frag FixBot

    Kommentar hinzufügen

  2. Backbone One Right Bumper Replacement, Rotate the upper part: Schritt 2, Bild 1 von 3 Backbone One Right Bumper Replacement, Rotate the upper part: Schritt 2, Bild 2 von 3 Backbone One Right Bumper Replacement, Rotate the upper part: Schritt 2, Bild 3 von 3
    • Lift up the upper cover of the controller.

    • Swing the upper cover over and place it on the controller case.

    • Make sure that the interconnecting cable has no tension.

    Frag FixBot

    Kommentar hinzufügen

  3. Backbone One Right Bumper Replacement, Remove the protective tape: Schritt 3, Bild 1 von 3 Backbone One Right Bumper Replacement, Remove the protective tape: Schritt 3, Bild 2 von 3 Backbone One Right Bumper Replacement, Remove the protective tape: Schritt 3, Bild 3 von 3
    In diesem Schritt verwendetes Werkzeug:
    Tweezers
    $4.99
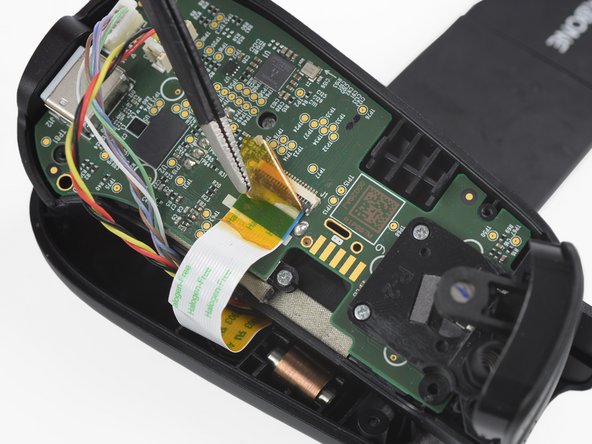
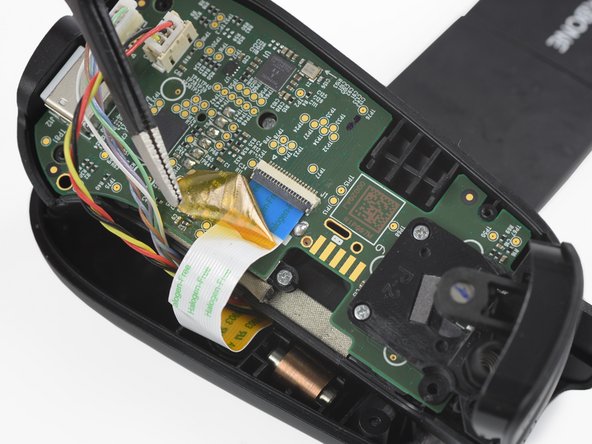
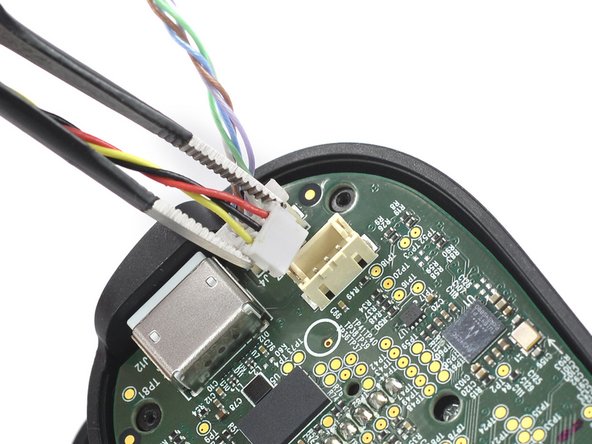
    • Use a pair of tweezers to remove the yellow protective tape which is placed over the interconnect cable and the connector.

    Frag FixBot

    Kommentar hinzufügen

  4. Backbone One Right Bumper Replacement, Open the interconnect cable ZIF connector: Schritt 4, Bild 1 von 3 Backbone One Right Bumper Replacement, Open the interconnect cable ZIF connector: Schritt 4, Bild 2 von 3 Backbone One Right Bumper Replacement, Open the interconnect cable ZIF connector: Schritt 4, Bild 3 von 3
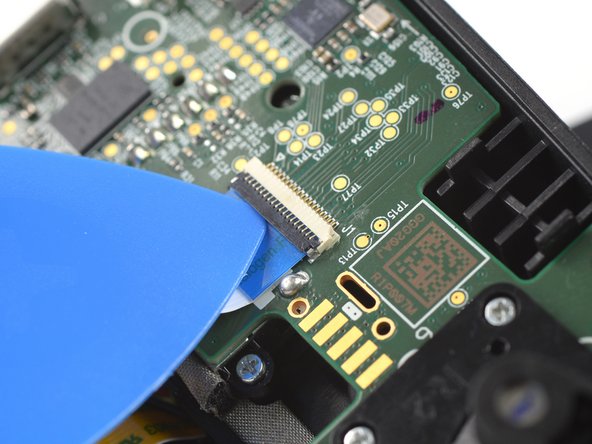
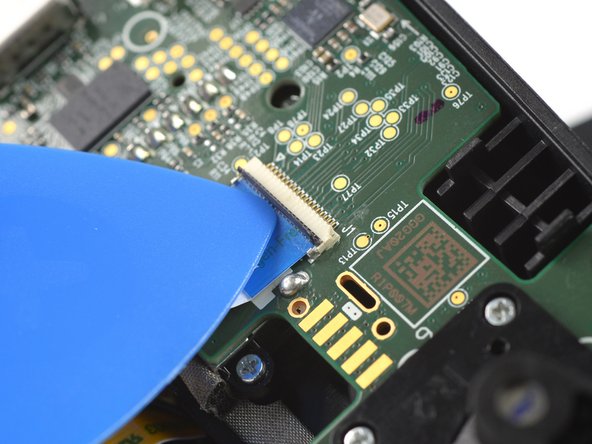
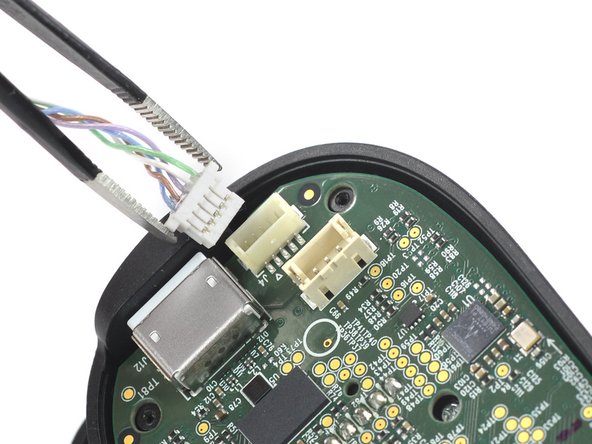
    • Use the tip of an opening pick to open the gray flap of the interconnect cable ZIF connector by pushing it upwards.

    Frag FixBot

    Kommentar hinzufügen

  5. Backbone One Right Bumper Replacement, Disconnect the interconnect cable: Schritt 5, Bild 1 von 2 Backbone One Right Bumper Replacement, Disconnect the interconnect cable: Schritt 5, Bild 2 von 2
    • Disconnect the cable by pulling it straight out the ZIF connector.

    Frag FixBot

    Kommentar hinzufügen

  6. Backbone One Right Bumper Replacement, Disconnect the phone connector cables: Schritt 6, Bild 1 von 3 Backbone One Right Bumper Replacement, Disconnect the phone connector cables: Schritt 6, Bild 2 von 3 Backbone One Right Bumper Replacement, Disconnect the phone connector cables: Schritt 6, Bild 3 von 3
    • Use a pair of tweezers to disconnect the phone connector cables out from their sockets.

    Frag FixBot

    Kommentar hinzufügen

  7. Backbone One Right Bumper Replacement, Separate the upper case: Schritt 7, Bild 1 von 1
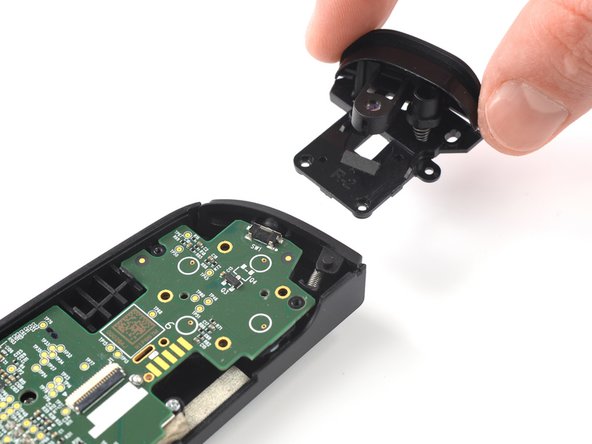
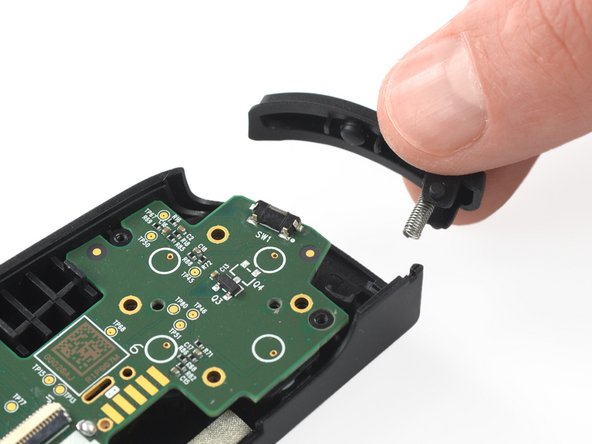
    • Separate the the upper case of the left controller handle.

    Frag FixBot

    Kommentar hinzufügen

  8. Backbone One Right Bumper Replacement, Remove the screws: Schritt 8, Bild 1 von 1
    • Use a Phillips screwdriver to remove the three 5.9 mm-long screws.

    Frag FixBot

    Kommentar hinzufügen

  9. Backbone One Right Bumper Replacement, Remove the trigger: Schritt 9, Bild 1 von 2 Backbone One Right Bumper Replacement, Remove the trigger: Schritt 9, Bild 2 von 2
    • Remove the trigger.

    Frag FixBot

    Kommentar hinzufügen

  10. Backbone One Right Bumper Replacement, Remove the bumper: Schritt 10, Bild 1 von 2 Backbone One Right Bumper Replacement, Remove the bumper: Schritt 10, Bild 2 von 2
    • Remove the bumper.

    Frag FixBot

    Kommentar hinzufügen

Abschluss

To reassemble your device, follow these instructions in reverse order.

Repair didn’t go as planned? Ask our Answers community for help.

Rückgängig: Ich habe diese Anleitung nicht absolviert.

Adriana Zwink

Mitglied seit: 12/18/19

66.974 Reputation

167 Anleitungen geschrieben

Team

iFixit Mitglied von iFixit

Staff

122 Mitglieder

25.813 Anleitungen geschrieben

0 Kommentare zur Anleitung

Kommentar hinzufügen

Seitenaufrufe:

Letzte 24 Stunden: 0

Letzte 7 Tage: 6

Letzte 30 Tage: 57

Insgesamt: 809