Einleitung
Ein beschädigtes Kabel ist ein häufiges Problem bei Lampen und anderen elektrischen Geräten. Vielleicht wurde es von einem Haustier angeknabbert, mit einer Schere beschädigt oder von einem schweren Gegenstand gequetscht. Diese Anleitung zeigt dir, wie du den beschädigten Stecker entfernst und durch einen neuen zweipoligen Stecker ersetzt.
Diese Anleitung bezieht sich auf einen polarisierten zweipoligen US-Stecker. Damit die Lampe nach der Reparatur wieder sicher funktioniert, müssen Neutralleiter und Außenleiter richtig angeschlossen werden.
Was du brauchst
-
-
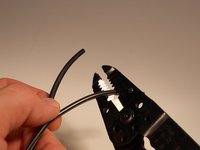
Finde die beschädigte Stelle am Kabel.
-
Schneide das Kabel einen Zentimeter unterhalb der beschädigten Stelle ab.
 Frag FixBot
-
-
-
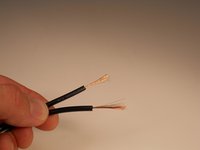
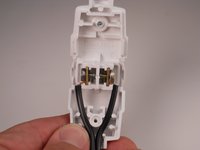
Trenne die Adern, indem du sie vorsichtig auseinanderziehst.
-
Die Ader mit der gerippten Isolierung ist der Neutralleiter.
-
Der Außenleiter hat eine glatte Isolierung.
-
-
-
-
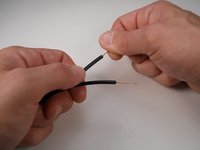
Entferne die Isolierung vom Draht.
-
Lege etwa 2 cm des Kupferdrahts frei.
-
Verdrille den freigelegten Kupferdraht, sodass keine Litzen abstehen.
-
-
-
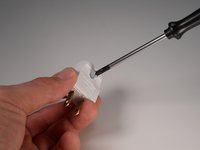
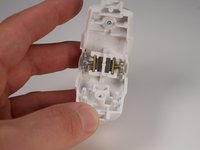
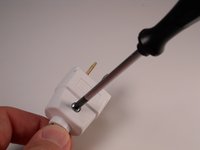
Löse die Schraube und öffne den Ersatzstecker.
-
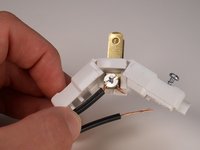
Die silberne Schraube ist der Neutralleiteranschluss und die messingfarbene Schraube ist der Außenleiteranschluss.
-
-
-
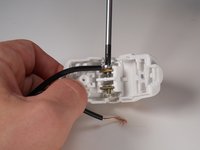
Wickle den Neutralleiter um die silberne Schraube. Ziehe die Schraube fest, um die Ader zu sichern.
-
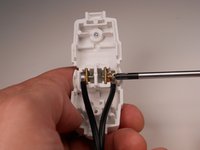
Wickle den Außenleiter um die messingfarbene Schraube. Ziehe die Schraube fest, um die Ader zu sichern.
-
-
-
Fädle das Kabel so ein, dass sich der Stecker vollständig schließen lässt.
-
Ziehe die äußere Schraube fest, um den Stecker zu schließen.
-


Wenn die Lampe nach dem Ersetzen des Steckers nicht funktioniert, könnte das Problem im Lampengehäuse oder in den Anschlüssen liegen.
Rückgängig: Ich habe diese Anleitung nicht absolviert.
19 weitere Personen haben diese Anleitung absolviert.
Besonderer Dank geht an diese Übersetzer:innen:
100%


Diese Übersetzer:innen helfen uns, die Welt zu reparieren! Wie kann ich mithelfen?
Hier starten ›
Team

Texas Tech, Team 3-2, Rauch SU 2015 Mitglied von Texas Tech, Team 3-2, Rauch SU 2015
TTU-RAUCH-SU15S3G2
3 Mitglieder
12 Anleitungen geschrieben
7 Kommentare zur Anleitung
Passt - gute Anleitung
A version for 3 prong (North American) would be great
https://www.noveltylights.com/coaxial-6-...
How would you repair a coaxial cord wire right where it enters the screw on part?
what do you do if the replacement plug has no screws to open it?
Buy a plug that can be opened with a screw