Zum Hauptinhalt wechseln
Gemeinsam reparieren - Jetzt registrieren

Logitech Webcam Pro 9000 USB Connection Replacement

Was du brauchst

    1. Logitech Webcam Pro 9000 USB Connection Replacement, Front and Back Cover: Schritt 1, Bild 1 von 2 Logitech Webcam Pro 9000 USB Connection Replacement, Front and Back Cover: Schritt 1, Bild 2 von 2
      • Remove the two 8 mm Phillips #0 screws on the back cover.

      • The motherboard connects the two covers together. DO NOT separate the two yet.

      • There is a button that loosens as the Phillips screws are removed. Don't be alarmed if it falls out.

      Frag FixBot

      Kommentar hinzufügen

    2. Logitech Webcam Pro 9000 USB Connection Replacement: Schritt 2, Bild 1 von 2 Logitech Webcam Pro 9000 USB Connection Replacement: Schritt 2, Bild 2 von 2
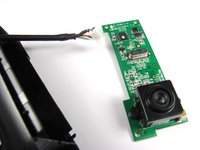
      • Remove the four 6mm Phillips #0 screws connecting the motherboard and front cover.

      • DO NOT detach the wire connecting the motherboard to the front cover.

      Frag FixBot

      Kommentar hinzufügen

    1. Logitech Webcam Pro 9000 USB Connection Replacement, USB Connection: Schritt 3, Bild 1 von 2 Logitech Webcam Pro 9000 USB Connection Replacement, USB Connection: Schritt 3, Bild 2 von 2
      In diesem Schritt verwendetes Werkzeug:
      Tweezers
      $4.99
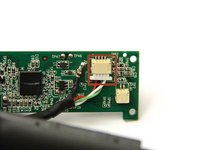
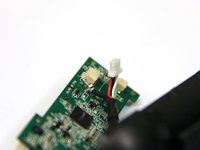
      • Use tweezers to grasp the white wire connector on the back of the motherboard.

      • Wiggle the connector back and forth to remove it from the socket.

      Frag FixBot

      Kommentar hinzufügen

    2. Logitech Webcam Pro 9000 USB Connection Replacement: Schritt 4, Bild 1 von 2 Logitech Webcam Pro 9000 USB Connection Replacement: Schritt 4, Bild 2 von 2
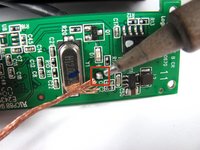
      • Desolder the joint on the front of the motherboard to completely detach the USB cable.

      • Follow this link to learn how to properly solder and desolder your parts.

      Frag FixBot

      Kommentar hinzufügen

Abschluss

To reassemble your device, follow these instructions in reverse order.

Rückgängig: Ich habe diese Anleitung nicht absolviert.

Team

Cal Poly, Team 12-34, Amido Spring 2013 Mitglied von Cal Poly, Team 12-34, Amido Spring 2013

CPSU-AMIDO-S13S12G34

4 Mitglieder

65 Anleitungen geschrieben

1 Kommentar zur Anleitung

what is the connector called

Anirudh Krishnan - Antwort Teilen

Kommentar hinzufügen

Seitenaufrufe:

Letzte 24 Stunden: 0

Letzte 7 Tage: 5

Letzte 30 Tage: 29

Insgesamt: 2,526