Einleitung
Diese Anleitung zeigt, wie du defekte Joysticks in deinem Nintendo Switch Pro Controller austauschen kannst. Du musst dazu Kenntnisse im Löten haben. Beim Abnehmen der Kunststoff-Gehäuseschalen und der Leiterplatten musst du besonders vorsichtig sein, damit das Gerät nicht unrettbar beschädigt wird. Bei dieser Reparatur wird auch der Lithium-Ionen-Akku ausgebaut, wenn dieser aufgebläht ist, musst du geeignete Vorsichtsmaßnahmen treffen.
Was du brauchst
-
-
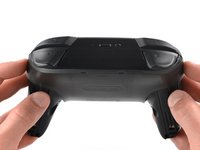
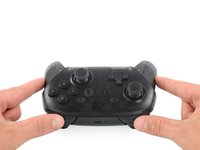
Drehe den Controller so um, dass der Aufkleber mit der Modellnummer nach oben zeigt.
-
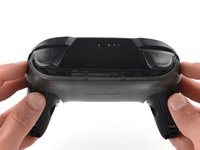
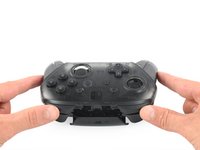
Entferne die beiden schwarzen 8,4 mm Flachkopf-Kreuzschlitzschrauben mit einem JIS #00-Bit, mit denen die Handgriffe am Ende verschraubt sind.
-
-
-
Ziehe die Abdeckungen der Griffe vorsichtig vom Controller.
-
-
-
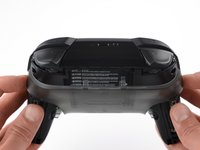
Entferne die vier silberfarbenen 6,8 mm langen JIS-Schrauben #00, mit denen die durchsichtige Abdeckung befestigt ist.
-
-
-
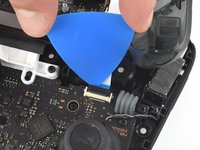
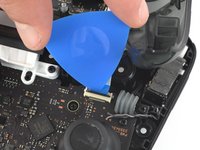
Löse die durchsichtige Abdeckung mit deinem Fingernagel ab.
-
-
-
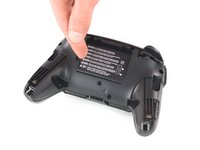
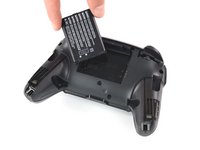
Entferne den Lithium-Ionen-Akku, indem du ihn mit deinem Fingernagel oder einem Öffnungswerkzeug an der linken Seite anhebst.
-
-
-
-
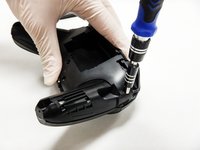
Entferne die fünf 6 mm Kreuzschlitzschrauben auf der Rückseite des Controllers:
-
Die beiden Gehäuseschrauben über den Handgriffen und eine Schraube unter dem Akku sitzen nicht sehr tief. Diese Schrauben können leicht entfernt werden.
-
Die beiden Schrauben neben der ZR und der ZL Schultertasten sitzen in tiefen Löchern. Um an sie heranzukommen musst du eine Bitverlängerung oder einen Schraubendreher mit langem Schaft verwenden.
-
-
-
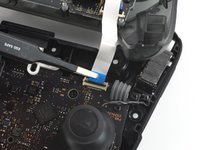
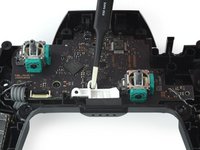
Drücke den schwarzen Sicherungsbügel am ZIF-Anschluss mit der Spitze eines Plektrums zum Öffnen nach oben.
-
-
In diesem Schritt verwendetes Werkzeug:Tweezers$4.99
-
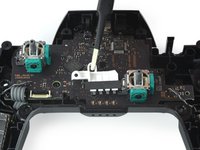
Löse das Verbindungskabel mit deinen Fingern oder einer stumpfen Pinzette aus seinem Anschluss.
-
-
-
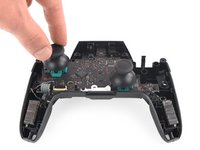
Ziehe mit leichter Kraft die beiden Joystickkappen vom Controller ab.
-
-
-
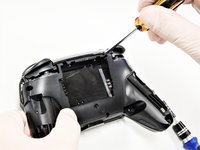
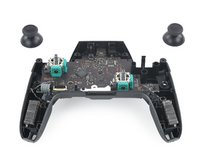
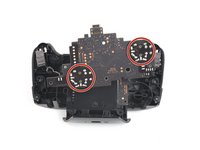
Entferne die vier 5 mm Kreuzschlitzschrauben, mit denen die Hauptplatine befestigt ist.
-
-
In diesem Schritt verwendetes Werkzeug:Tweezers$4.99
-
Löse das LED-Licht mit mit einer Pinzette oder deinen Fingernägeln aus seiner Fassung.
-
-
-
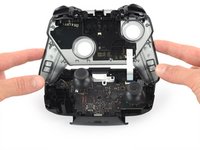
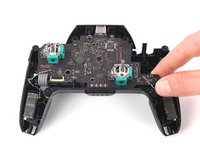
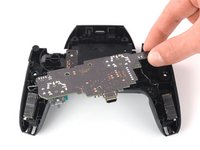
Löse die Platine aus dem Gehäuse, indem du sanft an der unteren rechten Ecke ziehst.
-
Hebe die Platine hoch, um an die Rückseite zu gelangen.
-
-
In diesem Schritt verwendetes Werkzeug:FixHub | Power Series Smart Soldering Iron$79.95
-
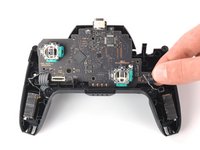
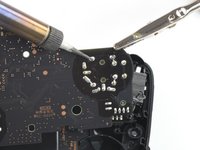
Auf der Rückseite der Platine hat du leichten Zugriff auf die Lötstellen.
-
Nimm den Lötkolben und entlöte alle markierten Lötstellen.
-
Entferne das Joystick-Modul von der Platine.
-


Um dein Gerät wieder zusammenzubauen, folge den Schritten dieser Anleitung in umgekehrter Reihenfolge.
Rückgängig: Ich habe diese Anleitung nicht absolviert.
52 weitere Personen haben diese Anleitung absolviert.
Besonderer Dank geht an diese Übersetzer:innen:
100%


Diese Übersetzer:innen helfen uns, die Welt zu reparieren! Wie kann ich mithelfen?
Hier starten ›

Team

Cal Poly, Team S11-G2, Regan Fall 2019 Mitglied von Cal Poly, Team S11-G2, Regan Fall 2019
CPSU-REGAN-F19S11G2
5 Mitglieder
45 Anleitungen geschrieben
26 Kommentare zur Anleitung
I managed to replace mine with much difficulty with the soldering but the stick does not seem to turn fully anymore, both with the replacement and the original. For reference, when I go to test it, it no longer registers as reaching the outer circle when pressed all the way down. Similarly when I go to calibrate it, it only reaches up til about the 2nd outer circle, not enough to actually trigger the green arrow. Since this seems to occur on both the replacement and original stick now, I’m guessing this must be some issue that arose while I was struggling with the desoldering process. Anybody have any ideas what might be causing my issue? Have I just damaged it beyond repair?
Without pictures it is impossible to tell, but there is the possibility that you strips the metal connection on the solder point. This is fixable by “bridging” the connection. You will want to find schematics of the wiring for the PCB and then solder the wire over to the next connection.
As a side note, I should mention that I have never tried this on a controller of any sort and that I have only used this method on keyboards with single wire connections. It is possible that the connection in a controller PCB have more going on and that this technique will not work.
Gavin A -
I have the same problem, I buy 2 joystick module from iFixit and the two gave me the same issue, the joystick module don't reach the green arrow.
I can't calibrate because of that issue.
Any ideas?
I have also had the same issue with replacement, only reaches roughly 75%. I contacted ifixit and they sent me a replacement thinking it might be a faulty pot, I installed the new stick and have the same issue. Maybe different years used different resistance.
See my answer a bit down. I think it has to do with the resistance of the module. I had the same issue with the part I received from iFixit, the original part has a resistance of 1150 ohm, but the replacement is 1600 ohm. And I have a different module which is about 500 ohm, and that works just fine.