Zum Hauptinhalt wechseln
Gemeinsam reparieren - Jetzt registrieren

iView-776TPCII Camera Assembly Replacement

Was du brauchst

    1. iView-776TPCII Camera Assembly Replacement, Rear Panel: Schritt 1, Bild 1 von 3 iView-776TPCII Camera Assembly Replacement, Rear Panel: Schritt 1, Bild 2 von 3 iView-776TPCII Camera Assembly Replacement, Rear Panel: Schritt 1, Bild 3 von 3
      • Before disassembling your device, make sure that the power is completely turned off.

      • Use the plastic opening tool to release the clips holding the rear panel of the device onto the front section.

      • The clips may take some pressure before releasing.

      • Continue around the entire device until all of the clips have been released.

      Frag FixBot

      Kommentar hinzufügen

    2. iView-776TPCII Camera Assembly Replacement: Schritt 2, Bild 1 von 2 iView-776TPCII Camera Assembly Replacement: Schritt 2, Bild 2 von 2
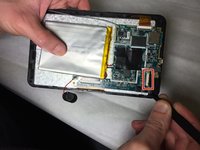
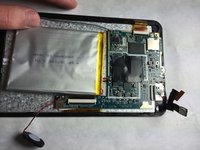
      • Use a spudger to carefully free the speaker from it's housing on the back panel.

      • Place the spudger between the speaker and the rear panel. Use a prying motion to remove the component.

      • Be careful not to apply an over amount of force. If care is not taken, the speaker could break under the pressure.

      Frag FixBot

      Kommentar hinzufügen

    1. iView-776TPCII Camera Assembly Replacement, Camera Assembly: Schritt 3, Bild 1 von 2 iView-776TPCII Camera Assembly Replacement, Camera Assembly: Schritt 3, Bild 2 von 2
      In diesem Schritt verwendetes Werkzeug:
      Heavy-Duty Spudger
      $4.99
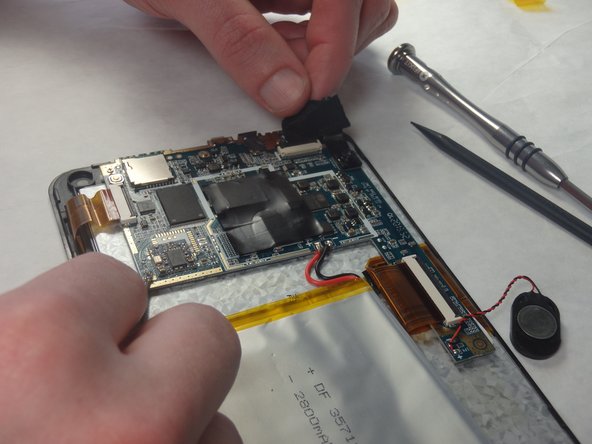
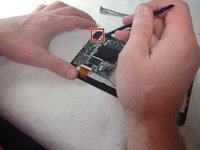
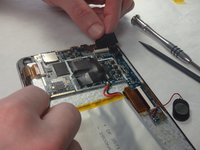
      • The camera module is located in the upper-right corner of the tablet.

      • Loosen the edges of the black tape covering the camera using the heavy-duty spudger.

      • Use the freed edges of the tape to gently remove the camera assembly from its plastic housing.

      • The camera assembly will still be connected to the rest of the device via a ribbon cable. Take care so as not to tear this connection.

      Frag FixBot

      Kommentar hinzufügen

    2. iView-776TPCII Camera Assembly Replacement: Schritt 4, Bild 1 von 2 iView-776TPCII Camera Assembly Replacement: Schritt 4, Bild 2 von 2
      In diesem Schritt verwendetes Werkzeug:
      Tweezers
      $4.99
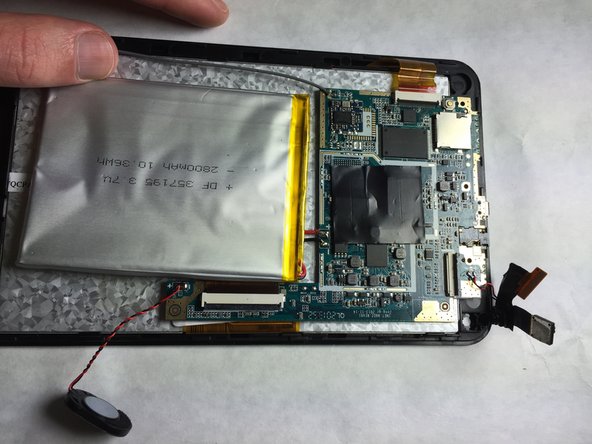
      • Use tweezers to lift the cover off the top of the camera's ZIF adapter.

      • When reassembling the device, be sure to fully secure the ribbon cable from the camera back into the ZIF adapter.

      • Pull the assembly away from the motherboard with a set of tweezers to prepare for desoldering.

      Frag FixBot

      Kommentar hinzufügen

    3. iView-776TPCII Camera Assembly Replacement: Schritt 5, Bild 1 von 1
      • Use the Portable Soldering Iron tool to heat the leads coming from the camera assembly to the motherboard, thereby breaking the connection.

      • For help on soldering, refer to the iFixit "How To Solder and Desolder Connections" technique guide as necessary.

      • Once heated, use tweezers to pull the wires free from their connections.

      • To ease reassembly, take note of which wire went to the positive and negative terminals.

      Frag FixBot

      Kommentar hinzufügen

Abschluss

To reassemble your device, follow these instructions in reverse order.

Rückgängig: Ich habe diese Anleitung nicht absolviert.

Eine weitere Person hat diese Anleitung absolviert.

Team

IUPUI, Team 2-2, Baechle Fall 2015 Mitglied von IUPUI, Team 2-2, Baechle Fall 2015

IUPUI-BAECHLE-F15S2G2

3 Mitglieder

12 Anleitungen geschrieben

0 Kommentare zur Anleitung

Kommentar hinzufügen

Seitenaufrufe:

Letzte 24 Stunden: 1

Letzte 7 Tage: 5

Letzte 30 Tage: 25

Insgesamt: 613