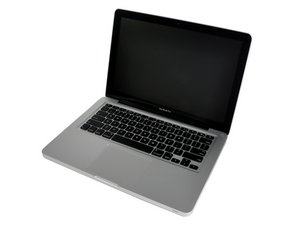
Apple threw you a ringer! Your granddaughter’s Mac is likely running a newer macOS which is not compatible and/or your systems firmware was not updated yet.
So we need to first talk about what your system can support for the newest macOS. The highest is macOS High Sierra (10.13.x). I recommend you just stick with Sierra (10.12.x) as it just runs better on your system.
So lets leverage your granddaughter’s Mac to get the needed file from here How to upgrade to macOS Sierra jump downs to Step 4 to get the needed file. Now with it in hand follow this guide to create the needed OS installer USB thumb drive How to create a bootable macOS Sierra installer drive. Now with that in hand plug it into your Mac and then press the Option key when you restart your system. This will allow you to select the OS installer drive to then install the OS on your internal drive.
@guinie -
Well, Yes & No!
Yes, following the steps I outlined in the last paragraph above! I have a bunch of USB thumb drives setup with the different macOS I deal with. What I want you to do is do the same here.
The No, is I don't think your drive is working properly! So while normally this might have been possible to just re-install the OS on your original drive if the drive was healthy I don't think your's healthy!
What you want to do here is salvage your data onto another drive we call this a TimeMachine backup. Apple give you a powerful tool called TimeMachine which will do that!
OK, so we need to make a backup but you need to have a working drive to boot up from. So we need two drives here! One to make as your backup drive (I would get a 1 or 2 GB HDD like this WD EasyStore) and the second to use as your new drive (I would get at either a 250 or 500 GB SSD drive like this Samsung 860 EVO SSD). We still need one one drive here! Thats the USB thumb drive here I would just get a 16 GB unit.
Step 1 - Create the USB thumb drive as I outlined above, like this one SanDisk Flash Drive
Step 2 - Using a USB to SATA adapter cable StarTech 2.5" SATA to USB adapter cable to connect your replacement drive (SSD) and Plug in your created OS installer thumb drive. Press the Option key to get to the Startup disk list and then using the arrows select the USB drive to boot up from.
Step 3 - Now select your new drive (SSD) for the installer to install the OS onto. Your system will restart a few times so let it do its thing good 3~5 hours.
Step 4 - Now restart your system, just like before you want to press the Option key again as well as remove the USB thumb drive and put that aside. This time we want to select your new drive letting it boot your system. Now we want to open the application TimeMachine so you can salvage your stuff from your failing drive. This will take some time depending how big your drive is and how full it is. Once done we can get into replacing your current drive.
Step 5 - Follow this guide: MacBook Pro (13 Zoll, Ende 2011, Unibody) Festplatte austauschen
There are a few issues here you might hit. The first is the uppercase is not well finished on the interior to help protect the HS SATA cable I always place a strip of electricians tape under it, here’s a bit more on this issue Your Hard Drive Cable Is A Ticking Time Bomb. The second issue is I often fine people damage the cable! They over bend it, folding a crease where the cable needs to bend. I use a BIC pen straw to help me form a nice round radius at the bend points! IF you over did the folding you damage the thin foil wires so the drive response will be spotty. When pushing heavy data the cable will fail to get the transfer done but light I/O flows will work. So if you over did the cable bends I would get a new cable at this point as well.
War diese Antwort hilfreich?
Bewertet
Rückgängig machen
Bewertung
1
Abbrechen
Schau durch den Thread, bis du den richtigen Platz für diesen Kommentar gefunden hast. Klicke dann auf "Den Kommentar diesem Post zuordnen", um ihn zu verschieben.

 1
1 
 329
329  971
971