Zum Hauptinhalt wechseln
Gemeinsam reparieren - Jetzt registrieren

Polaroid Go (Gen 1 and 2) Front Shell Replacement

Was du brauchst

  1. Polaroid Go (Gen 1 and 2) Front Shell Replacement, Before you begin: Schritt 1, Bild 1 von 2 Polaroid Go (Gen 1 and 2) Front Shell Replacement, Before you begin: Schritt 1, Bild 2 von 2
    • If you have any film left, take some photos! Disassembly will expose any leftover film.

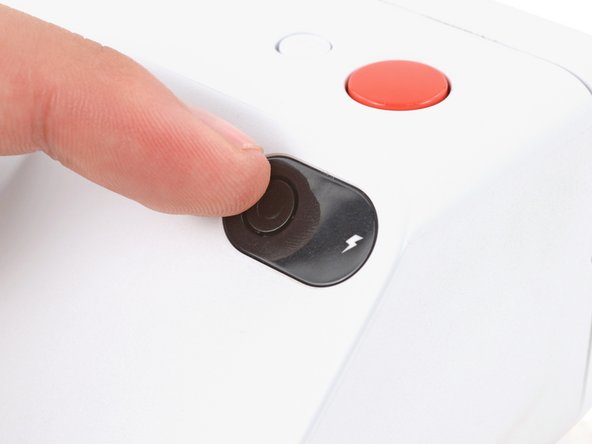
    • Before you begin, unplug all cables from your camera and fully power it down.

    Frag FixBot

    Kommentar hinzufügen

  2. Polaroid Go (Gen 1 and 2) Front Shell Replacement, Remove the film cartridge: Schritt 2, Bild 1 von 3 Polaroid Go (Gen 1 and 2) Front Shell Replacement, Remove the film cartridge: Schritt 2, Bild 2 von 3 Polaroid Go (Gen 1 and 2) Front Shell Replacement, Remove the film cartridge: Schritt 2, Bild 3 von 3
    • Throughout this guide, directional words (front, back, left, right) are from the perspective of using the camera—or when the lens faces away from you.

    • Set your camera down so the bottom is facing up.

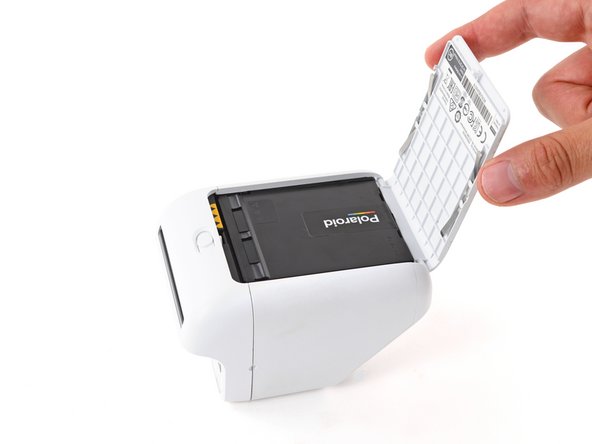
    • Use the latch on the bottom of the camera to open the film door.

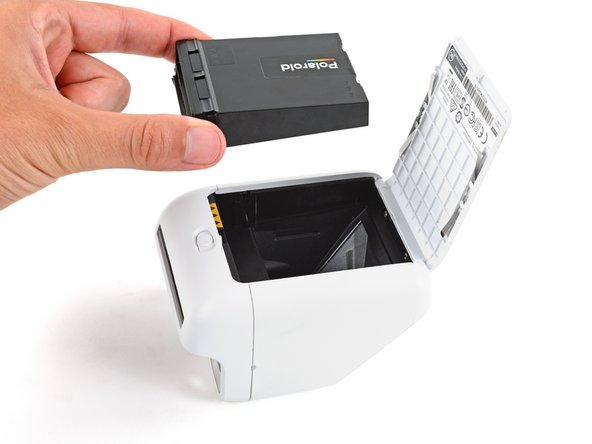
    • Use your fingers to lift and remove the film cartridge.

    • The camera mirror is now exposed. Be careful not to smudge it or get any debris on it. If you accidentally do, use a lint‑free cloth to gently wipe the mirror clean.

    Frag FixBot

    Kommentar hinzufügen

  3. Polaroid Go (Gen 1 and 2) Front Shell Replacement, Remove the front shell screws: Schritt 3, Bild 1 von 2 Polaroid Go (Gen 1 and 2) Front Shell Replacement, Remove the front shell screws: Schritt 3, Bild 2 von 2
    In diesem Schritt verwendetes Werkzeug:
    Flexible Extension
    $6.99
    • Given the location of the screws, it's difficult to keep your screwdriver properly aligned. You'll need to use a flexible extension or a very short screwdriver to remove the screws without stripping them.

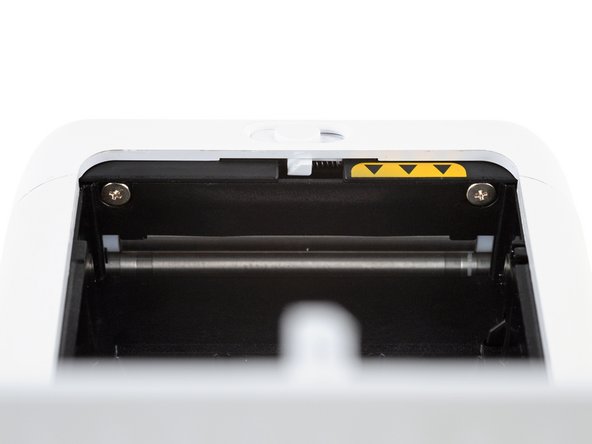
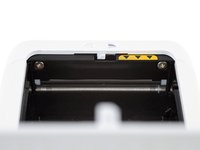
    • Use a Phillips screwdriver to remove the two 4.2 mm‑long front shell screws from the film compartment.

    • Throughout this repair, keep track of each screw and make sure it goes back exactly where it came from.

    Frag FixBot

    Kommentar hinzufügen

  4. Polaroid Go (Gen 1 and 2) Front Shell Replacement, Flip your camera over: Schritt 4, Bild 1 von 3 Polaroid Go (Gen 1 and 2) Front Shell Replacement, Flip your camera over: Schritt 4, Bild 2 von 3 Polaroid Go (Gen 1 and 2) Front Shell Replacement, Flip your camera over: Schritt 4, Bild 3 von 3
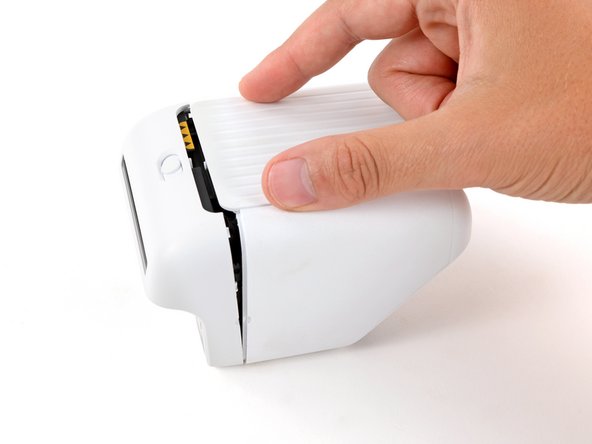
    • Secure the back of the camera with one hand, and use your free hand to gently pull the front shell away from the camera until a slight gap forms.

    • There needs to be enough of a gap that the film door latch won't re‑engage when the door is closed.

    • Close the film door, making sure the latch doesn't re‑engage.

    • Flip your camera over so the take button is facing up.

    Frag FixBot

    Kommentar hinzufügen

  5. Polaroid Go (Gen 1 and 2) Front Shell Replacement, Release the front shell clips: Schritt 5, Bild 1 von 3 Polaroid Go (Gen 1 and 2) Front Shell Replacement, Release the front shell clips: Schritt 5, Bild 2 von 3 Polaroid Go (Gen 1 and 2) Front Shell Replacement, Release the front shell clips: Schritt 5, Bild 3 von 3
    • Releasing the two clips is tricky and will likely take multiple attempts. Take your time and don't try to force the clips free, or you may break them.

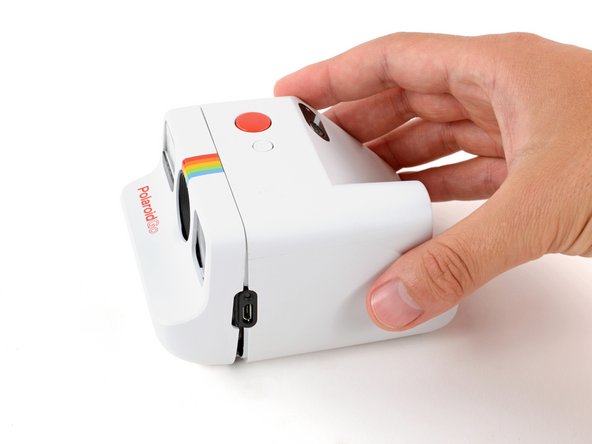
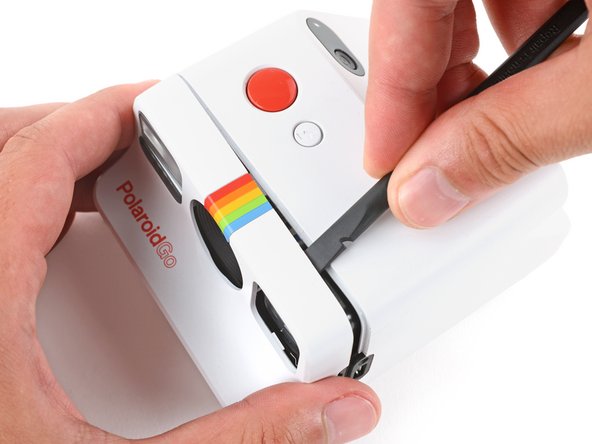
    • Insert the flat end of a spudger at a downward angle between the top edge of the front and rear shells, near the viewfinder.

    • Push your spudger into the gap and lower it towards the back of the camera to pry up the front shell and release the first clip.

    • Repeat the process on the other side of the camera to release the second clip.

    Frag FixBot

    Kommentar hinzufügen

  6. Polaroid Go (Gen 1 and 2) Front Shell Replacement, Remove the front shell: Schritt 6, Bild 1 von 3 Polaroid Go (Gen 1 and 2) Front Shell Replacement, Remove the front shell: Schritt 6, Bild 2 von 3 Polaroid Go (Gen 1 and 2) Front Shell Replacement, Remove the front shell: Schritt 6, Bild 3 von 3
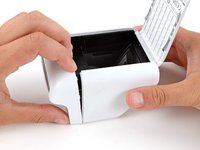
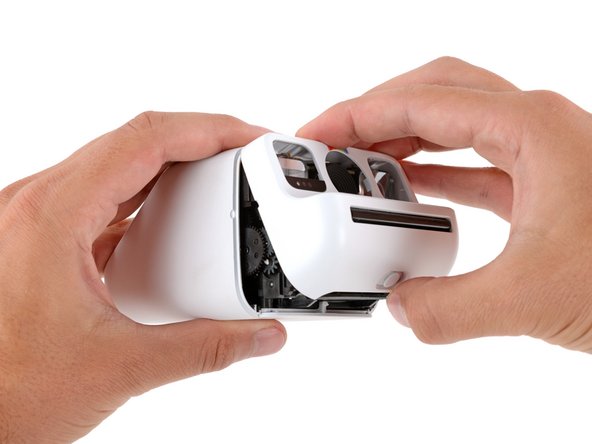
    • Firmly secure the main body of the camera with one hand, and use your free hand to grip the front shell.

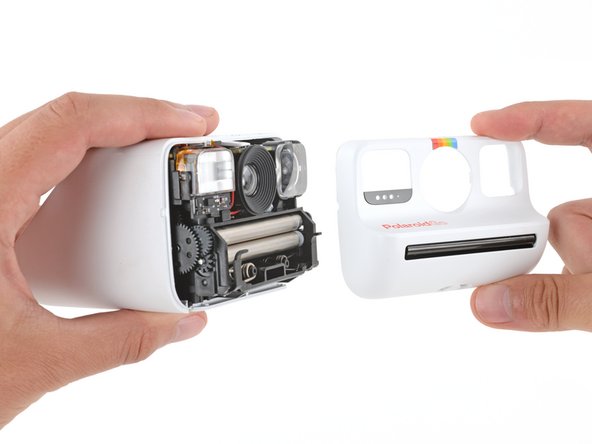
    • Rotate the bottom edge of the front shell upwards to separate it from the camera and remove it.

    • The shell can easily get caught on the flash unit and viewfinder. If you're having trouble, try gently wiggling the shell.

    • During reassembly:

    • Firmly push the front shell back onto the camera to engage the clips.

    • Be very careful that the clip on the right side of the camera doesn't dislodge any of the gears.

    • Check around the perimeter of the shell seam and make sure there are no gaps. If there are, firmly press the shells together to engage the clip near the gap.

    Frag FixBot

    Kommentar hinzufügen

Abschluss

To reassemble your device, follow these instructions in reverse order.

Repair didn’t go as planned? Try some basic troubleshooting, or ask our Answers community for help.

Rückgängig: Ich habe diese Anleitung nicht absolviert.

Spencer Day

Mitglied seit: 09/14/22

191.211 Reputation

1.204 Anleitungen geschrieben

Team

iFixit Mitglied von iFixit

Staff

122 Mitglieder

25.946 Anleitungen geschrieben

0 Kommentare zur Anleitung

Kommentar hinzufügen

Seitenaufrufe:

Letzte 24 Stunden: 2

Letzte 7 Tage: 8

Letzte 30 Tage: 62

Insgesamt: 504