Einleitung
Use this guide to remove and replace the display assembly with frame in your Huawei P10 Lite smartphone.
If your display glass is broken, place wide strips of tape over it before beginning the repair. This will protect your eyes and make clean up easier.
When reassembling apply new adhesive where it is necessary.
Was du brauchst
-
-
Insert the tip of an opening pick between the back cover and the mid frame and slide it around the phone, to cut the adhesive.
-
Using a suction handle to lift the back cover may help to get an initial gap for the opening pick to put in.
-
-
-
After you cut the adhesive on every edge, twist your opening pick, to separate the rear cover from the phone.
-
Flip the rear cover over to the right side of the phone.
-
-
In diesem Schritt verwendetes Werkzeug:Tweezers$4.99
-
Use a pair of tweezers to remove the sticker.
-
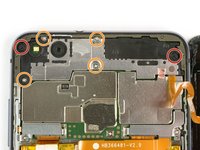
Remove the two Phillips #00 screws.
-
Remove the four 2.5 mm Phillips #00 screws.
-
-
-
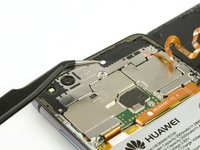
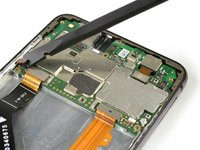
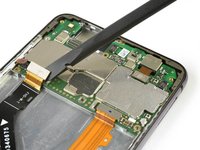
Use tweezers to remove the mainboard shield.
-
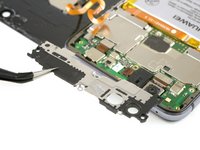
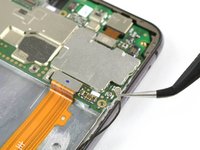
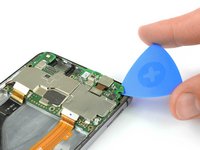
Use the flat end of a spudger to disconnect the finger print sensor flex cable.
-
-
-
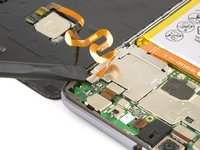
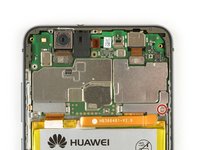
Remove the Phillips screw holding the battery connector plate in place.
-
Remove the battery connector plate.
-
Use the flat end of a spudger to disconnect the battery flex cable.
-
-
-
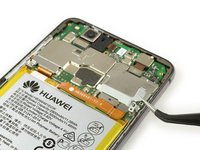
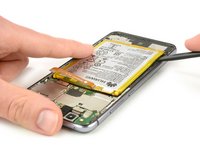
Use an iOpener to loosen the adhesive beneath the battery.
-
Insert a spudger between the battery and the mid frame to create a gap.
-
Insert an opening pick or use the spuder in the gap to cut the adhesive beneath the battery.
-
-
-
In diesem Schritt verwendetes Werkzeug:Tesa 61395 Tape$5.99
-
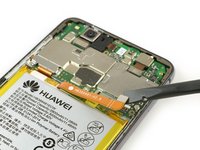
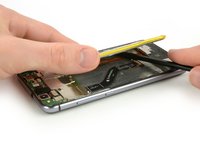
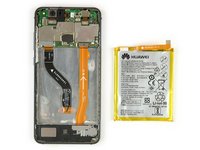
Use a spudger to cut the rest of the adhesive and lever the battery out of the phone.
-
Remove the battery.
-
-
-
Use a SIM card removal bit or tool and push it into the small hole in the SIM card tray.
-
Remove the SIM card tray.
-
-
In diesem Schritt verwendetes Werkzeug:Tweezers$4.99
-
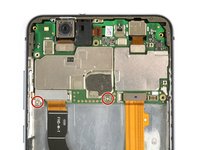
Remove the two Phillips screws.
-
Remove the display flex cable bracket with tweezers.
-
-
-
Use a spudger to disconnect the headphone jack flex cable.
-
Remove the headphone jack.
-
-
-
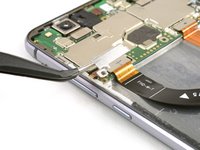
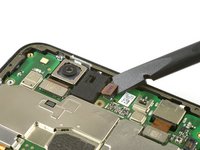
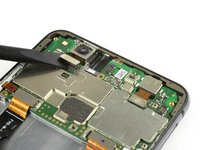
Use a spudger to disconnect the rear camera flex cable.
-
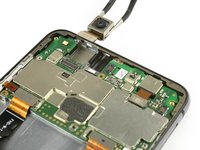
Remove the rear camera.
-
-
-
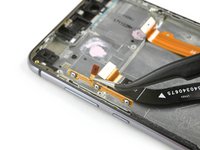
Use a spudger to disconnect the volume and power button, the display and the main flex cable.
-
-
-
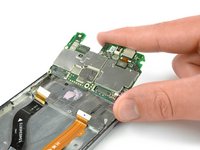
Unplug the antenna cable with tweezers.
-
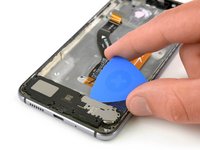
Use an opening pick to pry out the motherboard until you can get a good grip.
-
Remove the motherboard.
-
-
-
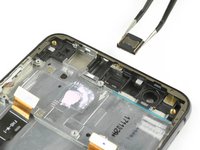
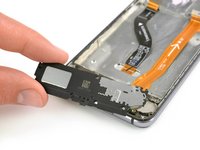
Remove the earpiece speaker with tweezers.
-
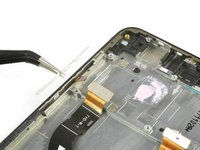
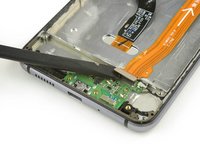
Use tweezers to remove the plastic cover of the volume and power button flex cable.
-
-
-
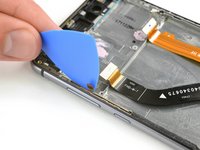
Use an opening pick to cut the adhesive between the volume and power button flex cable and the mid frame.
-
Carefully remove the volume and power button flex cable with tweezers.
-
-
-
Insert an opening pick under the loudspeaker unit and lever it up until you can get a good grip.
-
Remove the loudspeaker.
-
-
In diesem Schritt verwendetes Werkzeug:Tesa 61395 Tape$5.99
-
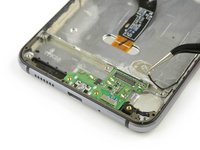
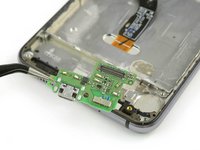
Use the flat end of a spudger to disconnect the interconnect cable and remove it.
-
Use tweezers to disconnect the antenna cable and remove it.
-
Remove the charging board with tweezers.
-


To reassemble your device, follow these instructions in reverse order.
To reassemble your device, follow these instructions in reverse order.
Rückgängig: Ich habe diese Anleitung nicht absolviert.
12 weitere Personen haben diese Anleitung absolviert.


4 Kommentare
Hello!
Thanks for the assembly guide! My phones display glass was broken, and I bought new display with frame (since the frame might have been bent), and this guide proved to be helpful. Though, I ought to mention that you did not show how the upper left metal cover for display port was removed (not that I needed it).
However, I think I slightly damaged the main cord between upper and lower motherboards, the orange one, when I was removing the battery. I can still recharge my phone and listen to music through loudspeaker, but I can not hear or be heard when I am having a phone call with someone. I can use hands-free with a microphone to get around the problem, but I wanted to ask that is it possible for the damaged cord to cause this problem, or could it be something else? I would imagine that I should at least hear the other person even if the cord is slightly damaged.
- Jesse
Hello Jesse
It could be, that cable sends data from the top to the bottom. The micro of the calls is the lower one, so the information could not reach the top if that part is damaged. Look at step 17, in that small plate is the microphone, it could be covered by dirt or not embedded in its hole. But the headset does not depend on that cable, could it have misplaced the headset? Look at step 13, if it is reversed, it will not work.
Oscar -
Hello all!
As we continue getting more and more boards with the same problem, I’d like to point out that you should be very careful when disconnecting the antenna cable. The soldering quality is probably not the best, and this may lead to the antenna cable coming out of the board along with the connector to which it is connected.. This is not so critical, but you will have to do some jewelry work to solder the detached connector.
Thank you for the good guide which helped us to save my son’s phone!
P.S.: I recommend buying the spare parts here - I had ordered the first display on ebay (this was before my brother recommended ifixit to me) and it was broken. The parts from ifixit came in perfect quality.