Einleitung
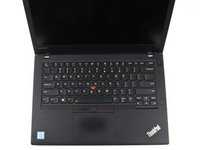
Use this guide to replace the display panel on your Lenovo ThinkPad T470.
The display panel, also known as a screen, is the component that outputs visual information from a computer.
Some signs your display panel may be faulty include a blank or black screen, flickering, no backlight, or horizontal or vertical lines. A display panel replacement may be needed if it is cracked or physically damaged. Before attempting a display panel replacement, you may be able to resolve the issue using Lenovo’s troubleshooting guide.
Before replacing your display panel, make sure to disable the internal battery, power down your device, and disconnect from any external power sources.
Was du brauchst
-
-
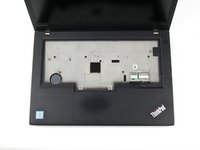
Place the laptop so that the bottom is facing upwards.
-
Slide the latch on the left side of the battery to the left until it clicks in place.
-
-
-
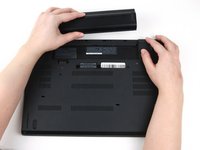
Slide the latch on the right side of the battery to the right and hold it in place with your thumb.
-
Use your other hand to slide the battery towards the back of the laptop.
-
Lift the battery up and away from the laptop.
-
-
-
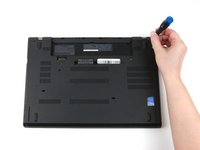
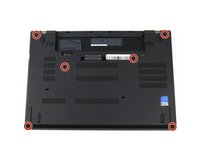
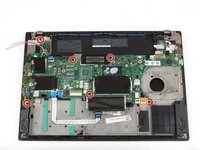
Use a Phillips #1 screwdriver to loosen the six captive screws on the bottom cover of the laptop.
-
-
-
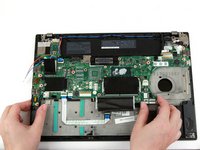
Place the laptop so that the top is facing upwards.
-
Open the lid of the laptop.
-
-
-
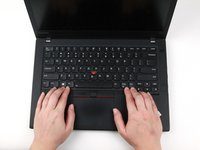
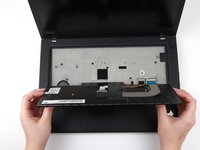
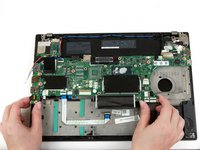
Place your fingers on the bottom edge of the keyboard.
-
Use a small amount of pressure to push the keyboard towards the screen.
-
-
-
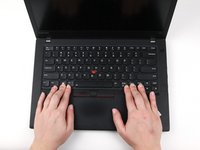
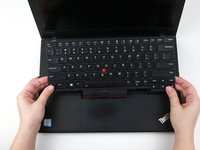
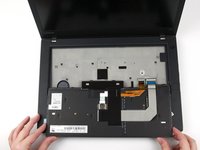
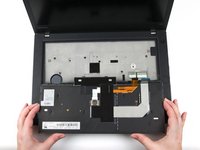
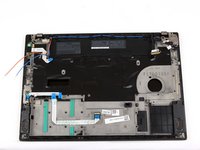
Grab the bottom edge of the keyboard with your hands, and flip the keyboard upside-down, so it rests on the bottom of the laptop.
-
-
-
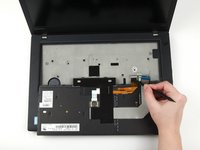
Use the flat end of a spudger to flip up the locking flaps securing each of the two ribbon cables.
-
-
-
Close the laptop's lid and flip the laptop over so that the bottom is facing upwards.
-
-
-
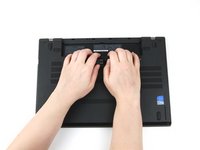
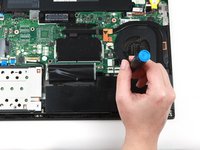
Use your hands to pull up on the back cover and release the plastic clips starting on the bottom side of the battery compartment.
-
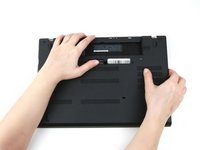
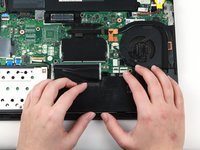
Use your hands to pull up on the right side of the bottom cover to release the plastic clips.
-
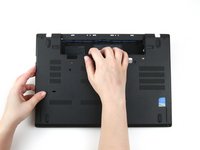
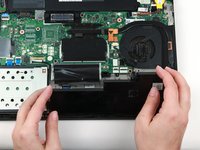
Use your hands to pull up on the left side of the bottom cover to release the plastic clips.
-
-
-
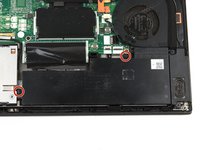
Use a Phillips #1 screwdriver to remove two 5 mm screws from the internal battery.
-
-
-
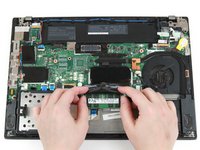
Use your fingers to lift the RAM out of its socket and away from the laptop to remove it.
-
-
-
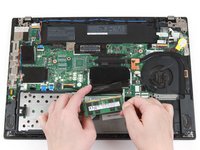
Use your fingers to flip the black flap covering the bottom stick of RAM up.
-
Use your thumbs to push the metal clips on either end of the RAM outwards.
-
-
-
Use your fingers to lift the RAM out of its socket and away from the laptop to remove it.
-
-
-
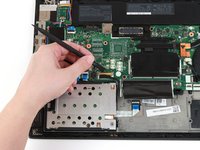
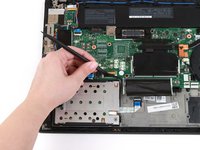
Use the flat end of a spudger to flip up the metal clip securing the SSD connector to the motherboard.
-
-
-
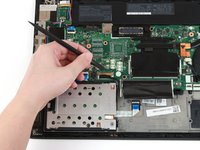
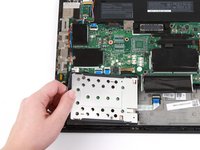
Grab the tab on the left side of the hard drive, and pull up to remove it from the laptop.
-
-
-
-
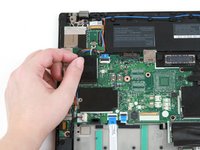
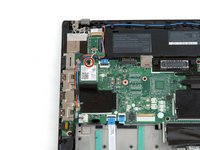
Use the flat end of a spudger to disconnect the two coaxial wires from the Wi-Fi card.
-
-
-
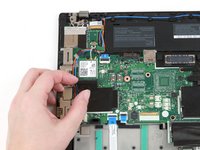
Use a Phillips #1 screwdriver to remove the single 4 mm screw from the Wi-Fi card.
-
-
-
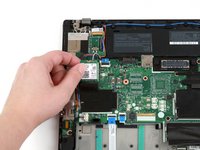
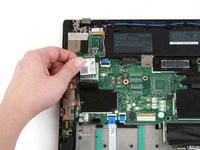
Use your fingers to lift the Wi-Fi card up and out of its slot.
-
This laptop does not include a WWAN card, but if yours does, follow the same procedure as Steps 9-12 to remove it.
-
-
In diesem Schritt verwendetes Werkzeug:Tweezers$4.99
-
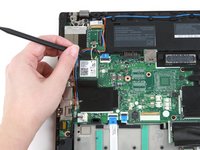
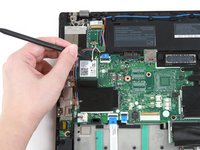
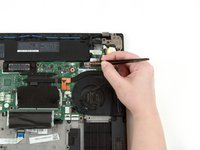
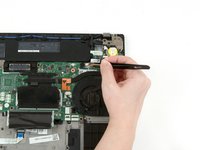
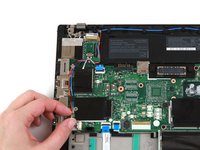
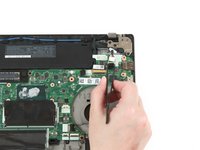
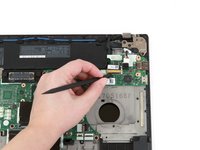
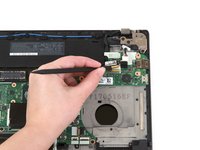
Use a pair of blunt nose tweezers to pull the white connector out of its socket.
-
-
-
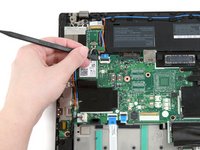
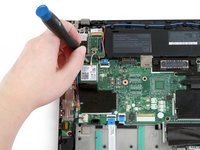
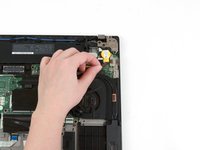
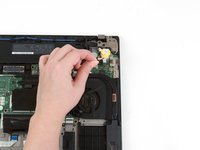
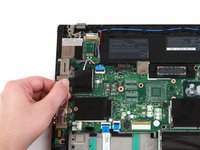
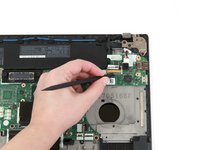
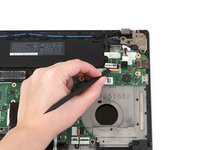
Grab the wire attached to the coin cell battery, and lift it up and out of the laptop.
-
-
-
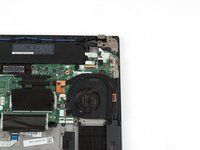
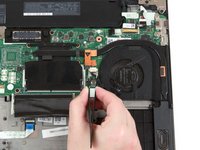
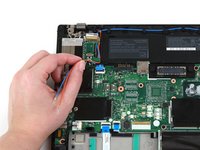
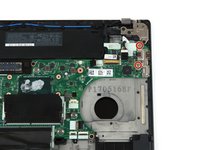
Use a pair of blunt nose tweezers to pull the white fan connector out of its socket on the motherboard.
-
-
-
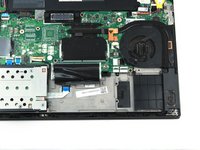
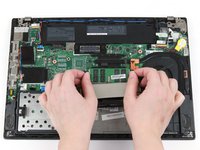
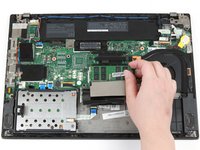
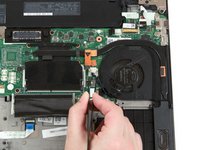
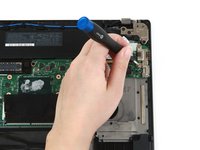
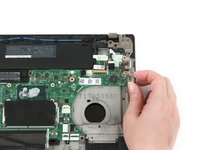
Use a Phillips #1 screwdriver to loosen the first pair of captive screws on the fan and heat sink assembly in a crosswise pattern.
-
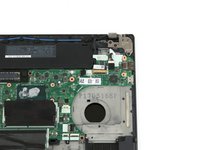
Use a Phillips #1 screwdriver to loosen the second pair of captive screws on the fan and heat sink assembly in a crosswise pattern.
-
-
-
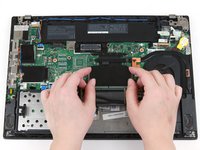
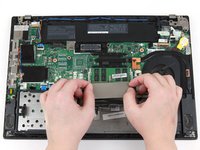
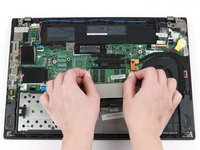
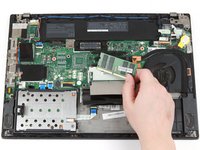
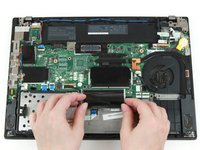
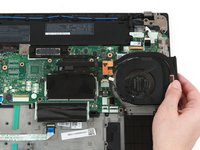
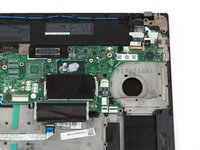
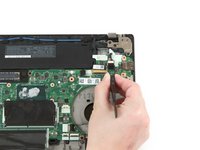
Use your hand to pull the fan and heat sink assembly up and away from the laptop.
-
-
-
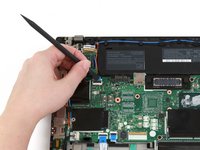
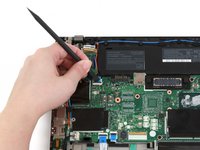
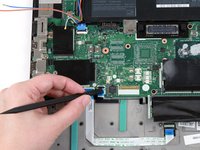
Use the flat end of a spudger to flip up the metal clip securing the LCD cable to the motherboard.
-
-
-
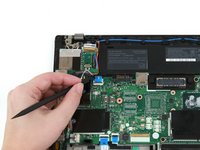
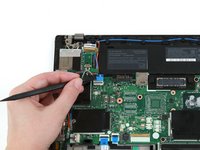
Use the flat end of a spudger to disconnect the LCD cable from its socket on the motherboard.
-
-
-
Use the flat end of a spudger to slide the power button cable out of its connector on the motherboard.
-
-
-
Use a Phillips #1 screwdriver to remove the two 4 mm screws from the USB bracket.
-
-
In diesem Schritt verwendetes Werkzeug:Tweezers$4.99
-
Use a pair of blunt nose tweezers to disconnect the DC-in cable from its socket on the motherboard.
-
-
-
Use the flat end of a spudger to flip up the metal bracket securing the camera cable to the motherboard.
-
-
-
Use the flat end of a spudger to disconnect the camera cable from its socket on the motherboard.
-
-
-
Use a pair of blunt nose tweezers to disconnect the speaker cable from its socket on the motherboard.
-
-
-
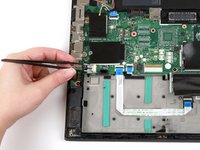
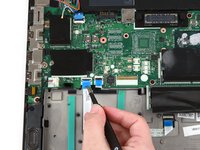
Use the flat end of a spudger to flip up the black tabs on the trackpad and fingerprint reader cables.
-
-
-
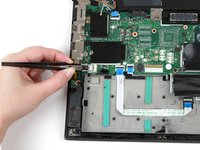
Use a pair of blunt nose tweezers to slide the trackpad and fingerprint reader cables out of their connectors on the motherboard.
-
-
-
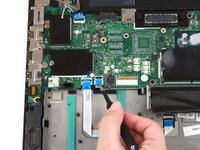
Use a Phillips #1 screwdriver to remove the three 4 mm screws from the I/O bracket.
-
-
-
Use your fingers to slide the I/O bracket to the left.
-
Lift the I/O bracket up and away from the laptop.
-
-
-
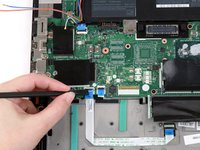
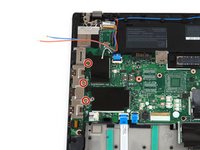
Use a Phillips #1 screwdriver to remove the six 4 mm screws from the motherboard.
-
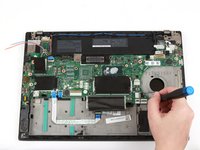
This laptop does not have an NFC cable, but if yours does, use the flat end of a spudger to flip up the tab and slide the cable out of its connector.
-
-
-
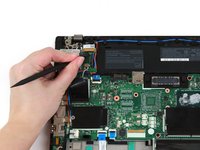
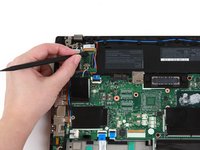
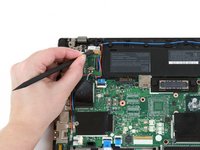
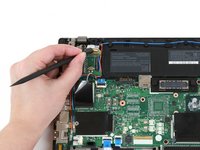
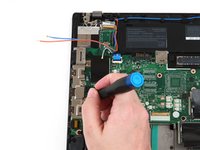
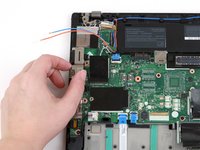
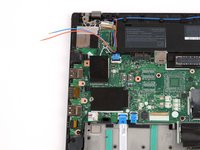
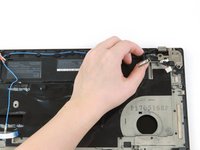
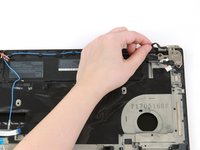
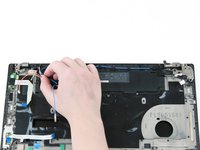
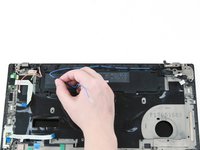
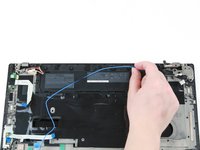
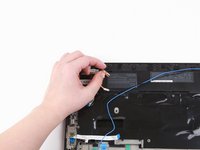
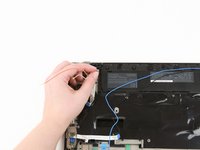
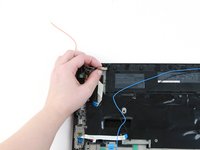
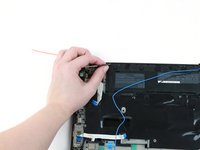
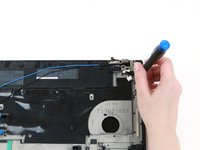
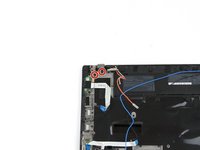
Use your fingers to lift the black and blue wires out of their slots along the top of the laptop.
-
-
-
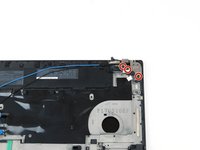
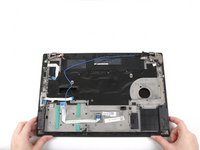
Use a Phillips #1 screwdriver to remove three 4.5 mm screws from the hinge in the upper right corner.
-
-
-
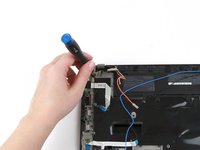
Use a Phillips #1 screwdriver to remove two 4.5 mm screws from the hinge in the upper left corner.
-
-
-
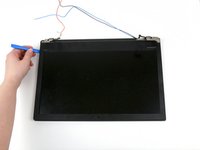
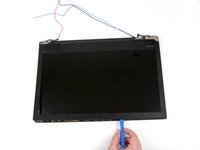
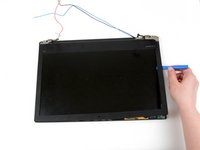
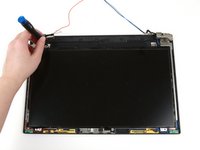
Use the iFixit opening tool to create a gap between the bezel and the display, starting in the upper left corner.
-
Continue to use the iFixit opening tool around the left side, bottom, and right side of the laptop to detach the clips securing the bezel to the display.
-
-
-
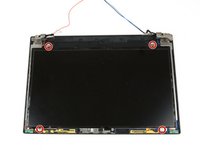
Use a Phillips #1 screwdriver to remove the four 3 mm screws from each corner of the screen.
-
-
-
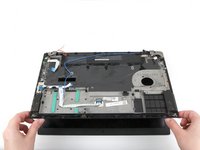
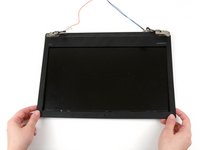
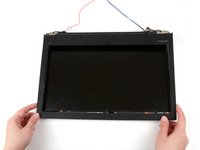
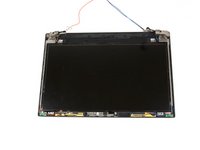
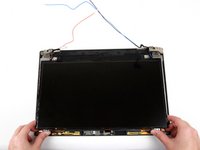
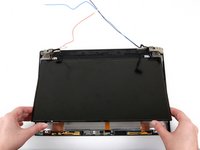
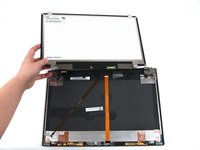
Use both hands to lift the bottom corners of the display panel
-
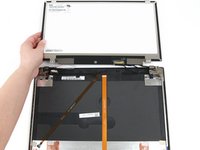
Gently flip the display panel over.
-
-
In diesem Schritt verwendetes Werkzeug:Tweezers$4.99
-
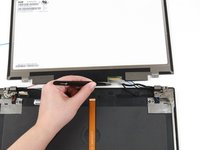
Use a pair of blunt nose tweezers to remove the clear tape from the display cable.
-
-
-
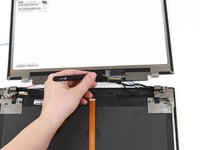
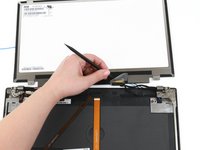
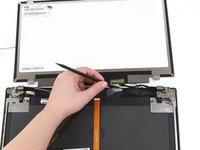
Use the flat end of a spudger to flip up the metal bar securing the connector.
-
Use the flat end of a spudger to disconnect the display cable from its socket.
-
-
-
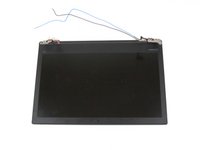
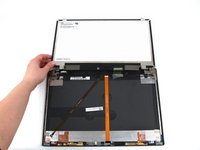
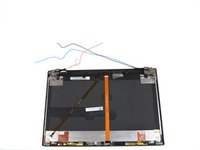
Use your hands to remove the display panel from the rest of the display assembly.
-


To reassemble your device, follow these instructions in reverse order.
Take your e-waste to an R2 or e-Stewards certified recycler.
Repair didn’t go as planned? Try some basic troubleshooting, or ask our Answers community for help.
To reassemble your device, follow these instructions in reverse order.
Take your e-waste to an R2 or e-Stewards certified recycler.
Repair didn’t go as planned? Try some basic troubleshooting, or ask our Answers community for help.


2 Kommentare
DO NOT WASTE YOUR TIME WITH THIS GUIDE. I am a certified repair technician and there is absolutely zero reason to disassemble the system and remove the motherboard for a panel swap. You can simply disconnect the antenna cables and EDP connectors; open the laptop and hang the LCD assembly over the edge of a table; then remove the hinge screws and lift it off. Nearly all ThinkPad models are like this. Please read the Hardware Maintenance Manual on the Lenovo support site for the correct way to do this. Page 93: https://download.lenovo.com/pccbbs/mobil...
Right, I was wondering why the nonsense that require me to remove all the mother board and things