Einleitung
In dieser Anleitung erfahren Sie Schritt für Schritt, wie Sie den Joystick eines Joy-Con Ersetzen. In dieser Anleitung wird der rechte (Joy-con R) gezeigt, aber der Vorgang ist fast der gleiche wie bei dem linken. '''
Stellen Sie sicher, dass Sie Ihre Konsole ausgeschaltet haben, um sicherzustellen, dass keine versehentlichen Verbindungen bestehen! Bitte beachten Sie auch, dass jeder Garantie Anspruch mit der Eigenreperatur erlischt!'''
Was du brauchst
-
-
Beginnen Sie die Reparatur, mit dem Entfernen dieser 4 Y00 Schrauben auf der Rückseite des Joy-con.
-
-
-
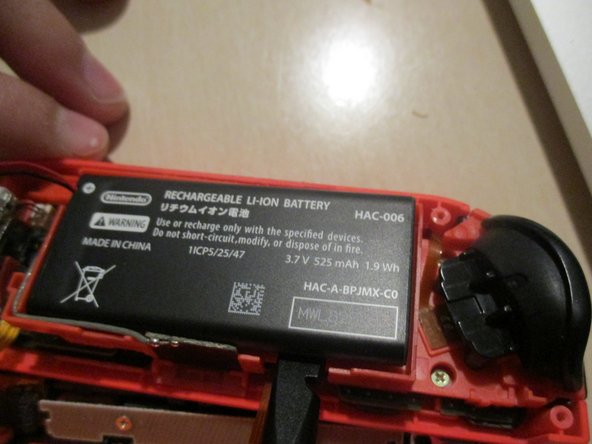
Ziehen Sie den Akku Stecker mit Ihrer Pinzette vorsichtig von unten heraus.
-
Entfernen Sie den Akku
Battery cable connector is pulled out perpendicular to the board and does not pull out parallel to the board. This is not clear in the guide and could cause someone to break the cable.
You are totally right. I thought it was too obvious but it’s better careful than sorry. Added it as a point.
Devnol -
-
-
-
-
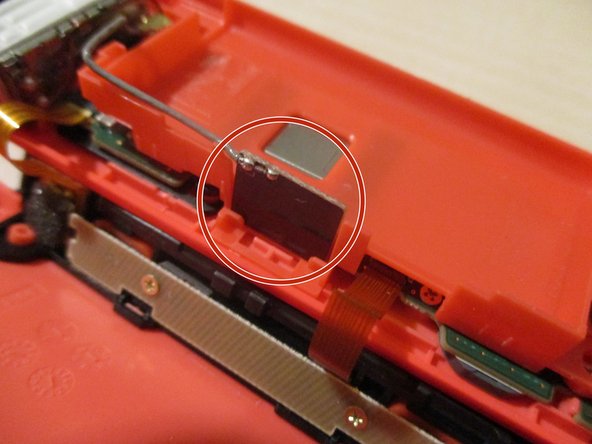
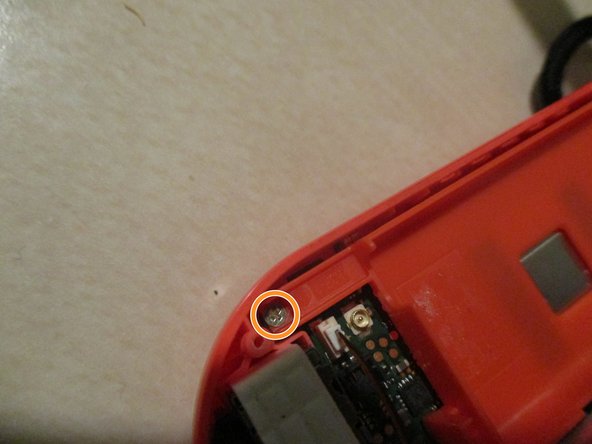
Ziehen Sie am goldenen SMP RF Stecker, der die Bt Antenne mit der Hauptplatine verbindet.
-
Entfernen Sie die quadratische Antenne von der Seite des Batteriefachs.
-
-
-
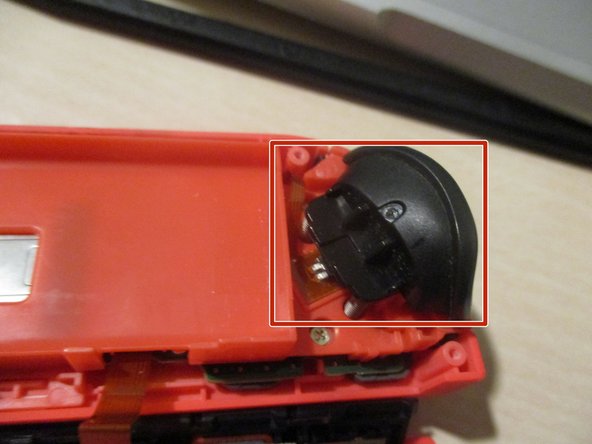
Entfernen Sie den ZR-Knopf und seine Federn. Achten Sie darauf, die Clips nicht zu beschädigen.
-
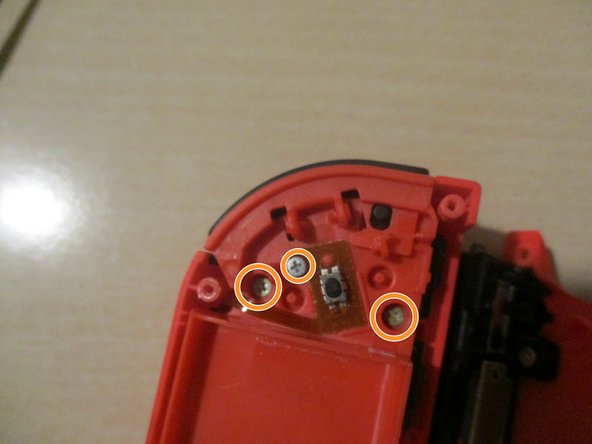
Lösen Sie die vier PH000-Schrauben, mit denen das Batteriefach und die ZR-Tastenplatine befestigt sind. Auf der Seite des vibrationsmoduls ist eine versteckt.
-
Heben Sie das Batteriefach auf.
-
-
-
Lösen Sie die beiden PH000-Schrauben, die den Joystick festhalten.
-
Stellen Sie sicher, dass Sie die beiden Kabel der Seitenplatine NICHT trennen. Dies kann den Controller unwiederbringlich beschädigen.
-
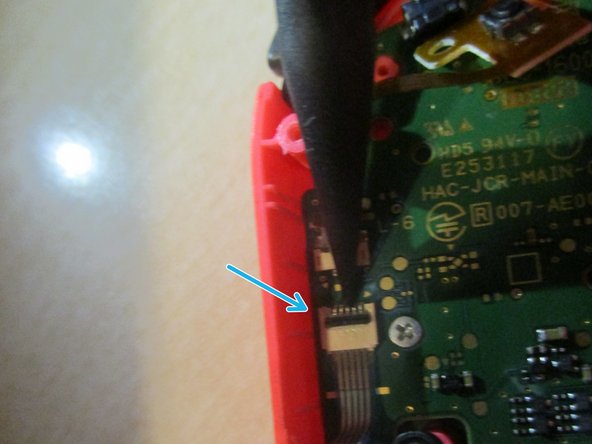
Bevor Sie den Joystick entfernen, entfernen Sie das gesicherte Flachbandkabel, indem Sie den Clip öffnen.
-
-
-
Um den neuen Joystick einzubauen, drücken Sie ihn fest hinein und vergewissern Sie sich, dass er die oben erwähnte Dichtung vollständig durchdrungen hat.
-
Schrauben Sie die schrauben rein und stecken Sie das Flachbandkabel in die Buchse. Vergessen Sie nicht, das Kabel zu verriegeln.
-


Befolgen Sie diese Anweisungen in umgekehrter Reihenfolge, um Ihren Joy-con wieder zusammenzusetzen.
Befolgen Sie diese Anweisungen in umgekehrter Reihenfolge, um Ihren Joy-con wieder zusammenzusetzen.
Rückgängig: Ich habe diese Anleitung nicht absolviert.
19 weitere Nutzer:innen haben diese Anleitung absolviert.
Besonderer Dank geht an diese Übersetzer:innen:
100%
Diese Übersetzer:innen helfen uns, die Welt zu reparieren! Wie kann ich mithelfen?
Hier starten ›

7 Kommentare
Just a tip for people doing this repair. DO NOT remove the two ribbon cables between the two parts unless you absolutely have to. I pretty much destroyed my right joycon doing so. One of the cables was so hard to replace for me that I ended up breaking the clip that holds it in. My mistake, I could’ve been more careful but it’s probably best to just not even take them out in the first place. I’ve heard these cables are very finicky to position correctly anyways.
Ok, added the bullet to step 6 so that people know. Thanks for pointing it out!
Devnol -
I did not need to take off the ZR button to fix mine - so for future fixers, try that part without taking off ZR first. :) THANK YOU for creating this tutorial. This fix WAS SO EASY compared to the 3DS XL fixes I did in the past.
You have a point. But it’s probably better to remove it because the chances of breaking it are quite high. These are very sensitive cables, but you were lucky. Someone else though might not be.
Devnol -
I do understand that not taking it off can be difficult, but I also know that putting it back on after taking it off is a pain, because you have to adjust it in a way so you don't destroy the button like I did. If you do have to put it back on, I suggest you take a thin ridged object to put over the button while putting the plastic button piece back in.
I’d already replaced once set of Joy Cons when I realized this was possible. Got a new set for Christmas and the left joy stick was already drifting. My hands shake a bit, but the guide was very straightforward. As far as I can tell, the fix is good to go, and I’m going to try and find my old set and replace that joystick too.
Thanks for the guide! It was great!
Used this on both the Left and Right Joycon, the Left Joycon has an extra ribbon that goes over the analog stick. So yes if you dont have to take off the 2 ribbons that connect the 2 halves don’t. Great job!
I stripped my back screws and I can’t take it out, what do I do?
Jonathan Hsin - Antwort
You can try this iFixit official technique: Wie man eine rundgedrehte Schraube entfernt Some steps will not work since it is an outer screw but it is probably worth trying. If that doesn’t work, I don’t know another solution but I hope you fix it.
Devnol -
You can try this iFixit official technique: Wie man eine rundgedrehte Schraube entfernt
Devnol - Antwort