Zum Hauptinhalt wechseln

Rotor Riot Phone Connector Cable Replacement

Was du brauchst

  1. Rotor Riot Phone Connector Cable Replacement, Remove the iPhone mount: Schritt 1, Bild 1 von 3 Rotor Riot Phone Connector Cable Replacement, Remove the iPhone mount: Schritt 1, Bild 2 von 3 Rotor Riot Phone Connector Cable Replacement, Remove the iPhone mount: Schritt 1, Bild 3 von 3
    • Use your fingers to remove the screw on the back side of the controller securing the iPhone mount.

    • Remove the iPhone mount.

  2. Rotor Riot Phone Connector Cable Replacement, Unscrew the back cover: Schritt 2, Bild 1 von 1
    • Use a T6 Torx screwdriver to remove the eight 9.2 mm-long screws securing the back cover.

    • Don't try to remove the back cover all the way yet! It's still connected to the mainboard.

  3. Rotor Riot Phone Connector Cable Replacement, Swing open the back cover: Schritt 3, Bild 1 von 3 Rotor Riot Phone Connector Cable Replacement, Swing open the back cover: Schritt 3, Bild 2 von 3 Rotor Riot Phone Connector Cable Replacement, Swing open the back cover: Schritt 3, Bild 3 von 3
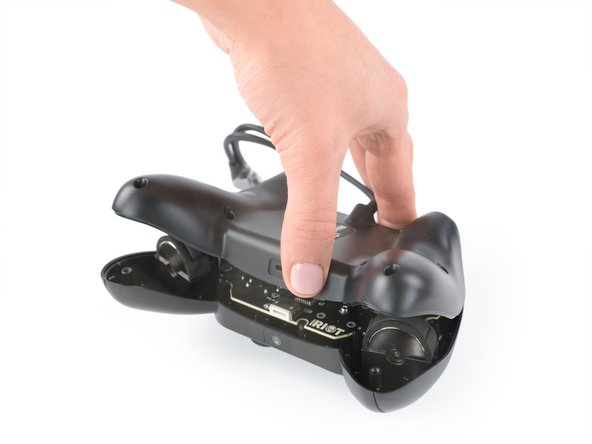
    • Lift up the back cover of the controller.

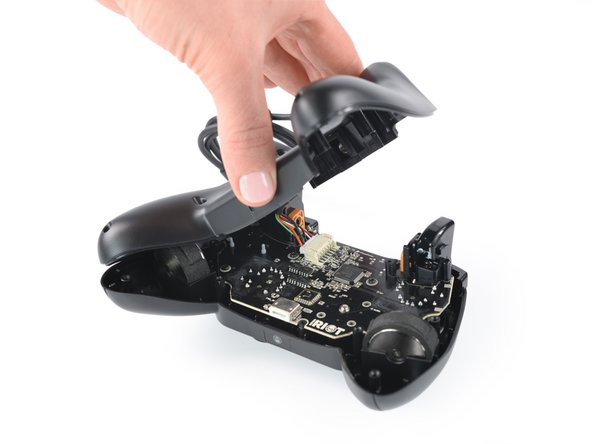
    • Lift the back cover to a 45 degree angle and place it next to the controller.

    • Don't strain the interconnect cable during this procedure.

  4. Rotor Riot Phone Connector Cable Replacement, Disconnect the phone connector cable: Schritt 4, Bild 1 von 3 Rotor Riot Phone Connector Cable Replacement, Disconnect the phone connector cable: Schritt 4, Bild 2 von 3 Rotor Riot Phone Connector Cable Replacement, Disconnect the phone connector cable: Schritt 4, Bild 3 von 3
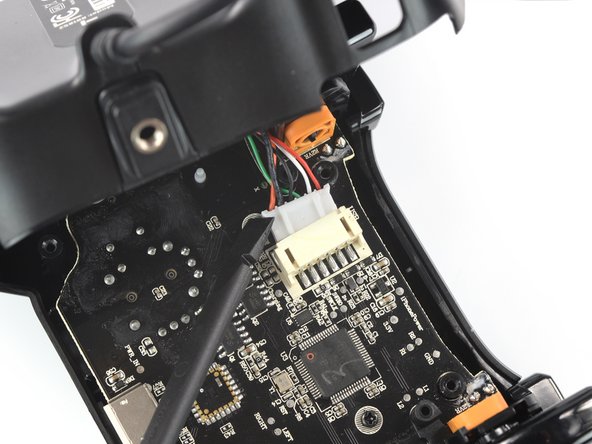
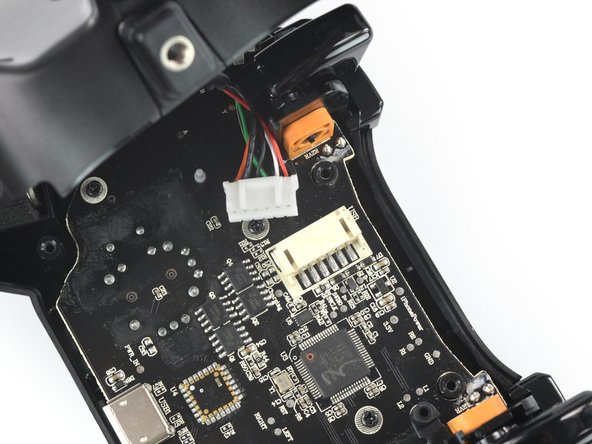
    • Use a spudger to disconnect the phone connector cable from the mainboard.

  5. Rotor Riot Phone Connector Cable Replacement, Remove the back cover: Schritt 5, Bild 1 von 1
    • Remove the back cover.

  6. Rotor Riot Phone Connector Cable Replacement, Remove the screw thread: Schritt 6, Bild 1 von 3 Rotor Riot Phone Connector Cable Replacement, Remove the screw thread: Schritt 6, Bild 2 von 3 Rotor Riot Phone Connector Cable Replacement, Remove the screw thread: Schritt 6, Bild 3 von 3
    • Pull the screw thread bracket straight up to slide it off of the rails securing it to the back cover.

  7. Rotor Riot Phone Connector Cable Replacement, Remove the phone connector cable: Schritt 7, Bild 1 von 3 Rotor Riot Phone Connector Cable Replacement, Remove the phone connector cable: Schritt 7, Bild 2 von 3 Rotor Riot Phone Connector Cable Replacement, Remove the phone connector cable: Schritt 7, Bild 3 von 3
    • Remove the phone connector cable.

Abschluss

To reassemble your device, follow these instructions in reverse order.

Take your e-waste to an R2 or e-Stewards certified recycler.

Repair didn’t go as planned? Ask our Answers community for help.

Adriana Zwink

Mitglied seit: 12/18/19

48.446 Reputation

167 Anleitungen geschrieben

Team

iFixit Mitglied von iFixit

Staff

135 Mitglieder

17.198 Anleitungen geschrieben

0 Kommentare

Kommentar hinzufügen

Seitenaufrufe:

Letzte 24 Stunden: 2

Letzte 7 Tage: 2

Letzte 30 Tage: 15

Insgesamt: 228