Einleitung
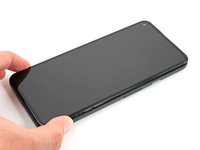
Diese Anleitung zeigt, wie das Display im Google Pixel 5a ausgetauscht werden kann.
Entlade zur Sicherheit den Akku vor Reparaturbeginn auf unter 25%. Dadurch reduzierst du das Risiko eines Brandschadens während der Reparatur. Wenn der Akku aufgebläht ist, musst du entsprechende Vorsichtsmaßnahmen treffen.
Was du brauchst
-
-
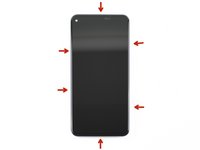
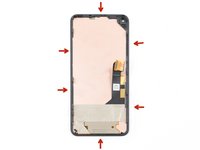
Schaue dir genau die beiden Nähte an den Kanten des Gerätes an:
-
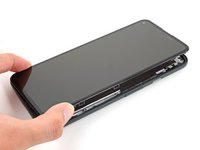
Displaynaht: diese Naht befindet sich zwischen dem Display und dem restlichen Gerät. Heble nicht an dieser Naht.
-
Blendennaht: diese Naht befindet sich zwischen der schützenden Kunststoffblende und dem Rahmen. Sie ist durch Rasten befestigt. Hier musst du hebeln.
-
-
-
Erwärme den rechten Displayrand eine Minute lang mit einem erwärmten iOpener.
-
-
-
Beachte die Stellen, an denen die Plektren am Besten eingesetzt werden sollen.
-
-
-
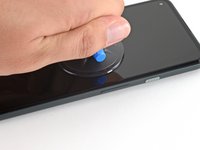
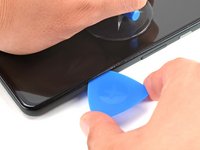
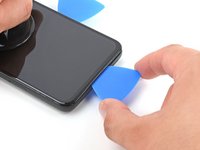
Platziere einen Saugheber so weit wie möglich an den rechten Bildschirmkante.
-
Ziehe den Saugheber fest und gleichmäßig nach oben, bis ein kleiner Spalt zwischen Mittelrahmen und Blende entstanden ist.
-
-
-
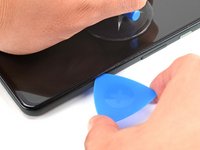
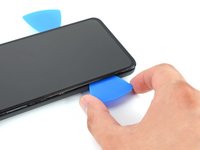
Setze die Spitze eines Plektrums ungefähr 4 - 5 cm von der Unterkante des Smartphones entfernt in die Blendennaht ein.
-
-
-
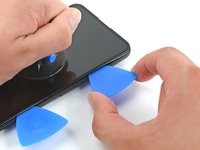
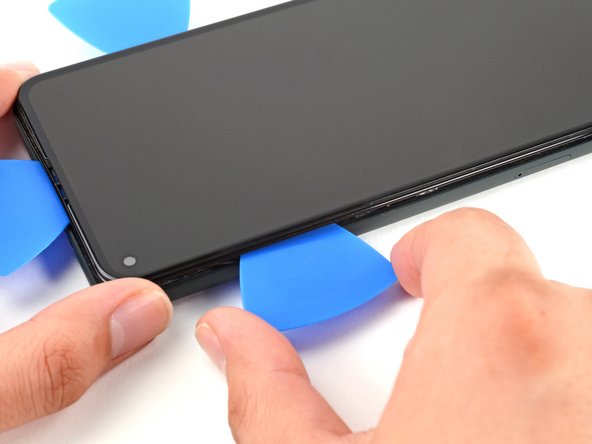
Setze die Spitze eines Plektrums ungefähr 3 - 4 cm von der Oberkante des Smartphones entfernt in die Blendennaht ein.
-
-
-
-
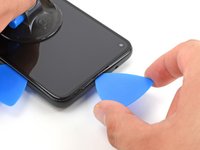
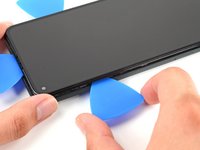
Setze die Spitze eines Plektrums an der Oberkante des Smartphones in die Blendennaht ein.
-
-
-
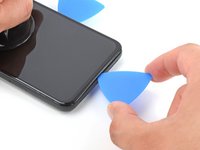
Setze die Spitze eines Plektrums an der Unterkante des Smartphones in die Blendennaht ein.
-
-
-
Setze die Spitze eines Plektrums ungefähr 2 cm von der Unterkante des Smartphones entfernt in die Blendennaht an der linken Seite ein.
-
-
-
Setze die Spitze eines Plektrums ungefähr 3 - 4 cm unterhalb der Frontkamera in die Blendennaht ein.
-
-
-
Überprüfe, ob alle Rasten gelöst sind. Trenne alle Kleberreste mit einem Plektrum auf.
-
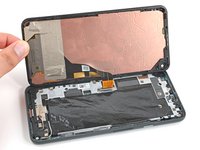
Klappe das Gerät von rechts her wie ein Buch auf.
-
-
-
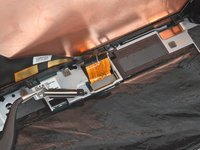
Drehe die 4,6 mm lange Torx T3 Schraube heraus, mit der die Halterung des Displaysteckers befestigt ist.
-
-
In diesem Schritt verwendetes Werkzeug:Tweezers$4.99
-
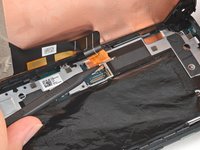
Entferne die Halterung des Displaysteckers mit einer Pinzette.
-
-
-
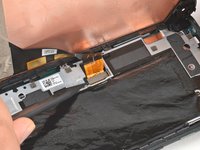
Heble das Flachbandkabel zum Display mit der Spudgerspitze hoch und trenne es ab.
-
-
-
Fasse das Display nur an den Kanten an.
-
Wenn du das Display auf die Arbeitsfläche ablegst, achte darauf, dass kein Fremdkörper die Rückseite berührt. Am besten legst du das Display auf ein sauberes, weiches und fusselfreies Tuch.
-
-
-
Entferne das Display vom Smartphone.
-
Wenn du das Display ausgetauscht hast, dann kontrolliere die Öffnung für die Frontkamera. Entferne alle noch vorhandenen Schutzfolien.
-
Wenn du beim Zusammenbau vorgeschnittene Klebestreifen verwendest, dann folge dieser Anleitung.
-
Wenn du Tesaband verwendest, um das Display zu befestigen, dann folge dieser Anleitung.
-
Beim ersten Systemstart nach dem Zusammenbau durchläuft das Display einen Kalibrierungsprozess. Berühre das Display dabei nicht, es könnte falsch kalibriert werden, dadurch könnten Probleme mit dem Touchscreen entstehen.
-


Um dein Gerät wieder zusammenzubauen, folge den Schritten dieser Anleitung in umgekehrter Reihenfolge.
Entsorge deinen Elektromüll fachgerecht.
Lief die Reparatur nicht wie geplant? Probiere zunächst einige grundsätzliche Lösungen oder frage in unserem Forum nach Hilfe bei der Fehlersuche.
Vergleiche das Ersatzteil mit dem Originalteil. Möglicherweise musst du fehlende Bauteile übertragen oder Schutzfolien vom Neuteil abziehen, bevor du es einbauen kannst.
Rückgängig: Ich habe diese Anleitung nicht absolviert.
84 weitere Personen haben diese Anleitung absolviert.
Besonderer Dank geht an diese Übersetzer:innen:
100%


Diese Übersetzer:innen helfen uns, die Welt zu reparieren! Wie kann ich mithelfen?
Hier starten ›

46 Kommentare zur Anleitung
Thank you, this was useful for removing the screen from my device without damaging it further! With the invisible fasteners, a guide like this is invaluable for knowing where the latches are and how to get to them.
As a guide for replacing a screen, there are a few other things worth mentioning:
• Is it necessary to remove the old gasket ("adhesive film")?
• How do you apply the new display adhesive, the one that comes on a blue card? Do you need to do that before re-attaching the new screen cable? Why are there cut-outs in the blue card that mostly match the positions of contacts on my device, but not entirely? Do I remove it before closing the device?
• In addition to a couple pieces of tape, the replacement screen also comes with a small piece of film protecting the camera area. Do pull it out by the small red tab before re-assembly.
• Any other tips for reattaching that press-fit board-to-board connector? Should I really expect it to click into place? It took me many tries to get that aligned and secured!
1. Depends on what you mean by "Necessary," but it is recommended
2. In Step 15, there is a guide linked for custom-cut adhesive; follow that one.
Yes, before you reconnect cable.
I don't know what the cutouts are for, but you will remove the blue card anyway after applying the adhesive to the frame. The important part to line up is the adhesive to the frame; the blue card doesn't matter beyond that.
And yes, you will remove it before closing the device.
3. Didn't see that. I hope my device's camera works. I'll check that now.
4. Reconnecting this was the most tedious part for me. I used the gold colored corners on the board to line up the connector(you can see these in the picture for step 15. Also, I used my finger and not the spudger for pressing down when reattaching (and I don't have small hands); this helps you feel the slight click when it's in place.
Also, you can use the suction cup as a sort of kickstand so you have enough ribbon cable to work with (because there's not a lot of it.)
Lol No -
Literally went step by step by this guide and repaired my own Google pixel 5A phone. If you purchase the entire repair kit for the Google Pixel 5A you have essential every tool you'll need. I will recommend ordering screens for this phone here from this website.
Good guide but agree with keturn that it would be great to have more tips and reminders for replacing the screen.
I mostly figured it out, heres how I did it:
- I removed the old adhesive, and tried to scrape and clear it all.
- next I attached the new adhesive before connecting the screen cable since I figured it would be hard when its attached. I did try to make sure to press all along the adhesive with tweezers to set it. I left the next set of backing on to minimize the time the adhesive is exposed (avoid dust or me touching it)
- then I attached the connector. This was a little difficult, but also not very experienced with this.
- then I removed the adhesive backing and closed it up right after. I used rubber bands (3 across and 1 down the middle) to clamp the screen and put some books on it as much as I could over the next day.