Einleitung
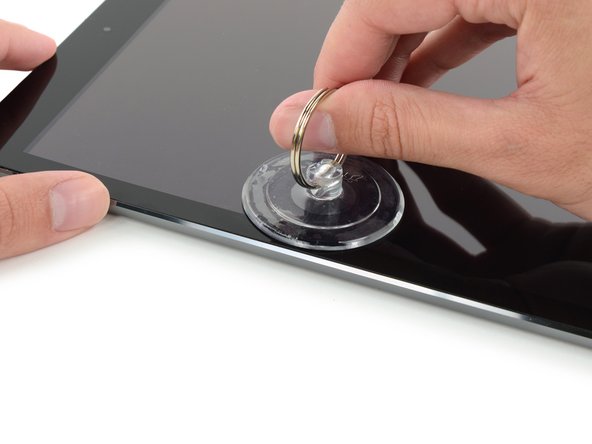
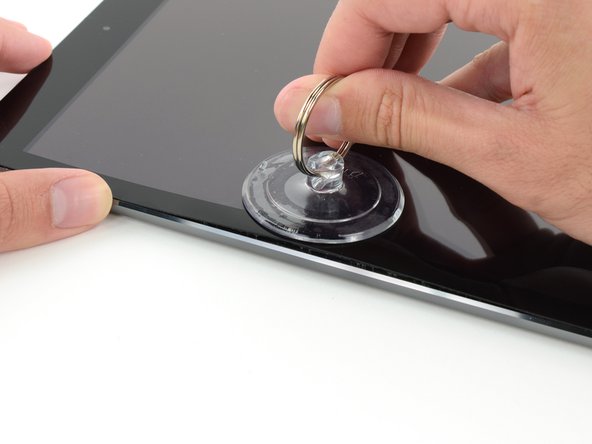
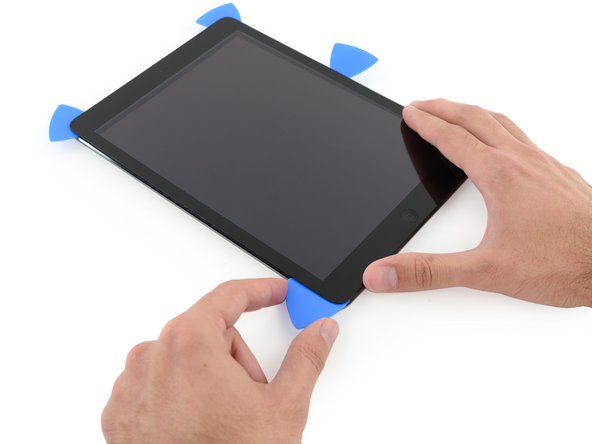
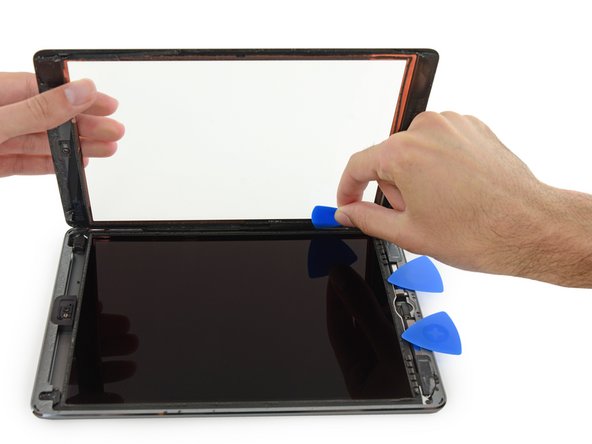
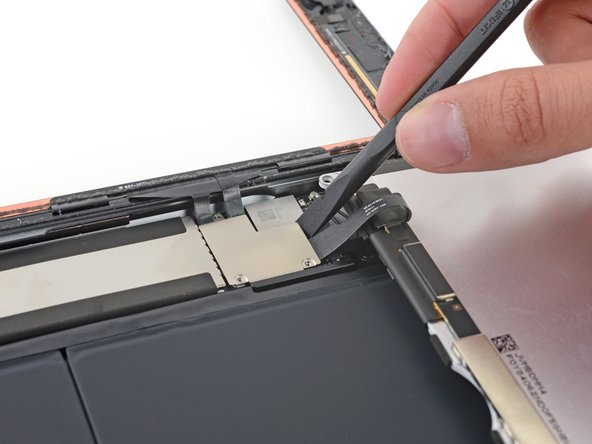
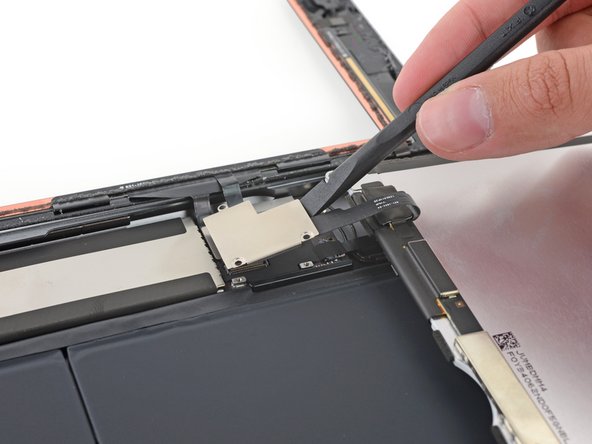
Hier wird der Austausch der Home Button Einheit am iPad 4 Wi-Fi gezeigt.
Beachte, dass der Fingerabdrucksensor im Home Button mit dem jeweiligen Logic Board gepaart ist. Durch den Austausch des Home Buttons verliert das iPad die Touch ID Funktion.
Warnhinweis: Die in der Anleitung beschriebene Methode zum Isolieren des Akkus ist überholt. Du kannst mit ihr die Akkukontakte dauerhaft beschädigen, bzw zerstören. Wenn du trotzdem den Akku auf diese Weise isolieren willst, dann befolge die Warnhinweise ganz genau und arbeite sehr sorgfältig. Wenn du aber weiterarbeitest, ohne den Akku zu isolieren, dann vermeide den Gebrauch von Metallwerkzeugen, außer wo unbedingt notwendig (z.B. um Schrauben zu entfernen). Dadurch beugst du einem Kurzschließen des Akkus und der empfindlichen Elektronik vor.
Was du brauchst
-
-
Erhitze den iOpener für dreißig Sekunden.
-
Im Verlauf der Reparatur kühlt sich der iOpener wieder ab. Erhitze ihn dann noch einmal für dreißig Sekunden.
-
-
-
Halte den iOpener an einem der flachen Enden und vermeide die heiße Mitte, während du ihn aus der Mikrowelle nimmst.
-
-
-
Fülle einen Topf oder eine tiefe Pfanne mit ausreichend Wasser, um den iOpener komplett damit bedecken zu können.
-
Erhitze das Wasser (ohne den iOpener) bis es kocht. Schalte die Wärmezufuhr (Platte) aus.
-
Lege den iOpener für etwa 2-3 Minuten in das heiße Wasser. Stelle sicher, dass der iOpener komplett mit Wasser bedeckt ist.
-
Nimm den iOpener mit einer Küchenzange aus dem Wasser heraus.
-
Trockne den iOpener gründlich mit einem Küchen- oder Handtuch ab.
-
Der iOpener kann jetzt verwendet werden. Solltest du den iOpener erneut erwärmen müssen, erhitze das Wasser nochmal bis zum Siedepunkt, schalte die Wärmezufuhr aus, und lege den iOpener wieder für 2-3 Minuten vollständig in das Wasser.
-
-
-
Wenn dein Touchscreen gebrochen ist, vermeide weitere Brüche und verletze dich nicht beim Berühren des Glases.
-
Klebe Paketband über den Touchscreen des iPads, sodass die ganze Oberseite bedeckt ist.
-
Bitte befolge die restliche Anleitung wie beschrieben. Wenn das Glas einmal gebrochen ist, wird es während der Reparatur weiter brechen. Eventuell benötigst du einen Metallspatel, um das Glas zu entfernen.
-
-
-
Lege den erhitzten iOpener auf die lange Seite links des Home Buttons.
-
Lass den iOpener für mindestens eine Minute liegen, um den Kleber zu erhitzen und zu lösen.
-
-
-
Wenn du die einzelnen Schritte ausführst, pass besonders an folgenden Stellen auf, wenn du das Glas entfernst:
-
Frontkamera
-
Antennen
-
Display und Touch Screen Kabel
-
-
-
Drücke den blauen Griff zurück, um die Arme zu entriegeln.
-
Lege das iPad so auf einen Gegenstand, dass es waagrecht auf gleicher Höhe zwischen den beiden Armen liegt.
-
Bringe die Saugheber mittig nahe an der linken Kante des iPads an, einen auf der Vorderseite, den anderen auf der Rückseite.
-
Halte die Anti-Clamp unten gut fest und drücke fest auf den oberen Saugheber, damit er sich festsaugt.
-
-
-
Drücke den blauen Griff vorwärts, um die Arme wieder zu verriegeln.
-
Drehe den Griff eine volle Umdrehung im Uhrzeigersinn, bzw. so weit, bis du merkst, dass sich die Saugheber dehnen.
-
Achte darauf, dass sich die Saugheber weiterhin gegenüber stehen. Wenn sie sich nicht mehr gegenüber stehen, dann löse die Saugheber ein wenig ab und schiebe sie in die richtige Position.
-
-
-
Warte eine Minute, damit sich der Kleber allmählich ablösen kann und sich ein Spalt bilden kann.
-
Wenn das Display nicht heiß genug ist, dann erwärme die linke Kante des iPads mit einem Haartrockner.
-
Wenn der Spalt groß genug ist, dann setze ein Plektrum unter das Display ein.
-
Überspringe die nächsten zwei Schritte.
-
-
-
Befestige einen Saugheber auf der linken Seite in der Mitte des iPads.
-
Drücke den Saugnapf flach auf den Touch Screen.
-
Halte das iPad mit der einen Hand fest und hebe mit der anderen vorsichtig den Touch Screen vom Gehäuse.
-
-
-
Platziere den Opening Pick in dem entstandenen Spalt.
-
Löse nun den Saugnapf vom Touch Screen.
-
-
-
Platziere nun einen weiteren Pick in dem entstandenen Spalt und ziehe diesen zur unteren Ecke. Dabei sollte sich der Kleber lösen.
-
-
-
Führe den Pick an der Seite des Displays entlang, um den Kleber zu lösen.
-
Wenn der Pick am Kleber festhängt oder stockt, dann "rolle" den Pick an der Seite entlang, um den Kleber weiter zu lösen.
-
-
-
Führe nun den ersten Pick hinauf bis zur oberen Ecke des iPads.
-
Siehst du den Pick durch das Glas? Keine Panik – ziehe es einfach wieder etwas raus. Meistens wird dadurch nichts beschädigt. Versuche dies aber zu vermeiden, weil der Kleber sonst das LCD oder Glas berühren könnte und sehr schwer zu reinigen ist.
-
-
-
Erhitze den iOpener erneut und platziere ihn auf dem oberen Rand des iPads über der Frontkamera.
-
-
-
Schiebe das Opening Pick um die obere linke Ecke herum, damit der Klebstoff gelöst wird.
-
-
-
-
Ziehe das Opening Pick entlang der oberen Kante bis kurz vor die Frontkamera und halte dann an.
-
-
-
Ziehe das Opening Pick leicht heraus und schiebe die Spitze sehr vorsichtig am oberen Rand des iPads auf Höhe der Frontkamera entlang.
-
-
-
Lass das Opening Pick gleich hinter der Frontkamera stecken.
-
Nimm ein zweites Opening Pick und setze vor der Frontkamera erneut an. Nun schiebe das Opening Pick in die linke Ecke, um den Klebstoff an diesem Rand vollends zu lösen.
-
-
-
Nun kannst du das erste Opening Pick wieder tiefer hineinschieben und von der Kamera weg bis in die Ecke ziehen.
-
-
-
Behalte die drei Opening Picks in den Seiten des iPads an denen der Kleber schon gelöst wurde, sodass dieser sich nicht erneut verklebt.
-
Erhitze den iOpener und platziere ihn auf der letzten unbearbeiteten Seite.
-
-
-
Schiebe den Opening Pick in die obere rechte Ecke des iPads, um den Kleber dort vorsichtig zu lösen.
-
-
-
Führe einen neuen Opening Pick in das iPad ein und schiebe ihn in die Mitte der rechten Kante des iPads, um den Kleber der Kante entlang zu lösen.
-
-
-
Lasse die Opening Picks an Ort und Stelle und lege den erneut aufgewärmten iOpener auf die Seite des iPads mit dem Home Button.
-
-
-
Schiebe den unteren linken Opening Pick in die untere linke Ecke, um den Kleber auf dieser Ecke zu trennen.
-
Lasse den Opening Pick in der Ecke. Gehe damit kein Stück weiter und entferne nicht den Opening Pick aus dem iPad.
-
Die folgenden Schritte führen dich so, dass du Schäden an den Komponenten vermeiden wirst. Verwende Hitze und Hebelwirkung nur da, wo es von dir in der Anleitung verlangt wird.
-
-
-
Schneide mit einem neuen Opening Pick vorsichtig über die linke Antenne, stoppe kurz vor dem Home Button.
-
Lasse den Opening Pick an Ort und Stelle und springe zum nächsten Schritt.
-
-
-
Nimm ein neues Plektrum und schiebe es an die Stelle des vorherigen Plektrums.
-
Fahre am Home Button und der rechten Antenne nur mit der äussersten Spitze des Plektrums entlang, um den Kleber zu entfernen.
-
-
-
Wenn der Kleber gelöst ist, kannst du das Plektrum in der Nähe der rechten Ecke einsetzen. Schiebe das Plektrum nach links und halte kurz vor dem Home Button an.
-
-
-
Erhitze den iOpener und lege ihn auf die Seite der Lautstärketasten des iPads.
-
-
-
Auf der den Lautstärketasten gegenüberliegenden Seite solltest du ein Plektrum in jede Ecke eingesteckt haben. Drehe die Plektren um die Scheibe leicht an zu heben - so löst du auch den letzten Kleber entlang der Kante mit dem Displaykabel.
-
-
-
Hebe langsam und vorsichtig das Display an, um den Kleber entlang der Kante mit dem Displaykabel zu lösen.
-
-
-
Während du das Front Panel Glas hebst, nutze ein Plektrum, um auch den letzten Kleber zu lösen.
-
-
-
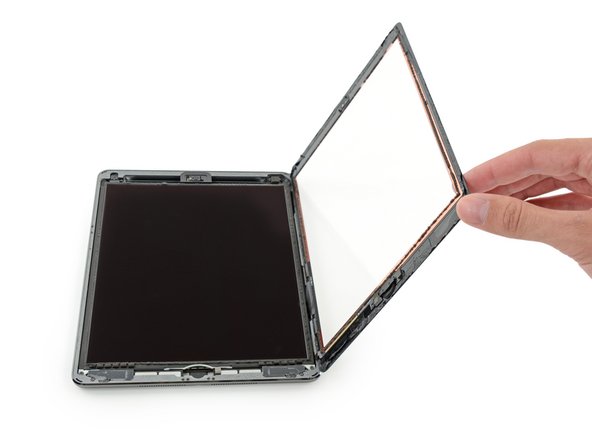
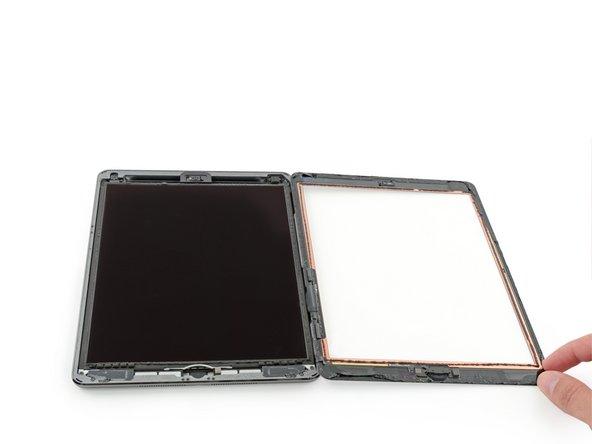
Wenn erst einmal jeglicher Kleber entfernt bzw. gelöst wurde, kannst du die Frontglasscheibe wie eine Buchseite öffnen und auf die Arbeitsfläche ablegen.
-
-
-
Entferne die folgenden Kreuzschlitzschrauben, die das LCD befestigen:
-
Drei 4,0 mm Schrauben
-
Eine 4,8 mm Schraube
Use the provided replace screen case's square compartments to place your screws into as you remove them. Really helpful and you likely won't mess up.
I tape a stripe of double sided tape on my workbench. You can place the screws on the tape on the location where the screw would be if it was in the screen assembly. In this step, your screws would be in the four corners of the tape stripe, with the longest screw (4,8mm) in the upper left corner. The other screws from the next steps can also be placed on the tape this way.
**I believe you mean the “top Right corner” Is where the longer screw goes.. not left.
! went to Office World bought 4 packs of bluetac stuck them on a sheet of paper to give approximately size and shape of iPad put it in a flat cardboard box
Where can I buy these screws please ?
-
-
-
Benutze das flache Ende eines Spudgers um das LCD aus seinem Bett zu lösen. Hebe grade soweit an, bis du es mit den Fingern greifen kannst.
-
Klappe das LCD um wie die Seite eines Buches, hebe es in der Nähe der Kamera an und Klappe es in Richtung des Home Buttons auf die Rückseite.
-
Lege das LCD auf seine Vorderseite, um an die LCD-Kabel heranzukommen.
Got a cracked screen from toddler stepping on the iPad. My repair went well, everything worked. Except I scratched the LCD. It seems to scratch easily.
At this step, be careful when folding over the screen, as it may scratch on the aluminum frame (third picture). When they say “soft lint free surface” that is needed, specifically where the LCD meets the frame. Place a thin cloth like sunglass cleaning cloth over the edge of the frame.
Thank you, very much, for this tip.
At this step, possibly depending on date of manufacture, there may be black silicone present on/around the four screws that mount the display. It needs to be carefully scraped away and the two screw mount holes at the top of the screen pried up and away from the chassis. Between the chassis and the plastic portion of the mounting frame, there is a slim sheet of metal. Be sure to pry this off WITH the mounting frame. It is part of it. DO NOT try to separate it.
-
-
-
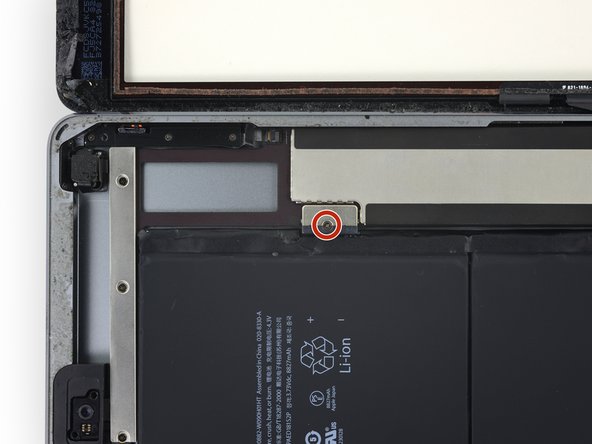
Entferne die einzelne 2,3 mm Kreuzschlitzschraube , mit der der Akkustecker am Logic Board befestigt ist.
-
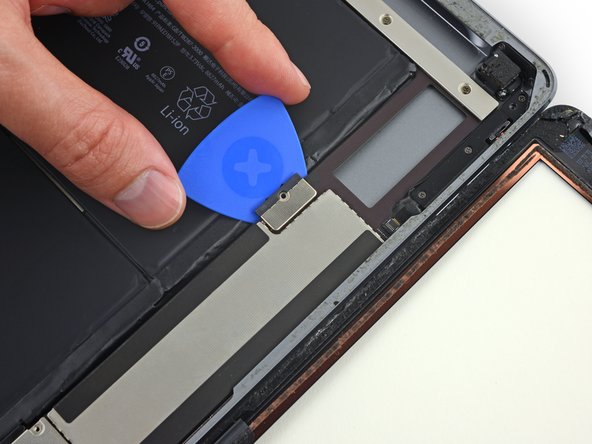
Schiebe ein Akkutrennstück unter den Bereich mit dem Akkustecker auf dem Logic Board, und lasse es dort während du arbeitest.
-
Wenn es schwer fällt, das Akkutrennstück unter das Logic Board einzusetzen, dann probiere, den Akku mit einer Spielkarte abzutrennen.
Not having the isolation pick, I used 2 thin guitar picks instead, which did the job fine.
I couldn't disconnect the battery connector - I applied some force, nothing happened and I was afraid of applying too much force - so I just left it connected and I was very careful not to short out any terminals with metal tools. I completed the repair without any other issues and the iPad now seems to be working fine.
Mine was missing. Made one with scissors but still didn't do the trick. I just worked with the batteries still plugged in.
Couldn’t get the battery terminal disconnected so I continued with repair. I didn’t short anything but now it won’t do anything. It worked before, just a cracked glass to replace. Any solutions?
Why do you say you didn’t short anything? Your result would seem to suggest otherwise
I don’t know if it applies to the iPad Air, but I saw elsewhere in my researches in reference to a iPad mini (or was it an iPod mini?) that disconnecting the LCD and/or digitizer with the battery still connected will blow a “fuse” for the backlight. Might yours still be working, just with no screen illumination whatsoever? Dunno. Just a thought.
It apparently can be repaired, but is no longer a DIY job.
Tim -
try lifting the board and not blocking the connector. If you block the connector there are pins that could be damaged.
A replacement of the battery connector is required if pins are bent should you get power on or charge issue after battery disconnection. This can be replaced with the right tools and low melt solder to remove the connector and replace.
Best method to disconnect battery is to carefully lift the logic board near the battery connector enough to slip a piece of thin plastic or paper between the batter connector and the logic board battery connector and pins.
Failing to isolate battery so can result in blown back light or touch filters or diodes in backlight circuit.
At the very least run down the battery flat prior to repair but you are really best to isolate battery.
From a repair point of view. This connector is a royal pain. For assembly it's great, well, nearly great.
This connector is SOLDERED to the motherboard side. Never lever this on the motherboard side, I will call it the right hand side. It will break leaving it's soldered pins behind. Yes I did it.
The pins, on the battery side of this connector, just rest on the batteries plated pads. They are kept under tension by the screw. It should be noted though that removal of the screw will not disconnect the connector pins from the battery pads. Natural tension is still present.
I suggest strongly that you take a look at the battery connector online to see the nature of the pins and you will see that some are quite delicate.
The tools purpose is to raise the battery side of the connector ; the left side, so there is some clearance between the pins and the batteries pads. If you have seen a picture of this connector then you will realise the potential of damage to this connector and will have a better idea of what to do.
Contd.
Lifting the connector and simultaneously sliding a thin piece of card or plastic under the pins should be done carefully. In fact, to minimise damage I just slid it under ONE of the main battery pins, plus or minus, which are in the middle and quite robust compared with the tiddlers on the side of the connector.
The second point, the battery and the motherboard have protection circuitry. When I broke my connector the battery dropped to 0.5V at the terminals. Connecting the charger, when all the connections were sound and not shorted raised it from the dead back to over 3.2V
I replaced the battery, and got things hooked backup. For the test, the screen came on, digitizer seemed to be functioning fine. But I couldn’t get it to charge. I used the i-fixit battery blocker by using my spooger to put a little up pressure on the board, and then sliding the blocker in. I don’t think I damaged the pins, but its possible. This is a friends ipad, and its obviously been dropped a few times. I started eye balling the charging port, it LOOKS ok, but looks can be deceiving. When plugged in, even trying different cables, the ipad is not showing the charging symbol. Some of the comments here seem to imply, if I damaged the battery connection pins, I would still get a charging symbol. My question is, if I damaged those battery connector pins, would the ipad show the charging icon or not? Should I be looking at replacing the charging port?
-
-
-
Entferne die drei 1,4 mm Kreuzschlitzschrauben von der Halterung des Displaykabels.
Be careful when re-installing screws on reassembly. I mistakenly put the longer screw from the battery connector in the outboard hole, and wound up twisting off the lug that is only lightly soldered to the metal below. Still have 2 screws and system seems to work fine.
-
-
-
Mit dem flachen Ende eines Spudgers kannst du ganz vorsichtig die Halterung des Displaykabels senkrecht aus der Hauptplatine heben.
bough my digitizer from ebay and have everything done up to this step. The screwdriver the kit came with said to be a #000 but it stripped the screw on the plate... I have tried rubber bands, tape and paper to no avail...anyone got an idea on how to remove the screw. Also I am currently studying in St. Kitts and they lack some products found in the US.
I'm sure you've moved past this by now, but I've had some success with stripped screws using a comparable, if slightly larger flathead screwdriver. The screwdrivers that come in those kits tend to suck quite a lot... iFixit actually has a guide for stripped screws: Wie man eine rundgedrehte Schraube entfernt
-
-
-
Entferne das LCD.
Andddddd continue this iFix folks! It's not a matter of working backwards. Most people must have cracked screens and end up having to rip the screen off and won't have a chance to inspect connections.
He is far from complete…..if lcd is being replaced its probably because top screen is busted too. He didn’t show anything about how to remove the cables for that.
There is a separate guide for replacing the outer glass ;)
-
-
-
Entferne vorsichtig das Klebeband, welches den Anschluss des Home Buttons schützt.
I totally skipped steps 39-98 I didn’t see any need to remove all these components and the logic board just to get the battery out. I gently pried up the board where the battery connector goes in, slipped it out, and slipped in the new one.
That is a great tip. There is plenty of space inside the case to lever out the battery without taking out all of the components. I laid the iPad on top of a large bean bag, heated for 3 minutes in the microwave. After 4-5 minutes, I was able to lever out the battery with the spudger and the credit cards. It came out after a few minutes of careful levering and cramming the credit cards under the battery. I unscrewed the earphone connector and carefully taped it back to the iPad housing with paint tape to have more room to maneuver.
I second this.
Just be careful to make sure you don’t squish or tear any wires or anything else surrounding when you’re fighting with the batteries, and it’s still way easier than removing everything else in there first.
I’ll add one bit, though. The hole in the battery connector that accepts the screw through the logic board also apparently slips over a pin in which the screw seats. I couldn’t see that. So when I got the last bit of battery adhesive to let go, the pin tore out the battery connector hole. Since I was replacing the battery, it wasn’t a problem, but did produce a little conductive piece that I had to fish out before putting anything back together. Wouldn’t want that little torn out piece running around in there to short something out later.
Also, that pin will locate the battery correctly, so that in one of the last steps of reassembly, the battery connection screws together properly. Make sure you find it before the battery adhesive grabs on to the back of the case.
Tim -
Careful removing the tape. The home button has a zif connector and if you aren’t careful the tape can rip the zif flap right off. You might have to hold it down while you pull it off or pull the tape from a different direction to make sure you dont tear the zif tab off.
-
-
-
Nutze die flache Seite des Spudgers, um die Abdeckung des ZIF-Anschlusses zu öffnen.
-
Entferne jetzt das Kabel aus dem Anschluss, indem du vorsichtig und gleichmäßig in horizontaler Richtung daran ziehst.
I got through the repair, only to have the new screen give me problems that I can not find solutions to any where. The digitizer is working on its own without my input, it will start apps, switch windows, etc. I have pulled up the new screen and checked my ribbons and cables seem to be fine. ANY IDEAS??
Moses Roman
Same exact problem that I have. I think it has something to do with the glass touching the ipad. Something like on the iPad mini, where you had to cover some areas beside the home button.
I would love to see a real solution, as im stuck with unhappy customers and frustrated me :)
I had mine replaced TWICE by a local repair shop. Soon noticed both times that the iPad would soon go haywire after a few minutes use with random clicks, ghost typing, opening apps, etc.
The iPad Air's such a poor quality, un-durable product anyway. I only had my screen replaced in the first place because it cracked with no apparent drop or trauma and Apple wouldn't replace.
I have also the same issue, does anyone know what the problem is?
Please give us some feedback.
Have seen this with multiple repairs where the digitizer was replaced. In each case it was a problem with the digitizer cables where it gets tucked under the glass near the edge of the frame. Not yet sure if they are badly made digitizers or if the cable gets damaged trying to tuck it under frame during installation.
To avoid the digi sending the ipad crazy. In the same way you tape the copper/silver edges on the back of the glass for the iPad Mini. You tape all the way around, making sure not to dirty the protective cover when placing back down after taping one edge.
Make sure all the metal surround is cover by tape, but careful not too go over the edges too much. It will be visible when using the device.
Like i said earlier, the real skill is not too dirty the screen when lifting the protective sheet.
Have fun!
Thanks man, I'll give it a try. Any idea what kind of tape should I buy?
Kapton tape otherwise known as heat tape or polyamide tape
Just fitted the screen, the digitizer works, display all good but I had a message saying I could not use touch ID and the home button doesn’t work at all…is this expected?
I break the ZIF connector. Is tat touch connecter.?
How do you take the ribbon cable off from the home button site???
-
-
-
Nutze die flache Seite des Spudgers (oder einen Fingernagel), um die beiden Digitizer-Kabel vom Logic Board zu lösen.
What are those connectors for because i kinda half broke the left one on the screen on the glass frame and now the lcd wont turn on
-
-
-
Löse vorsichtig das Home Button Kabel aus der Verklebung, die es am Gehäuse fixiert.
THIS PICTURE IS PERFECT AND PERTANANT TO THE NEXT STEP REGARDING “GHOST OR PHANTOM TOUCH” - See that foam around the edges? For some reason, the ifixit replacement digitizer doesn’t come with it (but it does come with new adhesive applied already.) With your screen, also purchase their “tesa tape” : Tesa 61395 Tape / 4 mm - it comes in different widths fyi. I choose 4mm as advised by a staff member.
On the replacement screen I received from you, the home screen ribbon cable does not fully seat inside the Zif connector like the original and will not lock in place as a result. It seems too fat. Any tips to make it work?
I can’t think of any reason for that other than it’s the wrong display for your model, or it’s defective. Double-check the model very carefully and make sure you ordered/received a compatible part. If you ordered from iFixit, contact customer support directly for returns or exchanges. Good luck!
I didn’t receive any of the two sided tape…I assume it needed to be ordered separately??
So, when I removed the glass, the bottom cable tore and I have to replace it. The video is not as clear regarding replacement. The old button had a round rubber gasket but the new one does not. No inst. how to re-use it. I can’t attach and keep in place the new button.
In a previous repair, i broke the zif, what you want to do is hold it down while removing the tape, otherwise it will pull the parts up with it.
Since it was broke i put a piece of electrical tape on top for the pressure the zif would push down, then another piece from the screw hole to the bend in the cable, so it does not come loose when putting back together.
-
-
-
Entferne nun das Frontglas.
-
Wenn du Probleme mit dem neuen Touchscreen des iPads durch Phantomauslöser hast, kannst du an den markierten Stellen auf der Rückseite sehr dünnes Isolierklebeband befestigen, so wie z.B. unser Kaptonband (Polyimidband). Ersatzteile von iFixit sind schon mit geeigneter Isolierung versehen, bei ihnen sollte das nicht nötig sein.
In your conclusion, which doesn't have a comments area, you say to reverse the procedure - simple enough, BUT what about the sticky adhesive residue along the edges of the (a) the just-remove-glass (if re-using) and (b) along the 'inside' edges of the iPad chassis? Typically Apple says to remove the adhesive residue (careful) with alcohol wipes (lint free & 98% isopropyl). Thanks for the instructions!
the hardest part of this repair for me is actually aligning the ribbons (especially on the aftermarket version) so they don't jumble and cause the glass to mush away from the adhesive leaving a gap. Would would be very helpful to see how to fold the ribbon cables back on the aftermarket digitizers. They are slightly different than the originals, or at least they appear different. This repair is super useful but we could really use a step 44 because re-assembly has a sequence and a folding technique.
The ribbon cable is a little tricky to figure out. But if you look closely at the old ( Broken) screen you will see they stick to the underside of the screen thin the remaining ribbon slides down into the ipad between the display and ipads frame.
I used a heat gun and suction cups to loosen screen.
This was a very good ifix ii
This is what I need too!
It is not as simple as reverse disassembly steps, the ribbon cables need to be tucked into the pocket on the side of the iPad. There is tape on them that has to adhere to the side of the digitizer too. Mine did not make it all the way down into the gap, and stuck on the other adhesive, now I have a gap by these two cables. To tuck these into this area is difficult at best. I now need to remove the glass, hoping it does not shatter and purchase more tape.
Other than this the task was not bad.. BTW: YES People use the capton tape
I’ve read that people are putting glue at each corner. I haven’t figured out what glue. One person said Glue Dot 1” 16lb, another said rubber cement, 1 video shows 5 min epoxy… Heard that some sort of glue (not super glue) needs to be used to avoid the glass lifting later on. And to use 3m red tape along the edges. I’ve been searching for which glue because I still have an ipad air to do screen replacement on.
Would be helpful if the tape were listed in the master supplies for the guide. I got the whole kit overnighted, but then had to wait a week to get the tape from Amazon (since I wasn’t going to shell out another $50 for overnight shipping). Otherwise, it’d be nice to know if the displays through iFix it included the foam or not—mine didn’t.
Second the concern about the foam. I bought the full repair kit, but was surprised there wasn’t already polyimide tape on the digitizer or in the kit. At least mention that it needs to be purchased extra.
@baron9 The displays we sell have the proper insulation and don’t require any tape. That note is more for folks who use our guides while buying the parts from somewhere else. (They tend to complain here, even though it’s the part that’s at fault, not the guide.) I’ve updated the instructions to try to make things a little more clear. Sorry about that!
My digitizer kit from ifixit also looks like it is missing the polyimide tape on the digitizer. Can someone confirm that i do not need to get the tape with the original ifixit kit and just slap the digitizer on there?
Alex -
I did not realize that aftermarket screens (besides the one ifixit sells) do not come with adhesive strips. Well worth the time to figure out what kind of adhesive you’re going to use to re-adhere the glass before you begin. Stopping while you’re so close to the end of the repair (or having to open the ipad up again after the screen doesn’t stick back down) is slightly frustrating.
I used a b-7000. 48 h cure time.
Just wanna say thank you. I replaced my LCD and digitizer today…. took a LOT longer to get that adhesive off than I expected. And the IOpener busted in my microwave despite following all directions (eg only 30 sec at a time, out for at least 10 min before reheating. So that sucked. Turns out the rice in a sock worked pretty well too.
Regarding assembly: even with carefully tucking the ribbon cables down the side while reassembling, it’s still hard to get that area to stick down.
Some advice when reassembling that I have learned in the hard way.
One good hint is to those who buy replacement parts that are not exactly the original ones. Some of the parts come with a 3M adhesive tape on the tab of the flex cables (I guess original parts are already folded and glued). I would strongly recommend to be very careful when you try to glue it on the front panel and maybe watch a video on how to fold it properly, so as not to fold or pinch the flex cable on an unrepairable way. Also, some of the low cost parts come with a very strong protection sticker on the front glass. It is advisable that you peel off the sticker before reassembling the ipad in order to not end up ruining the glue that was supposed to hold the front panel .
-
-
-
Beginne das Home Button Kabel vorsichtig von der Rückseite des Front Panels abzulösen.
-
Löse ab, bis du die Metallabschirmung am Kabel erreichst.
START using extreme caution at this point. This ribbon IS VERY FRAGILE, especially after the silver rectangle/shield. That gold piece is attached to the cable.
-
-
-
Setze einen Opening Pick (Plektrum) zwischen Metallabschirmung und Front Panel ein und löse sie vorsichtig vom Digitizer ab.
-
-
-
Löse vorsichtig den Metallkontakt von der Halteklammer des Home Button ab.
So what exactly does this metal contact do? Can the HB work without that single gold contact?
Can anyone answer this question? The gold metal rectangle contact ripped off even horizontally with the rest of the home button cable. Do I need to order a whole new home button with cable? Or will I at least get functionality from the home button, only missing that little gold rectangle ?
PC Ops -
I ripped mine. Reattached the metal contact to the cable with some tape as best as I could. The button and touch ID work, so not sure if the metal contact is absolutely needed…? If it’s just for grounding?
EXTREME CAUTION!!! The little metal contact is very fragile. I ripped mine off. Well, when I say ripped I mean I breathed on it.
I would suggest maybe warming that part up before pulling and don’t just pull up from the main ribbon. Work it slowly.
CAUTION!!! that little gold contact got me too!! Please update the instructions to include this.
Did you find out if the home button still works without the rectangular gold contact?
PC Ops -
-
-
-
Heble die Halteklammer des Home Buttons mit einem Plastiköffnungswerkzeug vorsichtig von der Rückseite des Front Panels.
-
Wenn eine Seite der Halteklammer befreit ist, kannst du sie fest anfassen und vom Front Panel abziehen.
I'd recommend using something stronger than double sided tape. I completed this whole repair without too much lasting trouble, but the biggest issue was I didn’t get the home bracket secured firmly enough. A few weeks after the repair, the home button got pressed in and lodged under the hole cut for it, so I can’t unlock my iPad at all (the home button can’t be “pressed” in its current state). So I’m ordering a second screen and have to go through everything again. This time I’m using super glue to get that thing welded on there. If anything breaks in the future, I’m just getting a new iPad.
I don’t see why iFixit does not simply sell an optional iPad screen with a new home button pre-installed - other competing companies do it, and with iFixit’s pro reputation, having a pre-installed option would certainly be an excellent sales option. My 2¢ worth.
The home button that came with your iPad is the only one that will allow touchID to function. This is why this must be migrated from the old to the new screen. Of course, if your iPad does not have touchID, this is not a concern.
Robert -
TIP FOR HOME BUTTON REMOVAL
I found it to be simpler by using the same pry tool shown in the image and pry the tab furthest from the flex cable. Its an easy start knowing that if you damage the cable you can loose Touch ID permanently.
My steps were basically as follows in this specific order:
1. Using a guitar pick, release the cable from the adhesive and SLOWLY lift up the cable and the components with it
2. Once you reach the tabs that hold the home button in place, pry the tab furthest from the flex cable (this requires a little more force)
3. Once the tab furthest from the home button is lifted away, you can hold on to the metal piece (The whole tab) and lift it away safely.
4. Using your finger, press in the home button to release it from the glass and your done.
After replacement m home button works fine, but it’s very loose in the housing. I can tip it around by moving my fingers to the edges. Any ideas what I did wrong?
I had to use far more pressure to remove the bracket than I was comfortable with and when it came loose it went flying. Re-attaching is easy, but I used some hobby glue to secure it in place, so if the screen breaks again, that part is NOT coming off again. I’m guessing because I did this I don’t have the “depressed” issues that others have described, it seems to be like new at this point.
I agree, the bracket needs glueing when refitting. Replaced the glass on my iPad and after a couple of days the home button came loose and stopped working. Now i just broke the glass when opening the iPad to fix the home button bracket. I love my life! :-)
I used a piece of the rectangular section of an adhesive strip cut to the exact size of the home button bracket feet to reattach it to the digitizer for reassembly. It is very strong and worked better than double sided tape or glue.
agree. I did same. Also do not forget to remove protective film from the inner side of the new digitizer. Do it before you start reassembly.
-
-
-
Drücke auf den Home Button von außen her, um den Kleber aufzubrechen der ihn festhält.
Are these last several steps necessary in just replacing the front glass panel that is cracked? my ipad is a wi-fi only
Yes, even if you’re only replacing the front glass panel, you still have to transfer your original home button from the old panel to the replacement. Even if the new panel comes with a new home button, Touch ID will only work with the original home button.
Buy an extra home button adhesive gasket. The adhesive from the original will not be reusable
I second this advice. I skipped it the first time, and the home button was too wiggly (although it worked). Now that I’ve replaced the screen a 2nd time (ugh), this time adding a new gasket, it’s a bit more firm, but still more wiggly than originally. If you don’t mind the button being lose, you probably can reuse the gasket, but if I have to do this again, I’ll probably get another gasket.
Yep, tore mine even as delicate as could be. I would highly recommend hitting the home button with a heat gun prior to attempting to remove. On the plus side, the replacement gaskets are cheap and easy enough to replace.
My screen was damaged in such a way that removing the old gasket didn't tell me how to install the new one.
I completed the reassembly of my digitizer. the process was pretty simple. After reviewing all the feedback and issues mentioned by others, I made sure to properly attach the home button/touch ID to my new screen by carefully installing it and ensuring the gasket was firmly in place. I used a small amount of liquid glue to secure the bracket as well. While everything is working correctly, I did notice that my repair kit came with a new bracket and home button gasket (with adhesive on the parts I used glue- I assume) lol. I clearly didn't utilize that… do you think I’ll be okay? I just hope I won't need to redo the whole process again just for the home button. 🤦🏻♀️ I don’t know how I missed that little baggie…
-
-
-
Entferne die Home Button Einheit.
Nicely done!
Be very careful !!!!
Given the delicacy of this stage, I believe it behooves iFixit to offer a panel replacement option with a new Home button pre-installed.
Others do; with iFixit’s reputation, such a purchase option would be a welcome, stellar addition to its inventory. Yes, you would have to cancel your Touch-ID setting prior to repair, but that’s a small inconvenience to having to negotiate such a procedure. My 2¢ worth.
Thanks, iFixit, for the excellent instructions
I second this - tore the home button cable during disassembly and ordered another home button assembly just to figure out that I need the gasket and holder as well as it was not included. -
Yes - the metal contact on the home button tore… now I have to figure out how to do another repair. Also, my replacement screen comes with plastic on both sides and multiple tabs in different colors. Now I’m too scared to remove those for fear of ripping something.. you should have glass replace directions here too.
Hi sir
Iam try replace ditigizer on iPad 6th gen
Will my home button and finger print if I replace the home to another the home button will if I buy it from you guys
replaced the display with new home button assembly, new gasket, and holder - button works but fingerprint sensor not anymore - It would be great to have detailed instructions for the complete the home button assembly with all the different parts, not only the teardown for reference. - i.e. it seems you need to push the button through the gasket before assembly so the cable leaves inside and the order is glass-button-gasket-holder.
The article explicitly states that the Home Button and the Motherboard are a BONDED PAIR. If you replace one without the other, Touch ID will stop working. This is why the instruction say you have to retain the button.
While I’m a fairly tech savvy person, telling people to reverse the steps is ridiculous—you need to show people what to expect. Second, include the home button on the new screen sale. I’m in the middle of the repair at this point, I’ve given you $100 and this seriously frustrating, especially when the home button you sell (which I had to buy after the screen, because I inadvertently tore off a bit) DOESN”T include the proper adhesive. PS—trying to get the adhesive on the new button is a practice in torture.
I had to notch out the glass adhesive just slightly where bottom right corner of the home button bracket sits against it. It is curved and needed to be squared off to match the bracket. I held the ribbon cable, button and bracket in place with tape before I glued the bracket. I also used a flashlight behind the bracket and button gap to see that the bump on the bracket was lined up with the button’s switch.
I'm quite disappointed the fact that this is a replacement guide but does not include re-assembly steps.
We ordered a new home button and gasket for an iPad 5, which works with the iPad 6 home button as well.
Neither guide has re-assembly instructions for the home button.
My customer service is important and I would like to see better guides that include disassembly and reassembly steps.
I need to know how to properly apply a home button gasket to the home button.
If I am missing something, please let me know.
PS. It's not good practice to use metal tools so close to the main board. An insolated pair would be more ideal.
The small black dot on the home button microswitch comes off no matter how careful you are. Home button will not work properly if you loose the black dot. I have done 5-6 repairs and on 4 of them the black dot just fell off. I have been successful using a small piece of Kapton tape and reinstalling the black dot in the center of the home button microswitch.
I also removed a metal ring that sits between the gasket and the glass. It has the same shape of the gasket, and it’s glued to the glass after removing the home button assembly. Used a thin double-sided tape with strong glue when reassembling; maybe B7000 glue would be easier.
It's so frustrating seeing these guides that just say “follow these steps in the reverse order" when I'm really searching for a technique and guidance on replacing the rubber gasket and and proper placement of the bracket so it clicks as it should and doesn't sink in.
Agree with previous comments. Would be helpful to go over replacing the button gasket, and the actual reassembly instead of just ‘reverse order’.
it would be nice to see how to re assemble when to pull backing off glue, how to add grommet, how to bend new wires in place to seat correctly
Would I be able to use the new replacement home button as to go back to home page? Or is it just going to he for the decoration?
I needed 6 hours for
1) removing the cracked display glass with a scalpell,
2) to remove the glue with glue remover,
3) to install a new home button (because I cutted the homebutten flex-cable) and
4) to glue the touchdisplay (digitizer) with T7000 diplay glue!!!. The delivered glueband on the digitizer shouldn't be used, because it is to weak.
There is a HowTo missing to install a new home button. I also didn't found a new homebutton from iFixit. So I had to buy it somewere else.
-
Um dein Gerät wieder zusammenzusetzen, folge den Schritten in umgekehrter Reihenfolge.
Um dein Gerät wieder zusammenzusetzen, folge den Schritten in umgekehrter Reihenfolge.
Rückgängig: Ich habe diese Anleitung nicht absolviert.
28 weitere Nutzer:innen haben diese Anleitung absolviert.
Besonderer Dank geht an diese Übersetzer:innen:
100%
Diese Übersetzer:innen helfen uns, die Welt zu reparieren! Wie kann ich mithelfen?
Hier starten ›
13 Kommentare
Hi. What happens if home button cable is broken? Can i use a home button from an ipad air 1?
The iPad 5 home button bracket that you order seems to be different from the original one I took off the iPad. Has anyone else noticed this? I also can’t get the button to work correctly with the new bracket.
yes i just ran across this. If seems the ones that come pre equipped are different. when attached i could not get it to respond back to home.. Touch id i get but no return to home im stumped on. ivfe just purchased the replacement home button to find that it seems a bit off aswell. The rear holding bracket doesnt seem to press against the button allowing you to push it back thru from the front of the ipad. I will update further once i complete this job. BR
A small metal slug is on the back of the original home button bracket, the slug can be removed carefully with pliers. Insert button into new digitiser and place slug on top of switch. You may need to remove the dust shield on the home button to get the spacing right for the switch, test before assembly, with a pin apply super glue to rear of slug and fit new bracket this should ensure the slug stays put. You general can’t use the old bracket as it has different spacing.
Have replaced the digitiser and lcd in a 5th gen iPad and using the original home button and back bracket. However the home button is not staying in place as the original adhesive was left on the broken digitiser and I couldn’t retrieve it. How do I get the home button to stick to the new digitiser?
I am trying to figure this out too
So how is the home button supposed to be attached to a new glass? Kit didn’t mention anything about that.
the home button bracket…
Disregard….. solved my issue.


