Schritt 14 übersetzen


-
Start by disconnecting everything, cables, battery, etc.
-
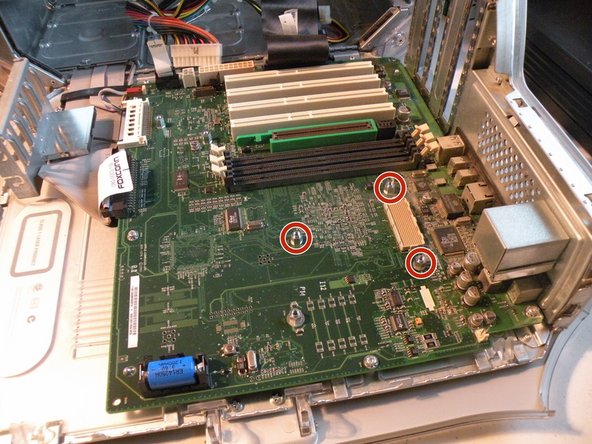
There are three hex-shaped screws holding the board, which are right where the CPU was. These also provide the screw holes to screw and hold the CPU. Use an English 1/4" size socket to remove these three screws left behind from the CPU.
-
Then remove the 4 screws which are located around the edge of the board. If you have less than 4 screws, don't worry too much, if you don't have trouble removing the board at the next step, then you are fine.
-
Now, slide the logic board away from the rear of the case about 1/2 inch, and lift it out. It should not be difficult to pull out or up, if it is, go back, and make sure you have removed all screws. I did, however, have to pull out towards the front, then up, then back towards the back of the case before I could completely remove the board.
Deine Beiträge sind lizenziert unter der Open-Source Creative Commons Lizenz.