Einleitung
Do you need to replace the battery for your 8BitDo Ultimate Wireless? If so, this guide will show you how to correctly and safely do so!
With that said, please make sure to check our Troubleshooting Guides first. Often times, there is no need to go as far to make a battery replacement.
Before beginning, turn off the controller and ideally make sure that it won't accidentally reconnect.
Was du brauchst
-
-
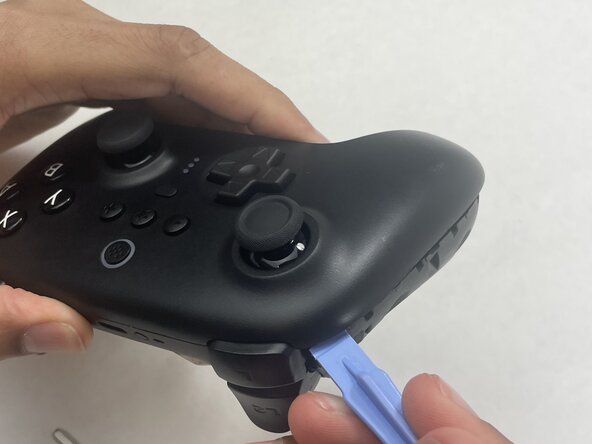
Insert an opening pick into the seam between the left controller grip and main controller body.
-
Pry the grip off.
-
Repeat for the right grip.
 Frag FixBot
-
-
-
Remove the six 8 mm T6 Torx screws securing the rear case to the front case.
-
-
-
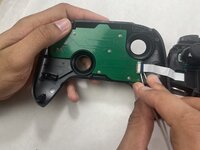
Insert an opening tool into seam at the bottom of the device and carefully pry the front and back shells apart.
-
Set the halves next to each other with care not to strain the connected ribbon cables.
-
-
-
-
The ribbon cable is secured with a locking tab connector.
-
Use tweezers to unlock the locking tab on the ribbon cable connector, then gently disconnect the ribbon cable.
-
-
-
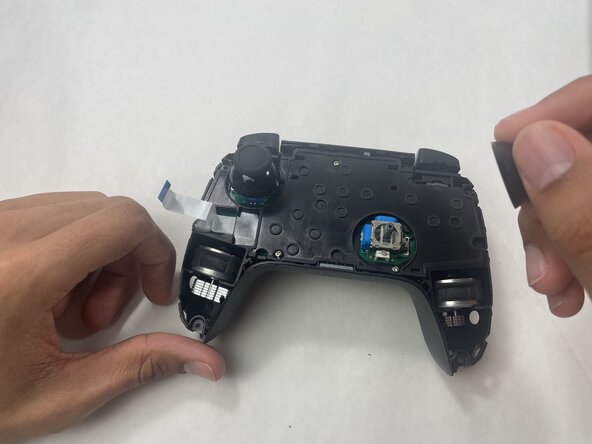
Grip each analog stick cap firmly and pull straight up to remove them.
-
-
-
Remove the three 5 mm Phillips #00 screws securing the midframe to the back shell, then lift it straight out.
-
-
-
Remove the two 1 mm Phillips #00 screws securing the plastic battery cover to the circuit board, then lift the plate away to expose the battery.
-


To reassemble your device, follow the above steps in reverse order.
For optimal performance, after completing this guide, calibrate your newly installed battery.
Take your e-waste to an R2 or e-Stewards certified recycler.
Repair didn’t go as planned? Try some basic troubleshooting or ask our Answers community for help.
Team

UMass Dartmouth, Team 1-3, Biswokarma Spring 2026 Mitglied von UMass Dartmouth, Team 1-3, Biswokarma Spring 2026
UMASSD-BISWOKARMA-S26S1G3
5 Mitglieder
5 Anleitungen geschrieben