ASUS ROG G46VW Motherboard Replacement
Einleitung
Zu Schritt 1 der AnleitungKeep close track of your screws and where they came from while disassembling due to the number of screws that are going to be removed in this guide.
Was du brauchst


-
-
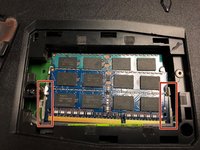
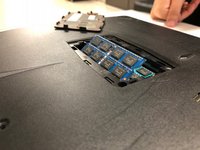
Push outwards on the clips to release the RAM stick. The stick should pop up at an angle.
-
-
-
-
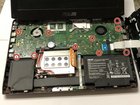
Remove all of the screws from the bottom of the case.
-
If replacing the screen, remove the rubber feet to reveal two more screws.
-
-
In diesem Schritt verwendetes Werkzeug:Tweezers$4.99
-
Use tweezers to remove golden screw caps.
-
-
-
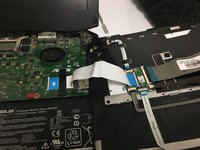
With the motherboard exposed, locate the Indicator Lights and their white plastic housing piece.
-
-
-
Remove all 3 screws from the motherboard connection using the Phillips #0 screwdriver.
-
Pull the plastic white housing piece away from the case.
-
-
-
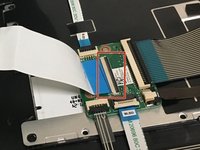
Locate the flat LED cable that connects the lights to the motherboard.
-
Flip the black cover upwards before pulling on the cable.
-
Repeat for the other connector piece.
-
-
-
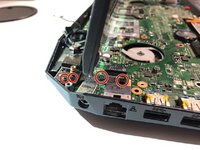
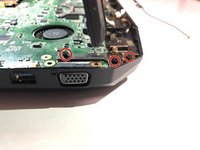
Locate and remove the screws.
-
Removing the screws allows you to lift up the motherboard
-
-
-
After lifting the motherboard up you can replace any component on it, such as the fans.
-


To reassemble your device, follow these instructions in reverse order.
To reassemble your device, follow these instructions in reverse order.
Rückgängig: Ich habe diese Anleitung nicht absolviert.
2 weitere Personen haben diese Anleitung absolviert.
Team

University of North Texas, Team S6-G3, Thompson Fall 2018 Mitglied von University of North Texas, Team S6-G3, Thompson Fall 2018
UNT-THOMPSON-F18S6G3
4 Mitglieder
13 Anleitungen geschrieben