Zum Hauptinhalt wechseln
Acer Aspire 5742G Memory stick Replacement

Acer Aspire 5742G Memory stick Replacement

Petter Berget

Petter Berget und 2 weitere Mitwirkende

Zuletzt aktualisiert am December 29, 2022

5 Minuten
Sehr einfach
Anleitung eines Community-Mitglieds

Just as simple as it gets! to work on a laptop, well there you have the Acer Aspire 5742G and the easiest job to change memory sticks!

Was du brauchst

Werkzeuge

Einführungsvideo

click here for video

  1. Acer Aspire 5742G Memory stick Replacement, Memory stick: Schritt 1, Bild 1 von 1
    • Make sure your computer is off and remove the battery with the security tabs shown in the picture

  2. Acer Aspire 5742G Memory stick Replacement: Schritt 2, Bild 1 von 1
    • Remove these philips screws, only two :)

  3. Acer Aspire 5742G Memory stick Replacement: Schritt 3, Bild 1 von 2 Acer Aspire 5742G Memory stick Replacement: Schritt 3, Bild 2 von 2
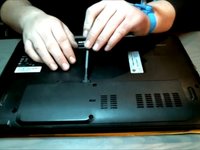
    • Then from the dented tab, either your finger, card or spudger will work, and start prying GENTLY!

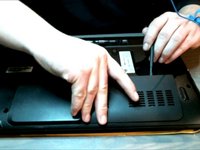
    • Easily work your way around.

    • WARNING! PLASTIC TABS! be careful not to break them!

  4. Acer Aspire 5742G Memory stick Replacement: Schritt 4, Bild 1 von 1
    • Now you've removed the cover, you will get access to your Antenna, HDD, and RAM

    • Please remove both tabs with the memory stick at the same time

  5. Acer Aspire 5742G Memory stick Replacement: Schritt 5, Bild 1 von 1
    • Now put the new memory stick in!

    • When it is in, then gently push it downwards to lock it in place!

    • Be aware you have to line up the stick with a pin in the socket!!

Abschluss

To reassemble your device, follow these instructions in reverse order.

2 weitere Personen haben diese Anleitung absolviert.

Team

Kid fixers Mitglied von Kid fixers

Community

184 Mitglieder

256 Anleitungen geschrieben

0 Kommentare

Kommentar hinzufügen

Seitenaufrufe:

Letzte 24 Stunden: 0

Letzte 7 Tage: 3

Letzte 30 Tage: 4

Insgesamt: 856