
Acer Chromebook Spin 511 (C741L) N20Q8 Display Assembly Replacement

Einleitung
Zu Schritt 1 der AnleitungIf your Acer Chromebook (Spin 511 C741L N20Q8) screen is turning off, has dead pixels, or will not display anything, the screen may be broken or defective. In order to display images again, the display assembly may need to be replaced.
Before beginning, ensure that the device is powered off and disconnected from any external sources. Then, follow these steps to replace your display assembly.
Was du brauchst


-
-
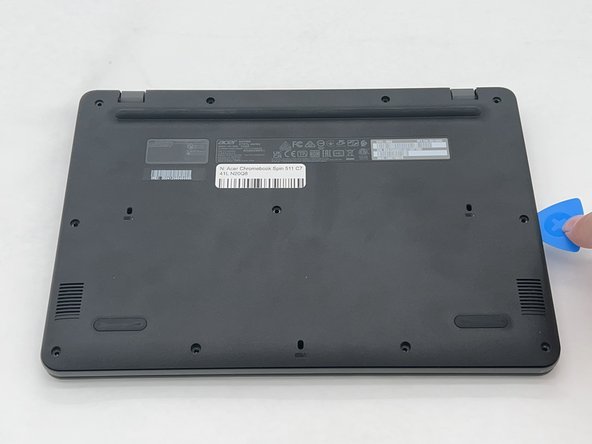
Remove the eleven 2.4 mm screws securing the back plate and internals of the Chromebook using a Phillips #1 screwdriver.
-
-
-
Use an opening pick to remove the backplate of the laptop revealing the internals of the Chromebook.
-
-
-
Remove the six 2.4 mm screws from the hinges using a Phillips #1 screwdriver.
-
-
-
-
Flip up the hinges on each side that were previously secured down by the screws.
-
-
-
Remove the electrical tape from the black connector and gently remove it from the socket.
-
-
-
The base and display assembly are now able to be separated. Simply pull and remove the display assembly from the base of the laptop.
-


To reassemble your device, follow these instructions in reverse order.
To reassemble your device, follow these instructions in reverse order.
Team

University of North Texas, Team 4-3, Harold Fall 2024 Mitglied von University of North Texas, Team 4-3, Harold Fall 2024
UNT-HAROLD-F24S4G3
4 Mitglieder
5 Anleitungen geschrieben