Acer Iconia Tab A501 Battery Replacement
Einleitung
Zu Schritt 1 der AnleitungBatteries tend to lose capacity over time as they are used and eventually fail. If your battery won’t hold a charge or can’t power your device, you may decide to replace the battery. This guide will demonstrate battery replacement for the Acer Iconia Tab A501.
Was du brauchst
Werkzeuge
Mehr anzeigen …
-
-
Use a plastic opening tool to carefully separate the back cover, starting at the volume buttons.
-
Continue separating the back cover along the short side closest to the camera and around the device.
-
-
-
When separated enough, a little more than halfway around the device, the back cover will be easy to take off.
-
-
-
-
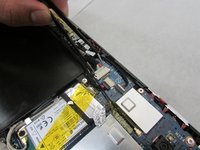
Take off any tape covering the battery or black battery-motherboard cable.
-
-
In diesem Schritt verwendetes Werkzeug:Tweezers$3.99
-
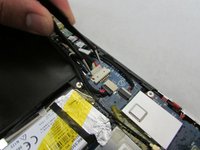
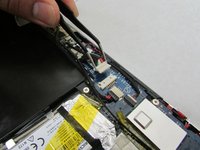
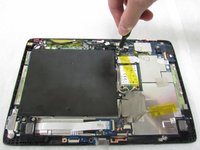
Use the angled tweezers to disconnect the white motherboard-battery connector in the middle of the side opposite the docking port.
-
-
-
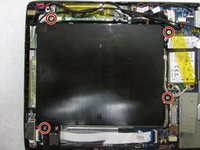
Use a Phillips #1 screwdriver to remove the four 4.0 mm Philips head screws connecting the battery to the motherboard.
-
To reassemble your device, follow these instructions in reverse order.
To reassemble your device, follow these instructions in reverse order.
Rückgängig: Ich habe diese Anleitung nicht absolviert.
Eine weitere Person hat diese Anleitung absolviert.


