
Asus G750JW-BBI7N05 Left and Right Speaker Bar Replacement
Einleitung
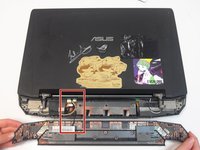
Zu Schritt 1 der AnleitungThe left and right speaker bar is located underneath the hinge cover at the back of the laptop. Follow the steps in this guide to replace it.
Was du brauchst


-
-
Slide the battery release latch all the way to the right. This will cause the battery to "pop" out slightly.
-
-
-
-
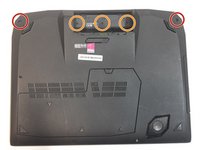
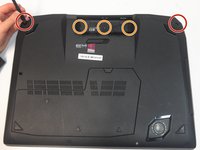
Remove the rubber stoppers in the top left and right corners to expose two 9mm Phillips #00 screws. Unscrew and remove them.
-
Unscrew and remove the three 4mm Phillips #00 screws inside the battery compartment.
-
-
-
Carefully turn the laptop right-side up.
-
Using an opening tool, pry the outer edges of the hinge cover up and away from the laptop.
-
-
-
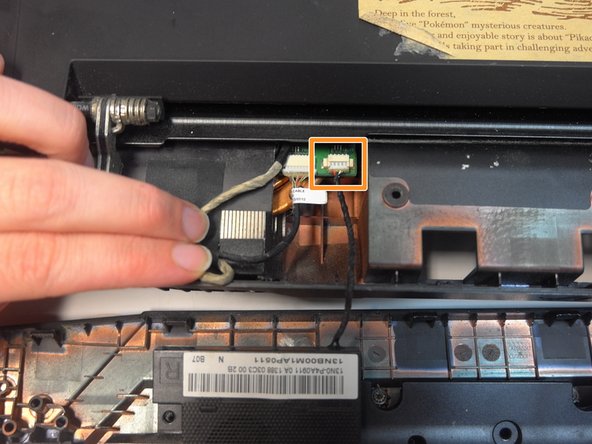
Without disconnecting the speaker cable, set the hinge cover upside-down.
-
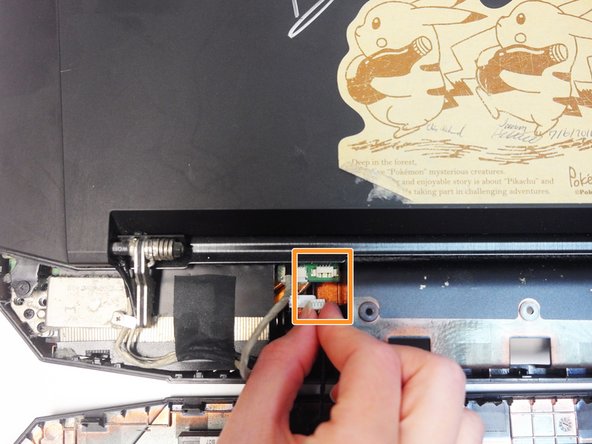
Hold the speaker cable by its white connector, then pull to unplug it from the motherboard.
-
-
-
The speaker is attached to the hinge cover by four 3.5mm Phillips #00 screws. Unscrew and remove them.
-


To reassemble your device, follow these instructions in reverse order.
To reassemble your device, follow these instructions in reverse order.
Rückgängig: Ich habe diese Anleitung nicht absolviert.
3 weitere Personen haben diese Anleitung absolviert.
Team

Portland State University, Team S1-G1, Read Fall 2017 Mitglied von Portland State University, Team S1-G1, Read Fall 2017
PSUN-READ-F17S1G1
2 Mitglieder
3 Anleitungen geschrieben