Zum Hauptinhalt wechseln

Asus ROG G53SW-XT1 RAM Replacement

Was du brauchst

  1. Asus ROG G53SW-XT1 RAM Replacement, Battery: Schritt 1, Bild 1 von 1
    • Unplug the power cable and flip the computer over.

  2. Asus ROG G53SW-XT1 RAM Replacement: Schritt 2, Bild 1 von 1
    • Unlock the battery by pushing the switch to the right.

  3. Asus ROG G53SW-XT1 RAM Replacement: Schritt 3, Bild 1 von 2 Asus ROG G53SW-XT1 RAM Replacement: Schritt 3, Bild 2 von 2
    • Push and hold the left switch, then pull the battery out.

  4. Asus ROG G53SW-XT1 RAM Replacement, Back Panel: Schritt 4, Bild 1 von 3 Asus ROG G53SW-XT1 RAM Replacement, Back Panel: Schritt 4, Bild 2 von 3 Asus ROG G53SW-XT1 RAM Replacement, Back Panel: Schritt 4, Bild 3 von 3
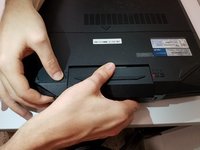
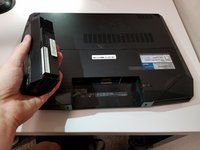
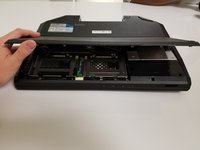
    • Insert your screwdriver into the locking mechanism and slide it to the left. This will unlock the hand rest and allow you to pull it free.

  5. Asus ROG G53SW-XT1 RAM Replacement: Schritt 5, Bild 1 von 1
    • Remove the fourteen Phillips #0 screws.

  6. Asus ROG G53SW-XT1 RAM Replacement: Schritt 6, Bild 1 von 2 Asus ROG G53SW-XT1 RAM Replacement: Schritt 6, Bild 2 von 2
    • Flip the laptop over and pull off the bottom cover.

  7. Asus ROG G53SW-XT1 RAM Replacement, RAM: Schritt 7, Bild 1 von 1
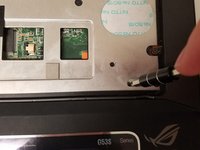
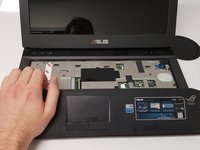
    • Push the metal tabs at the side of the RAM away from one another.

    • The RAM should pop up.

    • Pull the RAM out.

Abschluss

To reassemble your device, follow these instructions in reverse order.

Ein:e weitere:r Nutzer:in hat diese Anleitung absolviert.

sia

Mitglied seit: 02/21/18

127 Reputation

1 Anleitung geschrieben

Team

0 Kommentare

Kommentar hinzufügen

Seitenaufrufe:

Letzte 24 Stunden: 1

Letzte 7 Tage: 3

Letzte 30 Tage: 12

Insgesamt: 494