Einleitung
If your Asus ROG G752V has lost its ability to hold a charge, you most likely have a dead/faulty battery which would require replacement.
A functional battery provides power to your laptop. Eventually, the laptop battery will rapidly drain after going through a repeated amount of charge cycles. If you notice that your charged battery is draining more quickly than usual, consider calibrating your battery to determine an accurate charging capacity. If you continue to notice significant drops in battery percentage, you should replace your battery.
A punctured battery can cause a dangerous fire. If your battery is swollen, take appropriate precautions.
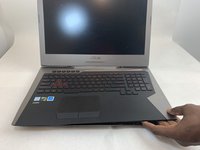
Before you begin to use this guide, make sure to power off your Asus ROG G752V completely and disconnect from any external power source.
Was du brauchst
-
In diesem Schritt verwendetes Werkzeug:Tweezers$4.99
-
Pick out all 11 rubber plugs off of the back cover with a pair of tweezers.
-
-
-
Using the Phillips #0 screwdriver, unscrew all twelve 5.2 mm screws on the back of the laptop.
-
-
-
Using the Phillips #00 screwdriver, remove the six 5.2 mm screws under the service cover.
-
-
-
-
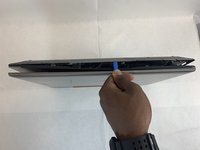
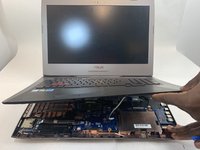
Use the iFixit Opening Tool to pry apart the back panel from the main body of the laptop.
-
-
-
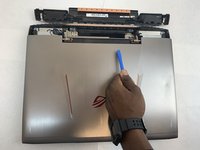
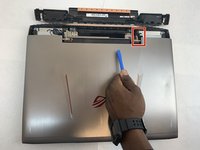
Remove the hinge on the back of the laptop cover using the iFixit Opening Tool. The piece should pop off.
-
-
-
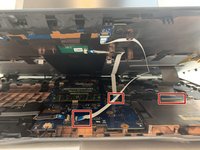
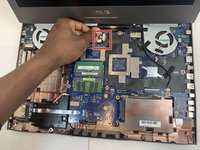
Using an ESD safe tool, detach all 3 ribbon cables securing the keyboard to the laptop.
-
-
-
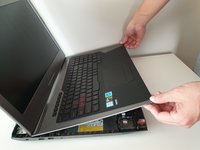
Once the cables are detached, lift the keyboard about 2 inches up and remove it from the rest of the body.
-
-
-
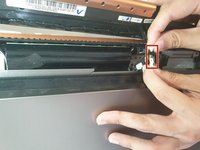
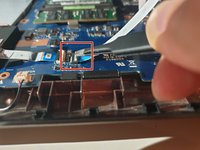
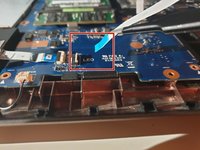
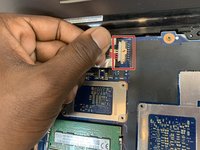
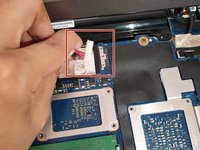
Disconnect the battery cable from its motherboard socket by gently pulling it towards the left of the socket.
-
-
-
Remove two 5.8 mm screws holding the screen and the laptop located at the hinge.
-
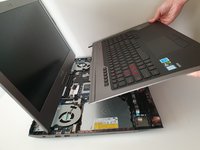
Remove the screen.
-


To reassemble your device, follow these instructions in reverse order.
For optimal performance, after completing this guide, calibrate your newly installed battery.
Take your e-waste to an R2 or e-Stewards certified recycler.
Repair didn’t go as planned? Try some basic troubleshooting, or ask our Answers community for help.
Rückgängig: Ich habe diese Anleitung nicht absolviert.
14 weitere Personen haben diese Anleitung absolviert.
Team

Embry-Riddle Aeronautical University, Team S2-G36, Watkins Fall 2019 Mitglied von Embry-Riddle Aeronautical University, Team S2-G36, Watkins Fall 2019
ERAU-WATKINS-F19S2G36
4 Mitglieder
7 Anleitungen geschrieben
10 Kommentare
The second set of wires going to the battery (shown on the right side between the tech's thumb and forefinger in the picture at the step where you remove the battery) are attached to a strip glued to the back of the battery. I believe it is a temperature sensor of some kind. Carefully peel it off the old battery, being careful not to bend it and press it to onto the new battery. There are two holes in the sensor strip, on at the right in the corner, another at the left end in the center. On the battery, there are two very small, hard to see alignment points to fit into those holes.
I see where Rich C says it's part of an LED strip. I didn't look at it closely.
Greg S. -
Thanks for this write up, excellent job. As Mickey mentioned, there is a second connection, from the side of the existing battery. This is actually part of an LED strip that is secured to the battery with an adhesive strip. Some models have this glowing back panel. I used a filet knife to pop the LED panel off the old battery and then tack it on the new one.
My lap top bears no relation to this but it is a UK spec laptop so may differ. I will need to purchase a kit from iFixit before I embark on replacing the battery in my laptop