
Asus ROG Strix GL702VS LCD Screen (Display) Replacement

Einleitung
Zu Schritt 1 der AnleitungThis is a step by step process for the replacement or repair of the LCD screen on your Asus ROG Strix GL702VS laptop. If you are experiencing dead pixels or a cracked screen, follow these steps to remove the screen and replace it.
Before fully reassembling, try powering on the computer to ensure all cable connections are working.
Was du brauchst


-
-
Remove the two screw stickers at the bottom corners of the screen.
-
Remove the two 4mm JIS #0 screws beneath the stickers.
-
-
-
Break the glue between the bezel and screen with a nylon spudger, working around the inside of the bezel.
-
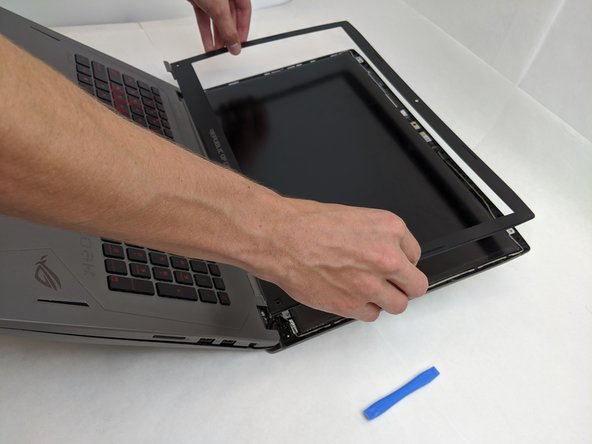
Using an opening tool, lift up the bezel once the glue has been removed.
-
-
-
-
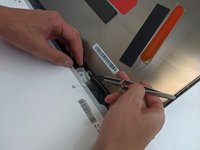
Remove the four interior 4mm JIS #0 screws from each of the four metal LCD tabs.
-
-
In diesem Schritt verwendetes Werkzeug:Tweezers$4.99
-
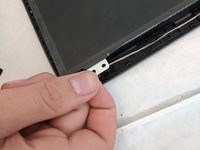
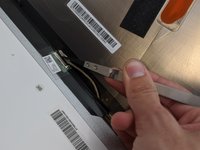
On the backside of the LCD, disconnect the LCD cable using a pair of tweezers.
-
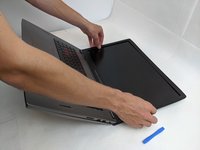
Once fully disconnected, remove the LCD and replace it.
-


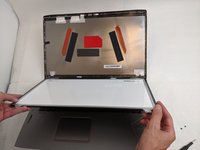


To reassemble your device, follow these instructions in reverse order.
To reassemble your device, follow these instructions in reverse order.
Rückgängig: Ich habe diese Anleitung nicht absolviert.
Eine weitere Person hat diese Anleitung absolviert.

Team

Embry-Riddle Aeronautical University, Team S8-G6, Salas Fall 2019 Mitglied von Embry-Riddle Aeronautical University, Team S8-G6, Salas Fall 2019
ERAU-SALAS-F19S8G6
4 Mitglieder
7 Anleitungen geschrieben