
Canon EOS 60D Rear LCD Screen Replacement

Einleitung
Zu Schritt 1 der AnleitungIf you drop the camera and break the LCD screen, or if the screen just stops functioning, this guide will help you replace it.
Be sure to use a magnetic mat or small container for your screws, as they are very small and easy to misplace.
Was du brauchst
Werkzeuge


Mehr anzeigen …
-
-
Take the LCD out of its place to expose the Phillips #PH00 screws.
-
Remove the two 2.5 mm Phillips #PH00 black screws on both sides of the LCD screen.
-
Next remove the two 3 mm Phillips #PH00 black screws near both sides of the base where the screen swivels.
-
-
-
-
Remove the 3 mm Phillips #PH00 silver screw on the side of the screen.
-
Turn the screen to remove the second 3 mm Phillips #PH00 silver screw.
-
-
In diesem Schritt verwendetes Werkzeug:Tweezers$4.99
-
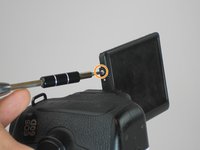
Using the tweezers, carefully disconnect the rear connector by pulling it away from the screen.
-
-
-
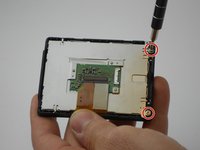
Remove the two 2.5 mm Phillips #PH00 silver screws using the PH00 screwdriver.
-
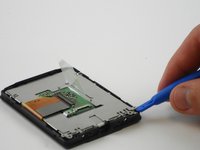
Using the plastic Spudger opening tool, carefully lift up on the medal tabs next to where the screws were located.
-
-
-
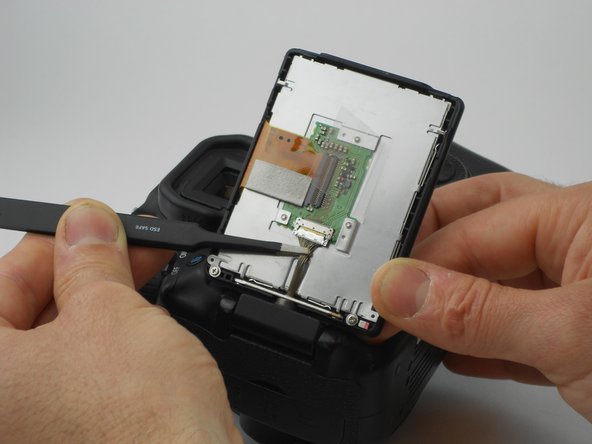
Finally, remove the LCD screen by grabbing the clear plastic tab and lifting it carefully.
-


To reassemble your device, follow these instructions in reverse order.
To reassemble your device, follow these instructions in reverse order.
Rückgängig: Ich habe diese Anleitung nicht absolviert.
3 weitere Personen haben diese Anleitung absolviert.

Team

USF Tampa, Team 16-6, Wollert Fall 2015 Mitglied von USF Tampa, Team 16-6, Wollert Fall 2015
USFT-WOLLERT-F15S16G6
3 Mitglieder
14 Anleitungen geschrieben