
Casio CZ-1000 Barrel Plug Replacement
Einleitung
Zu Schritt 1 der AnleitungUse this guide to replace the barrel plug on your Casio CZ-1000 synthesizer. The barrel plug is an essential component that connects your device to its power source. Over time, it may wear out, become damaged, or lose its connection, causing power issues. This step-by-step guide will walk you through the replacement process, ensuring your synthesizer can function properly again. You’ll need to know how to use basic tools like a soldering iron and a lint-free cloth, as well as some patience if you are new to soldering.
Was du brauchst
Werkzeuge


Mehr anzeigen …
-
-
Use a Phillips #1 screwdriver to remove the eleven 7.5 mm screws securing the back plate.
-
-
-
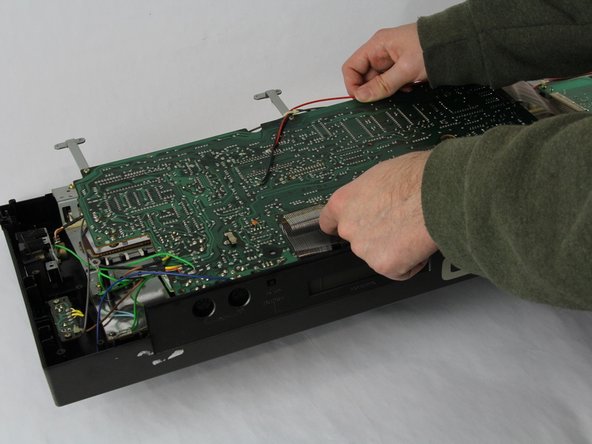
Using a Phillips #1 screwdriver, remove all 14 5.5 mm screws from the two motherboards.
-
-
-
-
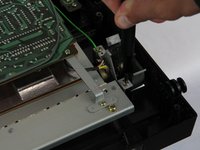
Carefully cut the zip tie located in the right-hand corner using a pair of scissors or wire cutters.
-
Gently slide all the plugs out of their sockets.
-
-
-
Clean the area around the barrel plug on the board using a lint-free cloth or a paper towel to remove dust or debris.
-
-
-
Hold the soldering iron against the solder joint for a few seconds to melt it, then gently pull the barrel plug out while the solder is liquid.
-


To reassemble your device, follow these instructions in reverse order.
To reassemble your device, follow these instructions in reverse order.
Team

Cuesta, Team 60-3, Krynen Fall 2024 Mitglied von Cuesta, Team 60-3, Krynen Fall 2024
CUESTA-KRYNEN-F24S60G3
4 Mitglieder
5 Anleitungen geschrieben