
Cricut Explore Air 2 Roller Bar Motor Replacement

Einleitung
Zu Schritt 1 der AnleitungIf you need to replace the roller bar motor, use this guide to access it. If the roller bar begins to malfunction or stops rolling altogether, the motor could be the cause. For this repair, you will need Phillips #1 and #2 screwdrivers or screwdriver bits. There are no difficult steps, but some are delicate and require particular care and attention.
Was du brauchst


-
-
With the Cricut open, access the two internal screws on the front left side.
-
Use the Phillips #1 screwdriver to remove the top 10.82 mm screw and the bottom 9.1 mm screw.
-
-
-
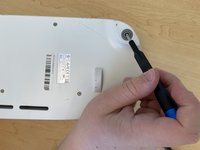
Rotate the Cricut so the bottom is facing upwards.
-
Identify the two screws with pads.
-
Using the Phillips #2 screwdriver, remove both 42.77 mm screws.
-
-
-
Rotate the Cricut back to its upright position.
-
Gently lift the cover on the left side of the machine to reveal the parts underneath.
-
-
-
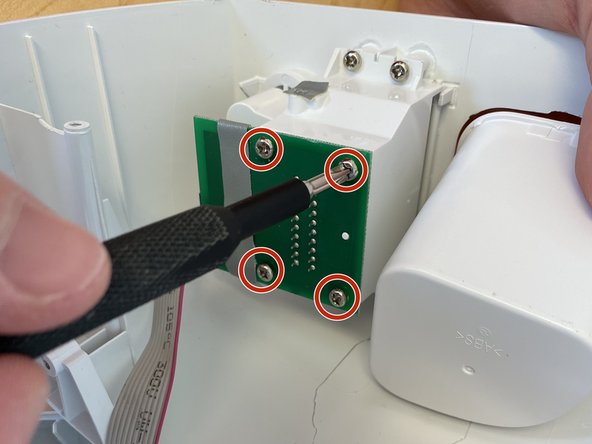
Locate the circuit board on the cover just removed.
-
Use the Phillips #1 screwdriver to unscrew each of the four 10 mm screws.
-
-
-
-
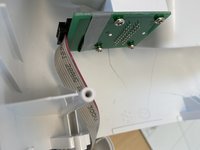
Locate the three screws securing the plate holding the roller bar motor to the Cricut.
-
Use the Phillips #1 screwdriver to remove each of the three 5 mm screws.
-
-
-
Locate the two screws holding the roller bar motor to the mounting plate.
-
Use the Phillips #1 screwdriver to remove the two 2 mm screws.
-


To reassemble your device, follow these instructions in reverse order.
To reassemble your device, follow these instructions in reverse order.

Team

Western Carolina University, Team 1-1, Virtue Spring 2024 Mitglied von Western Carolina University, Team 1-1, Virtue Spring 2024
WCU-VIRTUE-S24S1G1
4 Mitglieder
5 Anleitungen geschrieben