Zum Hauptinhalt wechseln
Dell Inspiron 13-7353 Fan Replacement

Dell Inspiron 13-7353 Fan Replacement

Stephany Marin Restrepo

Stephany Marin Restrepo und 7 weitere Mitwirkende

Zuletzt aktualisiert am June 10, 2022

8 Minuten
Mittel
Anleitung eines Community-Mitglieds
Bessere Einleitung

If you notice your laptop is overheating, then this guide may be able to help. This guide will show you how to replace the fan in a few steps.

Was du brauchst

Werkzeuge

Mehr anzeigen …

  1. Dell Inspiron 13-7353 Fan Replacement, Flip the Computer: Schritt 1, Bild 1 von 1
    • WARNING: Please read the safety information shipped with your computer and follow recommended steps before working inside your computer. When finished working inside your computer, follow the instructions included in the safety information.

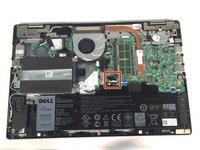
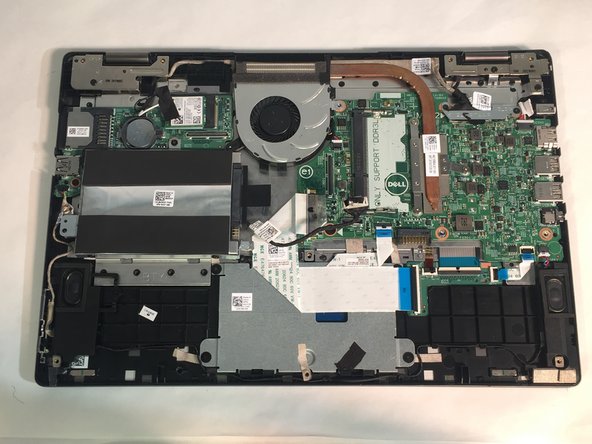
    • Close the computer display and turn the computer over so that the base of the computer is facing up.

  2. Dell Inspiron 13-7353 Fan Replacement, Secure the Base: Schritt 2, Bild 1 von 1
    • Remove the ten screws that secure the base cover to the base of the computer.

  3. Dell Inspiron 13-7353 Fan Replacement, Pry the Base cover: Schritt 3, Bild 1 von 1
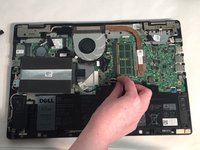
    • Using a plastic scribe (plastic opening tool), pry the base cover off of the base of the computer.

  4. Dell Inspiron 13-7353 Fan Replacement, RAM: Schritt 4, Bild 1 von 2 Dell Inspiron 13-7353 Fan Replacement, RAM: Schritt 4, Bild 2 von 2
    • Before opening your device, ensure that all data is backed up on a hard drive to prevent data loss.

    • Loosen and then unplug the hard drive cable.

  5. Dell Inspiron 13-7353 Fan Replacement: Schritt 5, Bild 1 von 2 Dell Inspiron 13-7353 Fan Replacement: Schritt 5, Bild 2 von 2
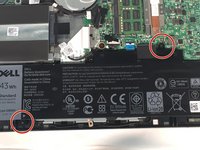
    • Remove the two M2 3mm screws attaching the battery using the Phillips #1 screwdriver.
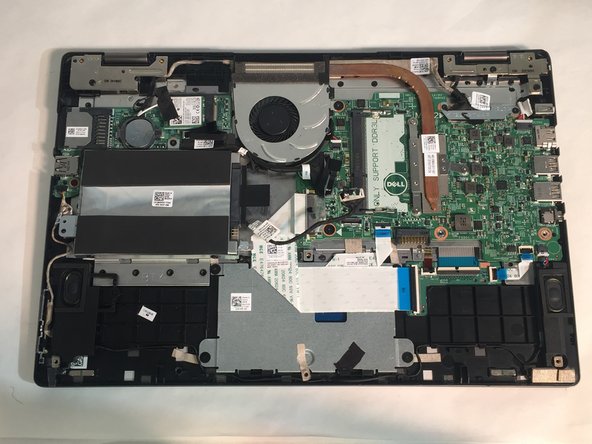
    • Remove the battery.

  6. Dell Inspiron 13-7353 Fan Replacement: Schritt 6, Bild 1 von 3 Dell Inspiron 13-7353 Fan Replacement: Schritt 6, Bild 2 von 3 Dell Inspiron 13-7353 Fan Replacement: Schritt 6, Bild 3 von 3
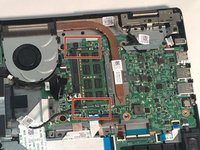
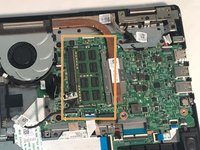
    • Pry open the two clips.

    • Gently lift the RAM stick and pull it out of the motherboard.

  7. Dell Inspiron 13-7353 Fan Replacement, Fan: Schritt 7, Bild 1 von 3 Dell Inspiron 13-7353 Fan Replacement, Fan: Schritt 7, Bild 2 von 3 Dell Inspiron 13-7353 Fan Replacement, Fan: Schritt 7, Bild 3 von 3
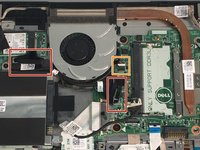
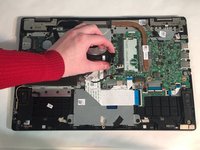
    • Unplug the daughterboard cable in two places, then remove the daughterboard.

    • Unplug the fan cable.

  8. Dell Inspiron 13-7353 Fan Replacement: Schritt 8, Bild 1 von 2 Dell Inspiron 13-7353 Fan Replacement: Schritt 8, Bild 2 von 2
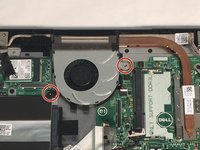
    • Remove two 3mm screws from the cooling fan using the Phillips #1 screwdriver.

    • Remove the cooling fan from the laptop.

Abschluss

To reassemble your device, follow these instructions in reverse order.

2 weitere Personen haben diese Anleitung absolviert.

0 Kommentare

Kommentar hinzufügen

Seitenaufrufe:

Letzte 24 Stunden: 0

Letzte 7 Tage: 2

Letzte 30 Tage: 8

Insgesamt: 714