
Dell Inspiron E1405 Hard Drive Replacement
Einleitung
Zu Schritt 1 der AnleitungUse this guide to help you replace the hard drive in a Dell Inspiron 1305.
Was du brauchst
Werkzeuge

-
-
Flip the laptop over.
-
Locate the battery release switch on the bottom of the laptop.
-
-
-
Slide the battery release switch away from the lock symbol until you hear the battery click.
-
Slide the battery towards the back of the laptop until it comes free.
-
-
-
-
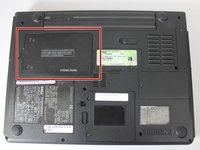
Locate the hard drive access door.
-
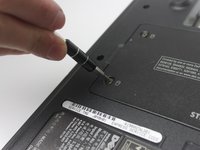
Remove the two 5.5mm screws with a #00 Phillips screwdriver. These screws are securing the hard drive access door.
-
-
-
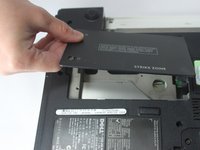
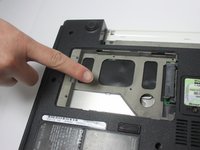
Using your fingers, open and remove the access door from the laptop, exposing the hard drive underneath.
-


To reassemble your device, follow these instructions in reverse order.
To reassemble your device, follow these instructions in reverse order.
Rückgängig: Ich habe diese Anleitung nicht absolviert.
Eine weitere Person hat diese Anleitung absolviert.
Team

Texas Tech, Team S8-G3, Bennett Spring 2017 Mitglied von Texas Tech, Team S8-G3, Bennett Spring 2017
TTU-BENNETT-S17S8G3
3 Mitglieder
5 Anleitungen geschrieben