Zum Hauptinhalt wechseln

Dell Inspiron N4010 Motherboard Replacement

Was du brauchst

  1. Dell Inspiron N4010 Motherboard Replacement, Battery: Schritt 1, Bild 1 von 1
    • Make sure the laptop is not plugged into any wall outlets or the charger

    • Unlock the battery by sliding the right-hand switch to the right.

  2. Dell Inspiron N4010 Motherboard Replacement: Schritt 2, Bild 1 von 2 Dell Inspiron N4010 Motherboard Replacement: Schritt 2, Bild 2 von 2
    • While holding the left-hand switch to the left position, pull the battery away from the laptop.

  3. Dell Inspiron N4010 Motherboard Replacement: Schritt 3, Bild 1 von 1
    • The battery is now fully removed and the laptop will not power on without it.

  4. Dell Inspiron N4010 Motherboard Replacement, Keyboard: Schritt 4, Bild 1 von 3 Dell Inspiron N4010 Motherboard Replacement, Keyboard: Schritt 4, Bild 2 von 3 Dell Inspiron N4010 Motherboard Replacement, Keyboard: Schritt 4, Bild 3 von 3
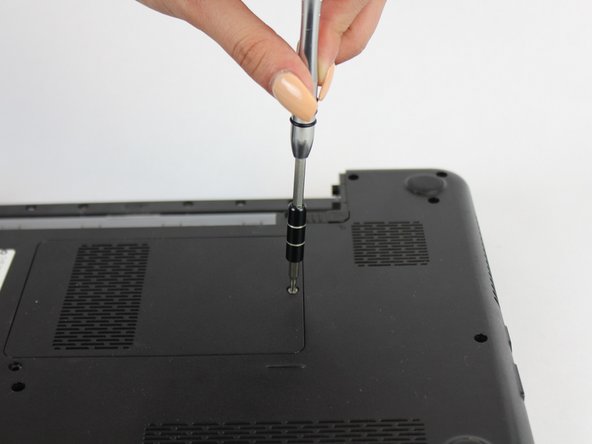
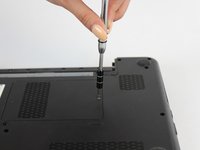
    • Using the #0 Philips head, unscrew the indicated screw.

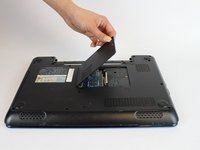
    • Carefully pull the RAM cover up and away.

  5. Dell Inspiron N4010 Motherboard Replacement: Schritt 5, Bild 1 von 1
    • Unscrew the indicated 5.7mm screw beneath the RAM Cover.

    • Remove another screw above the battery release tab

  6. Dell Inspiron N4010 Motherboard Replacement: Schritt 7, Bild 1 von 2 Dell Inspiron N4010 Motherboard Replacement: Schritt 7, Bild 2 von 2
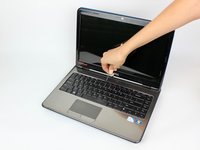
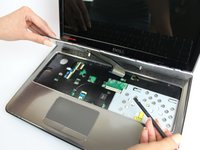
    • Using a thin plastic tool (such as a guitar pick or spudger) at the top of the keyboard just above the F7 key, gently pry the keyboard away.

    • Move the spudger to either end at the top of the keyboard to fully undo all plastic clips.

  7. Dell Inspiron N4010 Motherboard Replacement: Schritt 8, Bild 1 von 2 Dell Inspiron N4010 Motherboard Replacement: Schritt 8, Bild 2 von 2
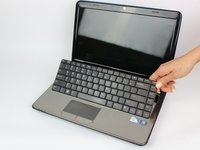
    • Carefully tip the keyboard upwards and pull it slightly away from the body of the laptop.

    • Be careful not to put stress on the ribbon cable below.

  8. Dell Inspiron N4010 Motherboard Replacement: Schritt 9, Bild 1 von 2 Dell Inspiron N4010 Motherboard Replacement: Schritt 9, Bild 2 von 2
    • Carefully unclip the ribbon cable by tipping the keyboard towards the screen.

    • The keyboard is now completely disconnected.

  9. Dell Inspiron N4010 Motherboard Replacement, Top Cover: Schritt 10, Bild 1 von 2 Dell Inspiron N4010 Motherboard Replacement, Top Cover: Schritt 10, Bild 2 von 2
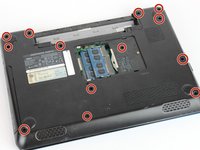
    • Remove the indicated 5.7mm screws.

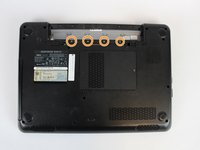
    • Remove the smaller 3mm screws from underneath the battery compartment.

  10. Dell Inspiron N4010 Motherboard Replacement: Schritt 11, Bild 1 von 2 Dell Inspiron N4010 Motherboard Replacement: Schritt 11, Bild 2 von 2
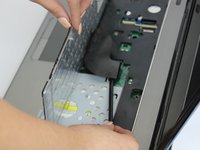
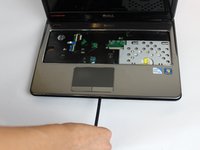
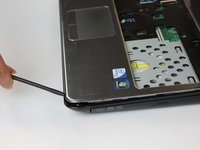
    • With a plastic spudger, pry away the silver top cover from the black casing.

    • Move the tool to the right and left along the seams to fully disconnect the cover.

  11. Dell Inspiron N4010 Motherboard Replacement: Schritt 12, Bild 1 von 1
    • Disconnect the indicated ribbon cables underneath where the keyboard sits.

  12. Dell Inspiron N4010 Motherboard Replacement: Schritt 13, Bild 1 von 1
    • Lift the cover upwards and away from the body of the laptop, after removing the optical drive and unscrewing the three screws on the right

  13. Dell Inspiron N4010 Motherboard Replacement, Fan: Schritt 14, Bild 1 von 2 Dell Inspiron N4010 Motherboard Replacement, Fan: Schritt 14, Bild 2 von 2
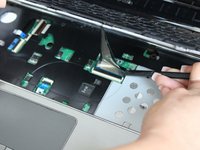
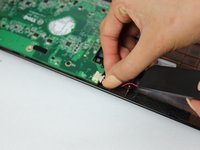
    • Peel back the yellow tape to expose the ribbon connector.

    • Unplug the ribbon cable from the motherboard.

  14. Dell Inspiron N4010 Motherboard Replacement: Schritt 15, Bild 1 von 1
    • Unplug the 3-wire connector from the motherboard.

  15. Dell Inspiron N4010 Motherboard Replacement: Schritt 16, Bild 1 von 1
    • Unscrew the indicated 5.6mm screws with the #0 Phillips Head Screwdriver.

  16. Dell Inspiron N4010 Motherboard Replacement: Schritt 17, Bild 1 von 1
    • Remove the fan from the device.

  17. Dell Inspiron N4010 Motherboard Replacement, Motherboard: Schritt 18, Bild 1 von 2 Dell Inspiron N4010 Motherboard Replacement, Motherboard: Schritt 18, Bild 2 von 2
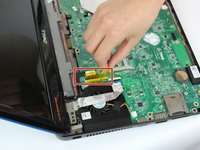
    • Unscrew the two screws on the right hand speaker with the #0 Phillips Head.

    • Unplug the speaker connector from the motherboard.

  18. Dell Inspiron N4010 Motherboard Replacement: Schritt 19, Bild 1 von 1
    • Reaching under the daughter board, disconnect the connector.

    • It will be under the board in the area indicated.

  19. Dell Inspiron N4010 Motherboard Replacement: Schritt 20, Bild 1 von 1
    • Unscrew the indicated 5.6mm screws with a Phillips #0 screwdriver.

  20. Dell Inspiron N4010 Motherboard Replacement: Schritt 21, Bild 1 von 1
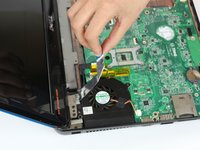
    • The motherboard can now be removed by pulling upwards, tilting it to the left of the laptop until the connectors clear the body of the laptop.

Abschluss

To reassemble your device, follow these instructions in reverse order.

2 weitere Nutzer:innen haben diese Anleitung absolviert.

Team

USF Tampa, Team S13-G5, Boczar Fall 2017 Mitglied von USF Tampa, Team S13-G5, Boczar Fall 2017

USFT-BOCZAR-F17S13G5

5 Mitglieder

9 Anleitungen geschrieben

3 Kommentare

Please before removing the keyboard you should remove all the back screws because a couple of them are attached to the keyboard.

rpmarcolin - Antwort

Also before removing the palm rest, you should remove the 6 M2x3 screws where the battery is located.

rpmarcolin - Antwort

Hi, the top left screw on the motherboard (just to the right of the fan) is different than the others. What type of screwdriver do I need for this one?

Michael del Rio - Antwort

Kommentar hinzufügen

Seitenaufrufe:

Letzte 24 Stunden: 1

Letzte 7 Tage: 1

Letzte 30 Tage: 17

Insgesamt: 1,866