
HP Compaq NC6120 Mouse Pad Replacement
Einleitung
Zu Schritt 1 der AnleitungReplacing the mouse pad may be necessary when the cursor begins to respond sluggishly to movements. This can be done fairly easily after the laptop has been opened up.
Was du brauchst


-
-
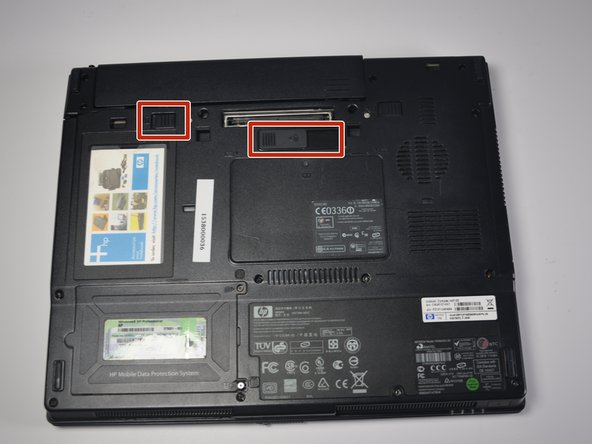
Flip laptop so the backside is facing upwards.
-
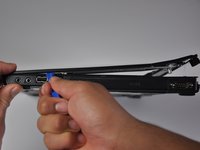
Pull the two plastic switches at the top of the backside of the computer outwards, and remove the battery.
-
-
-
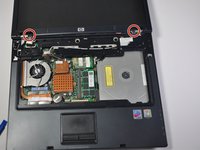
Remove all 13 screws from the back panel of the computer (includes the two torx screws under the battery and the two under the ram memory panel).
-
Remove the four screws at the hinge of the computer (also attaching the back panel to the rest of the computer).
-
-
-
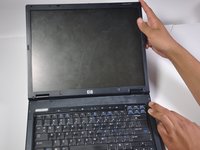
Open up the laptop so that the screen is facing towards you. Push the monitor back until it is flat, parallel to the keyboard.
-
-
-
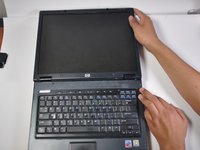
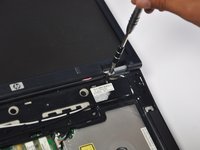
Using the iFixit opening tool, remove the plastic panel located between the keyboard and monitor. It should pop off easily with the spudger and can then be pulled away.
-
-
-
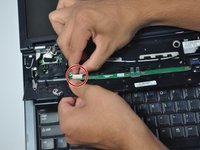
Remove the white cable attached to the just-removed plastic panel from the motherboard.
-
-
-
Flip the keyboard away from the monitor, rotating it so that the keys are face down on the mousepad. Remove the black cord at the bottom of the keyboard that connects it to the motherboard. The keyboard is now free and can be removed.
-
-
-
-
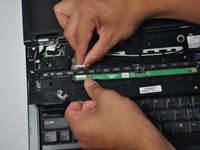
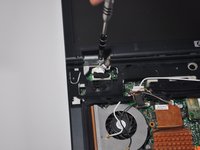
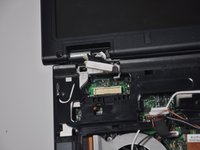
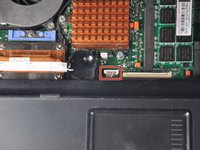
Unplug the black cable with rectangular white plastic head from the motherboard. It is located at the top left of the motherboard, directly below the left hinge.
-
-
-
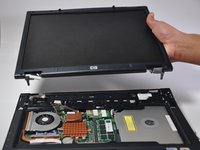
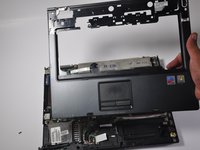
Pull the monitor directly upwards from where it lay. The two metal hinges should easily slide out of their holes and the monitor will be disconnected from the motherboard.
-
-
-
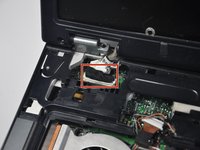
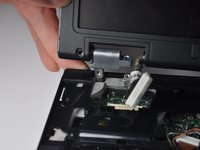
Using the iFixit opening tool, pry the black plastic panel (with mousepad) off of the motherboard.
-
-
-
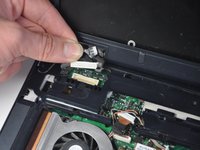
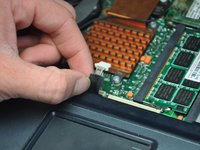
Unplug the white cord connecting the mousepad to the motherboard from the motherboard, and pull off the entire plastic panel.
-
-
-
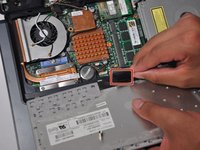
Find the green chip encased by an aluminum frame on the underside of the plastic panel that was removed last in the computer disassembly guide.
-
-
-
Remove the two 3.5mm Phillips #00 screws located at the bottom of the aluminum frame.
-
-
-
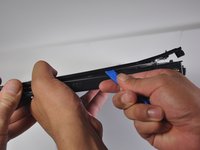
Slowly slide the frame in the direction of the keyboard hole on the plastic panel until the frame is released from the metal latches.
-
-
-
Carefully slide blue plastic connector on the mousepad towards the screw holes.
-


To reassemble your device, follow these instructions in reverse order.
To reassemble your device, follow these instructions in reverse order.
Team

Cal Poly, Team 17-4, Forte Spring 2015 Mitglied von Cal Poly, Team 17-4, Forte Spring 2015
CPSU-FORTE-S15S17G4
3 Mitglieder
6 Anleitungen geschrieben