
HP Envy 17-3070NR Battery Replacement
Einleitung
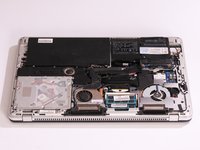
Zu Schritt 1 der AnleitungIf your HP Envy 17-3070NR is not holding its charge, it probably needs a battery replacement. These instructions will show you how to quickly remove the battery from your laptop.
Your battery should provide your laptop with power for several hours without needing to be plugged into a power source. With numerous charging cycles, the battery’s capacity will decrease over time. If you find you are having to charge your laptop too often or it simply won’t store a charge at all, you should consider replacing the battery.
Be sure the laptop is powered off before replacing the battery.
Was du brauchst
Werkzeuge


-
-
Slide the release latch away from the nearest edge.
-
Slide the back cover off of the computer.
-
-
-
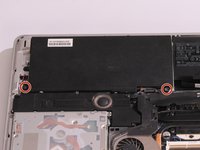
Remove the six 3.7mm Phillips screws.
-
Slide the back cover until it clicks, then lift it straight off.
-
-
-
-
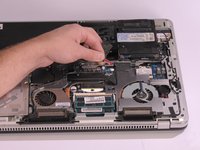
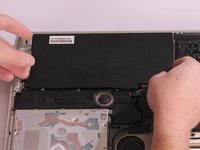
Disconnect the multi-colored battery cable from the main assembly by gently pulling upward on it.
-
-
-
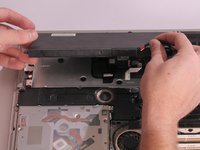
Remove the two 3.8 mm Torx screws using M8 Torx screwdriver.
-
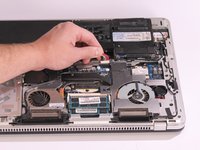
Remove the battery by pulling it straight out away from the computer.
-


To reassemble your device, follow these instructions in reverse order.
To reassemble your device, follow these instructions in reverse order.
Rückgängig: Ich habe diese Anleitung nicht absolviert.
5 weitere Personen haben diese Anleitung absolviert.
Team

Cal Poly, Team 14-8, Amido Spring 2015 Mitglied von Cal Poly, Team 14-8, Amido Spring 2015
CPSU-AMIDO-S15S14G8
4 Mitglieder
12 Anleitungen geschrieben