
HP Envy x360 m6-aq005dx Keyboard Replacement
Einleitung
Zu Schritt 1 der AnleitungThis guide will walk you through the process of replacing a broken keyboard in an HP Envy x360 m6-aq005dx.
The keyboard of HP Envy x360 m6-aq005dx is integrated into the front panel of the laptop. To replace the keyboard, users need to replace the whole front panel. The keyboard is malfunctioned when the keys are not responsive and in such a scenario, the users need to replace the keyboard.
Following the steps and instructions shown below, will help the user in the removal and replacement of the memory keyboard.
Was du brauchst


-
-
Use the Phillips #0 screw driver head to remove the two 7.8mm screws that secure the bottom cover to the computer.
-
Use the Phillips #00 screw driver head to remove the six 5.2mm screws that secure the bottom cover to the computer.
-
Insert the iFixit plastic prying tool between the bottom cover and bottom chassis.
-
Lift the cover carefully off the machine.
-
-
-
Use the Phillips #00 screw driver head to remove the six 4.6mm screws that secure the battery to the top cover.
-
Disconnect the battery cable from the motherboard.
-
Lift to remove the battery and set it to the side.
-
-
-
-
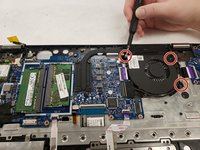
Use the Phillips #00 screw driver head to remove the three 4.6mm screws that secure the fan to the top cover.
-
Release the display panel cable from the retention clips and channel built into the fan.
-
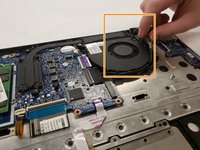
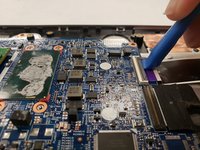
Use the Phillips #0 screw driver head to remove the four 6.2mm captive screws that secure the fan/ heat sink assembly to the motherboard.
-
Remove the fan/heat sink assembly.
-
-
-
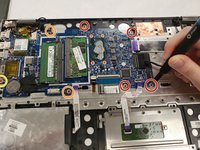
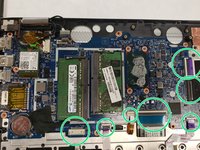
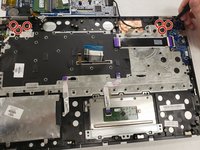
Use the Phillips #00 screw driver head to remove the following screws that secure the motherboard to the top cover:
-
Four 4.6mm screws;
-
Two 3.3 mm screws.
-
Use the Phillips #0 screw driver head to remove the one 4.5mm screw that secure the system board to the top cover.
-
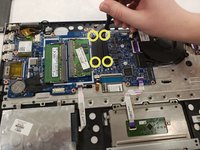
Use the iFixit plastic prying tool to disconnect the seven marked data cables linked to the system board.
-
Lift the motherboard to remove it from the top cover.
-
-
-
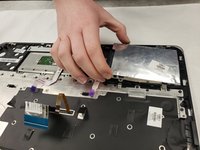
Use the Phillips #00 screw driver head to remove the three 4.6mm screws that secure the hard drive to the top cover.
-
Remove the hard drive.
-
-
-
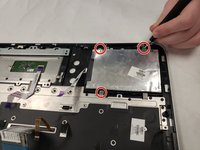
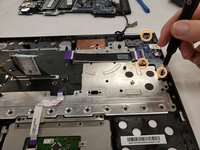
Use the Phillips #0 screw driver head to remove the six 4.5mm screws that secure the display assembly to the keyboard/ top cover.
-
Use the Phillips #00 screw driver head to remove the three 3.3mm screw that secure the connector board to the keyboard/top cover then remove the connector board.
-
Replace the keyboard.
-


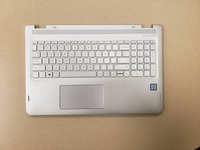
To reassemble your device, follow these instructions in reverse order.
To reassemble your device, follow these instructions in reverse order.
Rückgängig: Ich habe diese Anleitung nicht absolviert.
2 weitere Personen haben diese Anleitung absolviert.
Team

IUPUI, Team S4-G4, Wilson Fall 2019 Mitglied von IUPUI, Team S4-G4, Wilson Fall 2019
IUPUI-WILSON-F19S4G4
4 Mitglieder
2 Anleitungen geschrieben